A dark, dated hallway can make your whole home feel smaller and older than it is. The good news: you don’t need to knock down walls or hire a contractor to transform it. With a few focused upgrades, you can get a renovation-level impact over a couple of weekends, using tools most DIYers already own.
This guide walks you through five clear, practical steps to refresh a hallway—lighting, walls, trim, storage, flooring, and details—so the space finally matches the rest of your home.
Plan the Hallway Upgrade So You Don’t Create a Construction Zone
Before buying anything, take one walkthrough with a notepad and your phone camera.
- Evaluate what actually feels wrong. Is it too dark? Cluttered? Scuffed walls? Narrow feeling? Note each problem rather than jumping straight to decor.
- Measure everything. Length, width, ceiling height, and the distance between doors, outlets, and existing fixtures. Accurate measurements prevent bad purchases (like fixtures that hang too low or runners that don’t fit).
- Identify fixed elements you must work around. Doors, vents, smoke detectors, and existing electrical junction boxes are rarely worth moving in a simple DIY project. Design around them instead.
- Set a realistic budget and timeline. Decide how much you’re comfortable spending and whether you can live with the hallway partially torn up for a few days. Plan your work in phases (lighting, walls, then flooring) so the space stays usable.
- Check for safety and code basics. Confirm that any new lighting is rated for your ceiling height and junction boxes, and that your hallway still has sufficient clearance around doors and stairs. If you’re unsure about electrical or structural changes, plan to consult a licensed pro rather than guessing.
Having a simple written plan (even a page of notes and a quick sketch) helps you buy the right materials once instead of making multiple frustrating trips to the store.
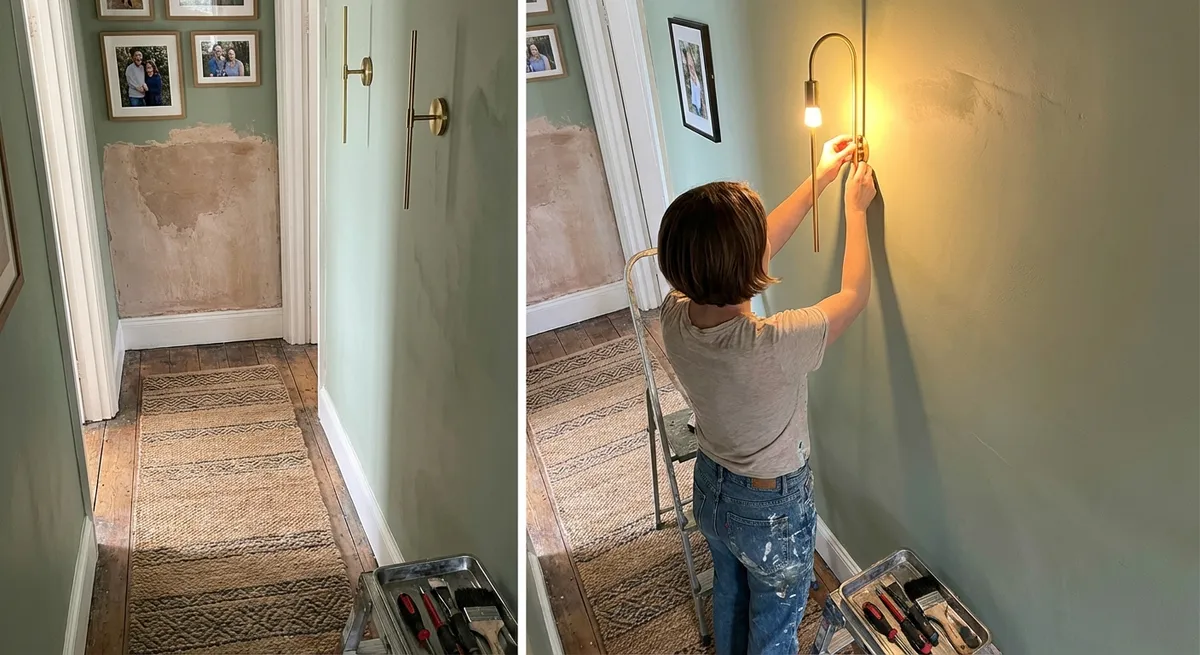
Step 1: Upgrade Hallway Lighting for a Brighter, Safer Path
Improving lighting is often the single biggest change you can make in a hallway.
- Choose the right color temperature. Aim for warm white (around 2700K–3000K) in most homes so the hallway feels inviting and consistent with adjoining rooms.
- Increase lumens, not just fixtures. Look at brightness output on bulb packaging. For a dark, windowless hallway, using higher-lumen LED bulbs (still within fixture limits) may do more than adding another fixture.
- Swap outdated fixtures for low-profile LEDs. Flush-mount or slim LED fixtures give plenty of light without making the ceiling feel lower. Choose designs that match the rest of your home’s style—simple and clean usually ages best.
- Install or upgrade dimmers where allowed. A compatible dimmer switch lets you lower light at night and crank it up for cleaning or projects. Always match the dimmer to LED-compatible specs and check your local code if unsure.
- Add task or accent lighting if needed. Small plug-in sconces, LED strip lights under a shallow shelf, or battery-powered motion lights in dark corners can help where wiring new fixtures isn’t practical.
DIY Tip: Always shut off power at the breaker before working on any electrical fixtures, and test with a non-contact voltage tester. If you’re not comfortable identifying neutral, hot, and ground wires, it’s worth hiring a licensed electrician just for that part of the project.
Step 2: Refresh Walls and Trim for a Clean, “New Build” Look
Hallways take a beating from bags, shoes, and elbows. Giving the walls and trim a real refresh goes a long way.
- Repair dings and nail holes first. Use lightweight spackle for small imperfections and joint compound for larger ones. Sand smooth once dry, then wipe down dust with a damp cloth so paint adheres properly.
- Choose a durable, washable paint finish. An eggshell or satin finish on walls is usually the sweet spot for hallways—easy to clean without highlighting every imperfection. Use semi-gloss or high-gloss on trim for extra durability.
- Consider a subtle color shift. Off-whites, soft grays, or very light greiges help bounce light. If your doors are dark, slightly warmer wall colors can soften the contrast.
- Prime problem areas. If you’re covering dark colors, stains, or glossy finishes, use a quality primer first. It reduces the number of top coats you’ll need and prevents bleed-through.
- Update or sharpen trim. If your baseboards and door casings are yellowed or dingy, sand lightly, caulk gaps between trim and wall, then repaint. Clean, crisp trim lines make the entire hallway look more intentional and “finished.”
DIY Tip: Work from the top down—ceiling, then walls, then trim. It’s easier to cut clean lines on trim than to patch wall paint you dripped onto fresh baseboards.
Step 3: Add Smart Storage That Doesn’t Shrink the Space
Hallways often become spillover storage by default. The key is adding solutions that stay slim and functional.
- Identify what actually lives in the hallway. Shoes? Coats? Mail? Backpacks? Don’t design storage for things that should be stored elsewhere; relocate anything that doesn’t truly belong.
- Use vertical space instead of floor space. Install narrow wall-mounted hooks, peg rails, or shallow shelves for small items. Aim to keep the floor visually as open as possible.
- Choose low-profile furniture. If you have the width, consider a slim console table, wall-mounted shelf, or shallow cabinet (often marketed as “shoe cabinets”) that’s less than 10–12 inches deep.
- Contain small clutter. Use labeled baskets or trays on shelves or consoles for keys, mail, and small electronics. This prevents visual noise even when items are in use daily.
- Keep sightlines clear. Avoid tall, bulky pieces that box in the hallway or block light from fixtures or doorways. Step back and check: can you see straight down the hallway floor without major visual blockages?
DIY Tip: When mounting hooks, rails, or cabinets, use appropriate anchors for your wall type (studs, drywall anchors, or masonry anchors). Overloaded hooks that pull out of drywall are both annoying and unsafe.
Step 4: Update Hallway Flooring or Add a Durable Runner
Floors set the tone for the feel of a hallway and take the most abuse.
- Inspect your existing flooring honestly. If it’s structurally sound but scratched or dull, you might get away with cleaning and refinishing instead of full replacement.
- Choose materials suited to foot traffic. For heavy-use hallways, consider durable options: vinyl plank, laminate rated for high traffic, or solid/engineered wood with a tough finish. If replacing isn’t an option, a quality runner can protect what you have.
- Use a runner to define the path. A washable, low-pile runner can hide minor imperfections and add warmth. Measure so it leaves a few inches of visible flooring on each side for good proportion.
- Secure everything safely. Use non-slip rug pads or carpet tape appropriate for your floor material to prevent slipping or bunching. This is critical on stairs or near entry areas.
- Address transitions. Make sure floor height changes between rooms or at the start/end of the hallway are handled with proper transition strips so there are no trip hazards.
DIY Tip: If installing new click-lock flooring, start along the longest, straightest wall in the hallway, and leave the required expansion gap as recommended by the manufacturer. Use spacers and check straightness every few rows.
Step 5: Finish With Functional Details That Look Custom
The last touches are where the space starts to feel thoughtfully renovated rather than just repainted.
- Upgrade hardware and switch plates. Swap yellowed plastic plates for clean white or metal versions, and replace damaged door hardware with simple, modern levers or knobs that match each other.
- Add a focal point at the end of the hallway. A single piece of art, a framed mirror, or a narrow plant stand draws the eye forward and makes the space feel intentional. Avoid cluttering every wall; one or two key pieces often look better.
- Use mirrors strategically. A mirror opposite a light source or at the end of a hallway can visually widen and brighten the space. Choose a frame that suits your trim and door style.
- Integrate a small “command center” if needed. A wall-mounted organizer for mail, keys, and notes can replace random piles on surfaces, especially if your hallway connects to the main entry.
- Keep decor consistent with adjoining rooms. Match metal finishes (black, brass, chrome) and general style (modern, traditional, farmhouse) so the hallway feels like part of the same home, not a random in-between zone.
DIY Tip: Lay everything out on the floor first—frames, mirrors, organizers—before committing to nails and screws. Take a quick photo and adjust spacing until it looks balanced, then mark your mounting points lightly with painter’s tape or pencil.
Conclusion
Refreshing a dark, tired hallway doesn’t require tearing out walls or spending contractor-level money. By planning the project, upgrading lighting, repairing and repainting walls and trim, adding smart storage, improving flooring or runners, and finishing with a few focused details, you can get a “mini renovation” effect with manageable DIY steps.
Start with the changes that solve your biggest daily annoyances—dim light, clutter, or scuffed walls—and work through the steps at your own pace. The result is a hallway that feels brighter, cleaner, and more functional every time you walk through it.
Sources
- [U.S. Department of Energy – LED Lighting Basics](https://www.energy.gov/energysaver/led-lighting) - Explains LED brightness, color temperature, and energy efficiency for better lighting choices
- [Consumer Product Safety Commission – Electrical Safety Tips](https://www.cpsc.gov/safety-education/safety-guides/home/electrical-safety-in-the-home) - Covers key safety practices when working around household wiring and fixtures
- [Benjamin Moore – Choosing Paint Finishes](https://www.benjaminmoore.com/en-us/paint-and-stain-advice/interior-painting-advice/how-to-choose-a-paint-finish) - Details how different paint sheens perform in high-traffic areas like hallways
- [National Wood Flooring Association – Consumer Resources](https://www.nwfa.org/homeowners.aspx) - Provides guidance on hardwood and engineered wood flooring selection and care in busy spaces
- [IKEA – Small Space Solutions](https://www.ikea.com/us/en/rooms/small-space-living/) - Offers examples of narrow storage and layout ideas useful for tight hallways
Key Takeaway
The most important thing to remember from this article is that this information can change how you think about Renovation.


