A full remodel isn’t always realistic, but living with a tired, mismatched room doesn’t feel great either. The good news: you can dramatically improve how a space looks and functions with a focused, step‑by‑step refresh instead of a total gut job. This guide walks you through a practical, DIY‑friendly process that improves lighting, surfaces, and storage in smart stages—so you can stop stalling and actually start renovating.
Step 1: Read the Room Like an Inspector, Not a Homeowner
Before you buy paint or new decor, you need a clear picture of what’s really going on in the space.
Walk the room slowly, notebook or phone in hand, and look at it like it belongs to someone else. Note anything that’s damaged, outdated, or just annoying to live with.
- Check walls and ceilings for cracks, nail pops, stains, and uneven patches. Lightly run your hand over suspicious areas; raised seams or soft spots may need repair, not just paint.
- Examine trim, doors, and baseboards for chips, gaps, or peeling finish. Gaps at the floor or corners often signal minor movement you can fix with caulk and new paint.
- Turn lights on and off at different times of day. Is the room too bright, too dim, or harsh at night? Good renovation choices are easier when you understand the natural and artificial light you’re working with.
- Look at the floor for worn finishes, loose boards or tiles, lifting corners on vinyl, or stained carpet. Decide whether you’ll repair, refinish, or cover with area rugs.
- Notice traffic patterns and clutter hotspots. Where do things pile up? That’s where you need better storage, not just better willpower.
Finish this step with a simple priority list: “must fix,” “should fix,” and “nice to have.” That list will keep your renovation focused and prevent you from getting sidetracked by impulse projects.
Step 2: Strip Back the Visual Noise Before You Build Anything New
Most rooms feel worse than they are because they’re crowded, not broken. Clearing visual noise lets you see what truly needs renovation—and what just needs rearranging.
- Empty as much of the room as possible. Remove wall art, small furniture, decor, and loose items. If you can, temporarily move large furniture to one side of the room.
- Pull outlet covers and vent grilles if you plan to paint; put the screws in labeled bags so reassembly is painless.
- Deep clean from top to bottom: dust ceiling corners and fixtures, wash walls with a mild cleaner if they’re grimy, vacuum or mop floors. Dirt hides flaws and makes colors look duller than they are.
- Strip or patch old wall anchors and random hooks you don’t use. Spackle small holes, sand flush after drying, and mark any larger repairs that may need joint compound or mesh tape.
- Remove tired window treatments you already know you hate. Bare windows give you a neutral starting point for new design choices and let in more light while you work.
By the end of this step, the room should look a bit worse (emptier, patchy walls) but feel clearer. This is the true “before” you’re renovating from—not the cluttered, lived‑in version you started with.
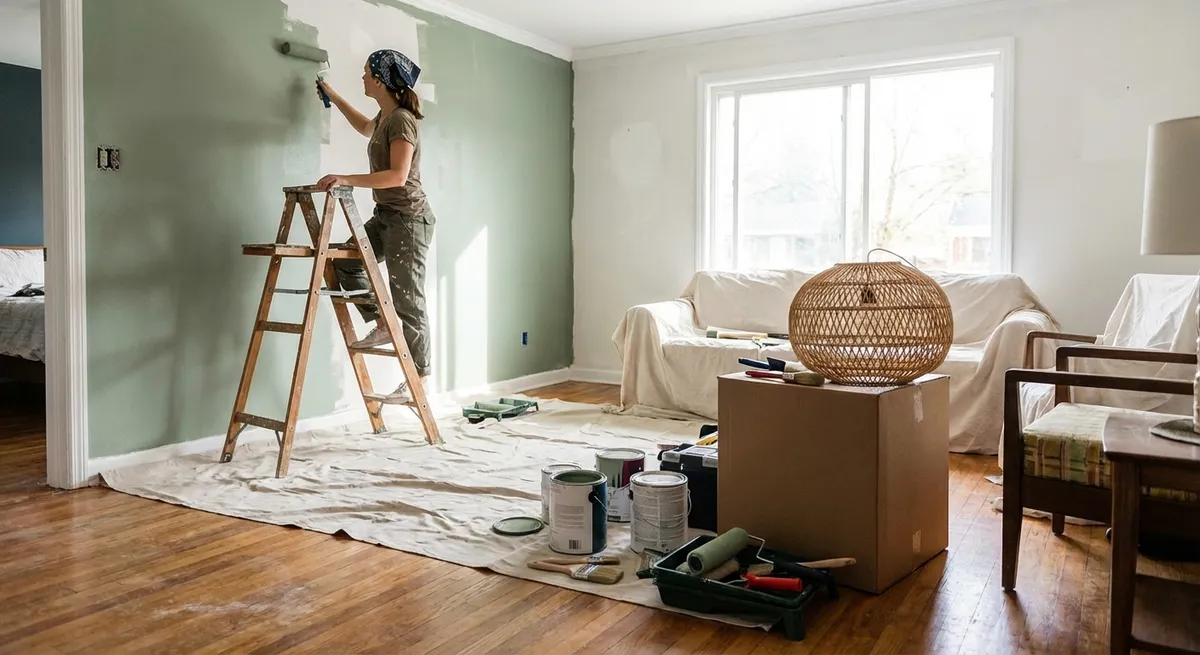
Step 3: Fix Surfaces First: Walls, Ceilings, and Trim
With the room stripped back, focus on the surfaces that define it. Fresh, even surfaces instantly make a space feel more “renovated,” even before new furniture or decor.
- Repair cracks and dents properly. For hairline cracks, cut a shallow V‑groove with a utility knife, fill with joint compound, let dry, then sand and repeat as needed. For larger cracks or seams, use joint tape plus compound so they don’t reappear in a few months.
- Address stains and water marks. Once the underlying leak or moisture issue is fixed, use a stain‑blocking primer before painting. Without it, yellow or brown stains will bleed back through.
- Decide on paint sheen strategically. Flat or matte hides surface flaws on ceilings and imperfect walls. Eggshell or satin is easier to clean in living areas. Semi‑gloss is best for trim and doors where durability matters.
- Cut in carefully, then roll. Paint edges and corners with a brush first, then use a roller in overlapping “W” patterns to avoid lap marks. Keep a wet edge to prevent visible lines.
- Upgrade trim with simple changes. Even if you’re not replacing baseboards, you can:
- Fill gaps between trim and walls with paintable caulk
- Sand and repaint yellowed or chipped trim in a crisp white or contrasting color
- Replace damaged or mismatched door hardware with a consistent finish (black, brushed nickel, brass) throughout the room
If you’re planning any wall treatments like beadboard, simple board‑and‑batten, or peel‑and‑stick panels, install and prime them in this stage so all surface work finishes together. Getting the envelope of the room right makes every later upgrade look more intentional.
Step 4: Upgrade the Lighting So the Room Works All Day, Not Just at Noon
Lighting changes how every surface, color, and material appears. A basic renovation mistake is painting and decorating first, then realizing the room still feels wrong because the lighting is poor.
Use a simple three‑layer approach:
- Ambient lighting: This is your general room light. If you have a single overhead fixture, consider replacing it with a modern flush mount or semi‑flush that spreads light more evenly. Choose LED bulbs with a color temperature around 2700K–3000K for a warm, inviting feel in living spaces, or 3000K–3500K if you prefer a slightly cooler, “cleaner” look.
- Task lighting: Add focused light where you actually do things—reading, working, cooking (if it’s a kitchen extension), or hobbies. This can be:
- Table lamps near seating
- Floor lamps for corners that feel dark
- Under‑cabinet LED strips in work areas
- Accent lighting: Highlight architectural features or decor so the room doesn’t feel flat at night. Simple plug‑in wall sconces, picture lights, or LED strip lighting behind a media unit can dramatically improve the mood without hardwiring.
Practical wiring and safety tips for DIYers:
- Always turn off power at the breaker before replacing fixtures, not just at the wall switch.
- Use a non‑contact voltage tester to confirm wires are dead before you touch them.
- Follow manufacturer instructions closely, and if the existing wiring looks brittle, scorched, or confusing, stop and call a licensed electrician.
Plan to test the lighting in the evening before you finalize furniture placement. Good lighting can make a budget renovation look far more expensive and polished.
Step 5: Rebuild the Layout and Storage Around How You Actually Live
Now that surfaces and lighting are set, it’s time to put the room back together with a smarter layout and storage that prevents future clutter.
Start with function, not furniture:
- Decide the primary job of the room: reading, watching TV, working, dining, or a mix. Let that decide where the main seating or work surface goes first.
- Place your largest pieces (sofa, bed, desk, dining table) so they don’t block natural walkways or windows. Aim for clear paths at least 30–36 inches wide.
- Test multiple furniture arrangements on paper or with painter’s tape before committing. Sometimes rotating a couch or shifting a desk 12 inches dramatically improves flow.
Then add storage that solves the clutter you noticed in Step 1:
- Use vertical space: wall‑mounted shelves, hooks behind doors, or tall bookcases free up floor area and reduce visual chaos.
- Choose multi‑purpose pieces: storage ottomans, benches with hidden compartments, or side tables with drawers tame everyday items you need nearby.
- Create clear “drop zones”: a tray for keys and mail, a basket for blankets, a specific drawer for remote controls. When everything has a deliberate home, the room stays “renovated” longer.
Finish with the details:
- Add rugs that are sized correctly—front legs of major furniture on the rug in living rooms, or a rug large enough to extend past the sides and foot of the bed in bedrooms.
- Rehang art at eye level (center about 57–60 inches from the floor) and group pieces instead of scattering small frames randomly.
- Reinstall or upgrade window treatments. Layered solutions—like a simple roller shade plus curtains—give you both light control and softness without a full remodel.
By now, you’ve changed how the room looks, feels, and functions without major demolition—and you’ve done it in a practical order that respects both your time and budget.
Conclusion
Renovation doesn’t have to mean tearing everything down. By working in clear stages—inspecting the room honestly, stripping back visual noise, fixing surfaces, improving lighting, and rebuilding layout and storage—you create a space that looks updated and actually works better day‑to‑day. The key is sequence: handle the unglamorous repairs first, then invest in the pieces you’ll see and use every day. Tackle one step at a time, and you’ll end up with a room that feels like a fresh start, without needing a full‑scale remodel.
Sources
- [U.S. Department of Energy – Lighting Choices to Save You Money](https://www.energy.gov/energysaver/lighting-choices-save-you-money) - Explains lighting types, efficiency, and color temperature to guide smart bulb and fixture choices
- [Consumer Product Safety Commission – Safety Checklist for Home Electrical Work](https://www.cpsc.gov/safety-education/safety-guides/home-electrical-safety-checklist) - Covers essential electrical safety practices for DIYers replacing or installing fixtures
- [Family Handyman – How to Repair Drywall](https://www.familyhandyman.com/project/how-to-repair-drywall/) - Step‑by‑step instructions for patching cracks, nail pops, and larger wall damage
- [HGTV – Room Layout Rules You Should Follow](https://www.hgtv.com/design/decorating/design-101/room-layout-rules-you-should-follow) - Practical guidelines for furniture placement and traffic flow in renovated spaces
- [Mayo Clinic – Light and Your Health](https://www.mayoclinic.org/healthy-lifestyle/adult-health/in-depth/light-therapy/art-20048298) - Provides background on how light affects mood and daily living, helpful when planning room lighting
Key Takeaway
The most important thing to remember from this article is that this information can change how you think about Renovation.


