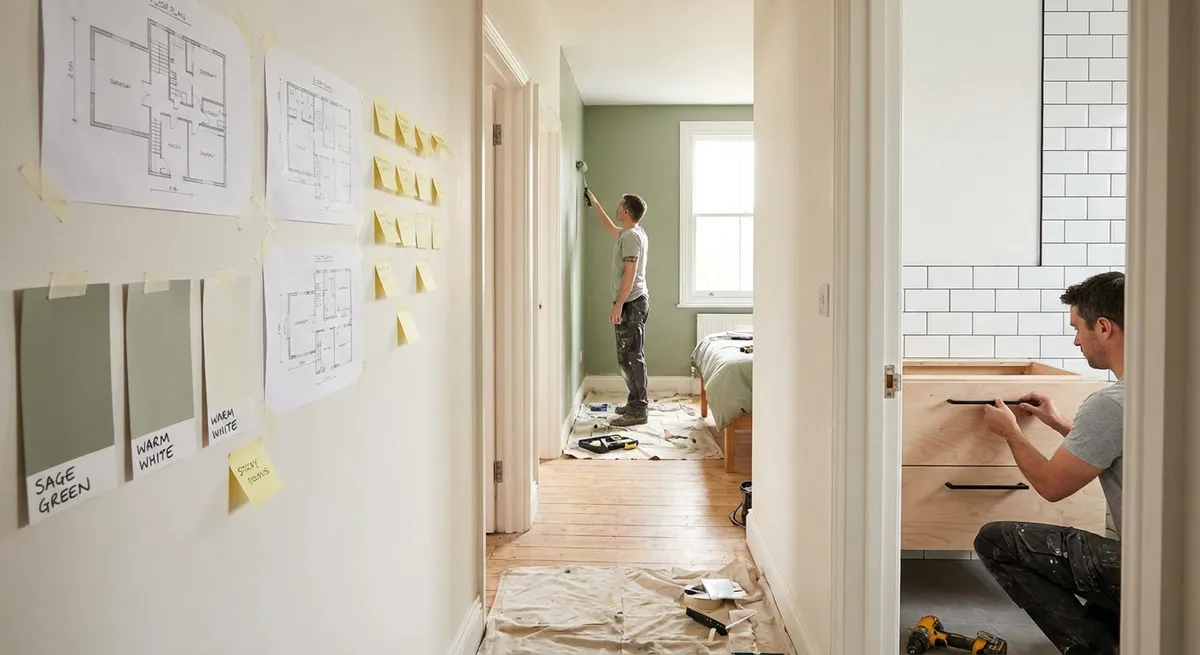
Renovation doesn’t have to mean tearing your house apart for months. With a clear plan and realistic steps, you can tackle meaningful upgrades that fit a weekend, a budget, and your actual skill level. This guide walks you through five practical, step-by-step projects that improve how your home looks, feels, and functions—without requiring a contractor.
Each project is designed for DIYers who want real results, not just ideas: clear tools lists, prep steps, and practical checks so you don’t end up redoing work later.
Step 1: Start With a Simple Room Audit (So You Fix the Right Things)
Before you swing a hammer, figure out what’s worth your time and money. A quick “room audit” keeps you from chasing cosmetic fixes while ignoring problems that can cost you later.
- Walk each room and list what actually bothers you. Focus on function first (drafty windows, sticky doors, poor lighting, no storage) and looks second (dated paint color, worn trim, mismatched hardware).
- Check for red-flag issues. Look for signs of leaks (stains on ceilings or near windows), soft spots in flooring, mold or mildew in corners and around vents, and outlets or switches that don’t work. Those may need pro attention.
Group fixes into three buckets:
- Safety/structural (e.g., suspicious wiring, major cracks) - Function (e.g., poor lighting, no counter space, bad storage) - Aesthetics (e.g., color, trim, visible damage) 4. Choose one room and one primary goal. Example: “Make this hallway brighter and less cluttered,” or “Update this bedroom so it feels modern and calm.” This keeps you from spreading tools and dust across the whole house. 5. Estimate time and tools honestly. If you only have a weekend, skip tasks that require long dry times, major demolition, or specialty tools you’d have to learn from scratch. 6. Take reference photos. Shoot wide angles and close-ups. You’ll use these when shopping for materials and hardware and to compare “before and after.” 7. Set a realistic budget ceiling. Decide what you’re willing to spend on this room only. That stops “one more upgrade” from turning into a surprise credit card bill.
By the end of this step, you should have: one room chosen, one main goal, and a short list of fixes that match your time, tools, and budget.
Step 2: Prep the Space So Work Goes Faster (and Cleaner)
Good prep makes the rest of your renovation smoother, cleaner, and less frustrating. Skipping it is usually why DIY projects drag on.
- Clear more than you think you need. Remove furniture, curtains, outlet covers, wall hangings, and rugs. Stack items in another room, not just the hallway. The emptier the space, the easier everything else is.
- Protect what’s staying.
- Cover floors with rosin paper, cardboard, or drop cloths.
- Tape around baseboards, trim, and fixtures if you plan to paint.
- Wrap remaining furniture with plastic or old sheets.
- Set up a “staging area.” Choose a nearby spot (garage, entryway, or corner of another room) for tools and materials. Keep:
- Basic hand tools
- Painter’s tape and caulk
- Measuring tape, pencil, and level
- Extension cord and work light if needed
- Improve lighting before you start. Add a temporary work light or brighter bulbs. You’ll spot flaws (like uneven paint or gaps in caulk) before they dry.
- Ventilate if you’re using paints or adhesives. Open windows, use a box fan facing outward, and wear a proper respirator for sanding or strong-smelling products as recommended by the label.
- Plan cleanup BEFORE you make dust.
- Keep a shop vacuum nearby.
- Have trash bags, a broom, and microfiber cloths ready.
- Lay out a small bin for screws and hardware so nothing disappears.
A well-prepped room saves time on every project that follows—especially painting and trim work.
Step 3: Refresh Walls the Right Way (Paint That Actually Looks Professional)
Painting is one of the highest-impact, lower-cost renovation moves, but the difference between “DIY” and “almost professional” is in the prep and technique.
- Repair before you paint.
- Fill nail holes with lightweight spackle; deeper holes with a stronger compound.
- Cut out and patch damaged drywall sections instead of piling on filler.
- Sand patches smoothly with fine-grit sandpaper; run your hand over the area to feel for ridges.
- Choose the right paint and sheen.
- Walls: eggshell or matte hides minor flaws while staying cleanable.
- Trim/doors: semi-gloss or satin for durability.
- Kitchens/baths: moisture-resistant paints labeled for high-humidity or bath use.
- Don’t skip primer on problem surfaces. Use primer if you’re:
- Covering darker colors
- Painting over stains or patched areas
- Painting over glossy paint
- Cut in first, then roll.
- Use a quality angled brush for edges around ceiling, trim, and corners (“cutting in”).
- Work in small sections and roll the wall while edges are still wet to avoid lap marks.
- Roll with a consistent pattern.
- Use a “W” or “M” pattern and then fill in without pressing too hard.
- Keep a wet edge—don’t stop in the middle of a wall for long breaks.
- Do at least two coats. Even if it “looks fine” after one coat, the second coat evens color, improves durability, and hides roller marks.
- Check your work in different light. Inspect once during daylight and once at night. Touch up visible misses or thin areas before putting the room back together.
A careful paint job instantly modernizes a space and sets the stage for every other upgrade.
Step 4: Upgrade Storage and Function Without Major Demolition
You don’t need to rearrange walls to make a room more functional. Smart, simple storage changes can dramatically improve how you use the space.
- Identify what actually lives in the room. Make a quick list: everyday items (used daily), occasional items, and “wrong room” clutter. Move “wrong room” items out immediately.
- Add wall storage where floor space is tight.
- Install simple shelving or a track system on free wall areas.
- Use vertical space above desks, dressers, or in hallways.
- Anchor shelves and brackets into studs or use appropriate wall anchors.
- Use behind-the-door opportunities.
- Over-the-door hooks or racks for coats, towels, or bags.
- Slim organizers for cleaning supplies or small items in closets.
- Build or upgrade a simple closet system.
- Replace a single rod with a double-rod system (upper for shirts, lower for pants).
- Add one or two sturdy shelves above the rod and labeled bins for seasonal items.
- Add built-in-looking solutions without custom carpentry.
- Pair ready-made cabinets or bookcases and secure them to the wall.
- Add trim or a top shelf to “bridge” units together for a more finished look.
- Label and contain small items. Baskets, bins, and drawer organizers prevent future clutter buildup and make the room easier to keep tidy after your renovation.
Improving storage and function often changes how a room feels more than any single decorative upgrade.
Step 5: Finish Strong With Details That Make the Room Feel “Done”
Final touches are where many DIY projects stall. Spending focused time here makes the space feel intentional instead of “mid-reno.”
- Update hardware and visible fixtures.
- Change dated switch plates, outlet covers, and doorknobs to a consistent style.
- Replace cabinet pulls and knobs for an instant refresh in kitchens and bedrooms.
- Re-caulk gaps around trim and fixtures.
- Use paintable caulk around baseboards, window and door trim.
- Smooth with a damp finger or caulk tool; wipe excess immediately.
- Let it dry fully before painting over.
- Check alignment and level.
- Make sure shelves, curtain rods, and art are level and at consistent heights.
- Center fixtures relative to windows, furniture, or the room’s main focal point.
- Dial in lighting layers.
- Combine overhead lighting with task lighting (desk/reading lamps) and accent lighting (wall sconces, LED strips, or table lamps).
- Use warmer bulbs (around 2700–3000K) in living and bedroom spaces for a more comfortable feel.
- Bring textiles and color back intentionally.
- Reintroduce rugs, curtains, and cushions that match your updated wall color and finishes.
- Aim for a simple color palette: one main color, one secondary, and 1–2 accent colors.
- Do a final pass for touch-ups.
- Fill any missed nail holes, touch up paint dings, and tighten loose screws.
- Vacuum, dust, and clean windows so the improvements stand out.
Once this step is done, take updated photos from the same angles as your “before” shots. This makes your progress visible—great for motivation and perfect for sharing.
Conclusion
Renovation doesn’t have to be all-or-nothing. By auditing a single room, prepping it properly, refreshing the walls, improving function, and finishing with details, you can complete projects that look polished and hold up over time.
Work room by room, goal by goal. As you finish each space, you’ll build skills, confidence, and a home that fits how you actually live—without the chaos of a whole-house remodel happening all at once.
Sources
- [U.S. Department of Housing and Urban Development – Rehab and Repair](https://www.hud.gov/program_offices/housing/sfh/rehab/rehabfaq) - General guidance on home rehabilitation and repair considerations
- [U.S. Consumer Product Safety Commission – Home Maintenance Safety Tips](https://www.cpsc.gov/Safety-Education/Safety-Guides/home) - Safety practices to keep in mind during DIY projects and renovations
- [Energy.gov – Energy-Efficient Windows, Doors and Skylights](https://www.energy.gov/energysaver/design/windows-doors-and-skylights) - Useful when evaluating drafts, window issues, and potential upgrades during a room audit
- [Paint Quality Institute – Interior Painting Tips](https://www.paintquality.com/en/painting-tips-advice/interior-painting) - Detailed information on paint selection, prep, and application techniques
- [IKEA – Home Storage Ideas & Planning](https://www.ikea.com/us/en/rooms/storage/) - Practical examples of modular storage and organization concepts that can inspire DIY-friendly solutions
Key Takeaway
The most important thing to remember from this article is that this information can change how you think about Renovation.


