Every home has those half-done corners: a blank wall, a messy entry, or a closet that never quite works. This guide walks through five practical DIY projects that don’t just look good—they solve real everyday problems. Each one is beginner-friendly, uses common tools, and can be done over a weekend or less.
Project 1: Build a Sturdy Wall-Mounted Coat Rack With a Shelf
A solid coat rack near the door instantly cuts clutter. Done right, it looks built-in and holds up to heavy winter gear.
Plan the Size and Layout
Decide where it will go and what it must hold: coats only, or also bags and hats. Measure the wall width and choose a board length that leaves a few inches of space on each side. A 1x6 or 1x8 board works well for the rack back, and a 1x8 or 1x10 for the shelf. Sketch where hooks will go, spacing them 4–6 inches apart.
Cut and Prep the Boards
Cut your back board and shelf board to length, or have the store cut them. Lightly sand all edges and faces with 120–150 grit sandpaper to remove splinters and ink stamps. Round over sharp corners to give it a finished look. Wipe away dust with a damp cloth.
Attach the Shelf to the Back Board
Mark a line across the top edge of the back board where the shelf will sit. Use wood glue along the joint, then clamp and secure with wood screws from the back into the shelf. Pre-drill pilot holes to prevent splitting. Check with a level so the shelf isn’t slanted.
Finish the Wood
Apply a primer if painting, or a wood conditioner if staining softwoods like pine. Add paint or stain in thin, even coats, sanding lightly between coats if needed. Seal with a clear polyurethane or water-based topcoat if you expect heavy use.
Mount Securely Into Studs
Use a stud finder and mark at least two studs. Pre-drill mounting holes through the back board where it crosses studs. Hold the rack in place, check for level, and drive long wood or structural screws into the studs. Add hooks along your marked line, using the included screws. Test by hanging something heavy before regular use.
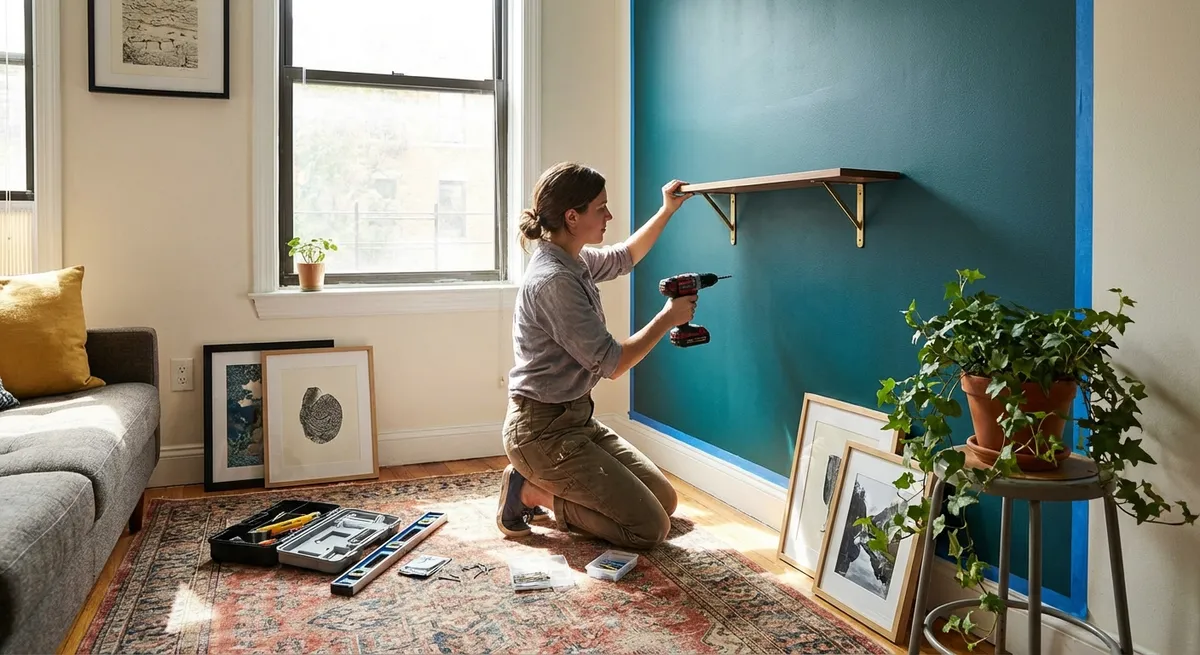
Project 2: Install a Simple Floating Shelf That Won’t Sag
Floating shelves are ideal for bathrooms, kitchens, or above desks. The key to success is proper anchoring and load planning.
Choose Shelf Material and Location
Decide what will go on the shelf—books are much heavier than decor. For heavier loads, use solid wood or a strong plywood at least 1 inch thick. Avoid locations with obvious plumbing runs (like directly behind a sink wall) to reduce the risk of drilling into a pipe.
Find Support Points
Use a stud finder to locate studs within your planned shelf width. Mark them lightly with painter’s tape or pencil. If studs don’t match your ideal location, plan to use high-quality wall anchors rated for the load, and limit shelf weight.
Mark and Install the Bracket
Most floating shelf systems come with a metal bracket or cleat. Hold it against the wall at shelf height, use a level to align, and mark screw holes. Pre-drill into studs and install the bracket with the recommended screws. For areas without studs, install heavy-duty hollow wall anchors and fasten the bracket to them.
Prep and Attach the Shelf
If you’re making your own shelf, drill holes or slots to match the bracket prongs. Test-fit to ensure the shelf slides fully onto the bracket and sits flush. Sand, finish, and seal the shelf before final installation. Slide it in place and secure from underneath or behind if the system allows.
Load Gradually and Monitor
Start by placing lighter items and watch for any movement or sag. Keep the heaviest items closest to the wall, not at the front edge. Make a note of the manufacturer’s weight rating and stay under it.
Project 3: Refresh a Room With Clean, Sharp Painted Trim
Freshly painted trim can make an older room look newly renovated, even if you don’t touch the walls.
Prepare the Area and Surfaces
Move furniture away from walls and cover floors with drop cloths. Clean trim with a degreaser or mild soapy water to remove dust and oils, then let dry. Fill nail holes and small gaps with wood filler or paintable caulk. Sand patched areas smooth and wipe clean.
Protect Adjacent Surfaces
Apply high-quality painter’s tape where trim meets walls or floors. Press the tape edge firmly with a putty knife or your fingernail for a crisp line. Remove outlet and switch plates nearby to avoid accidental splatter.
Prime Where Needed
If you’re painting over stained wood, glossy surfaces, or dark colors, use a bonding primer first. Spot-prime patched areas at minimum, or prime the entire trim for best adhesion and color coverage. Let primer dry fully according to the can.
Apply Paint in Thin, Even Coats
Use a high-quality angled sash brush. Dip the brush no more than a third of its bristle length into the paint, then tap off excess. Start with the detailed areas and profiles, brushing along the length of the trim. Avoid over-brushing; lay off each section with a single smooth pass. Apply 2–3 thin coats rather than one thick coat.
Remove Tape and Touch Up
Remove painter’s tape before the final coat is completely dry to prevent peeling. Pull it back on itself at a 45-degree angle. Touch up any small bleeds or misses with a small artist brush. Let trim cure fully before moving furniture back to avoid dents or scuffs.
Project 4: Build a Simple Over-the-Toilet Storage Shelf
Bathrooms rarely have enough storage. A basic ladder-style shelf or framed unit over the toilet uses vertical space without a big remodel.
Measure Clearances and Plan Design
Measure from the top of the toilet tank to the ceiling and from the tank to the wall. Allow enough space so the toilet lid and seat can move freely. Sketch a frame with two vertical side pieces and two or three shelves above the tank, leaving at least 2–3 inches of clearance over the tank lid.
Cut and Sand the Frame Pieces
Use 1x2 or 1x3 boards for the sides and front supports, and 1x10 or 1x12 boards (or plywood) for shelves. Cut two equal vertical legs, plus shelf boards to your desired width. Sand all pieces smooth, paying attention to edges and corners.
Assemble the Frame
Lay the side pieces on a flat surface and mark where each shelf will attach. Pre-drill screw holes through the side pieces into the shelf edges. Use wood glue and screws to attach shelves to sides, checking for square as you go. Add a simple back brace near the top for stability.
Finish for a Bathroom Environment
Bathrooms see a lot of moisture, so choose a paint or sealer meant for humid spaces. Prime bare wood first, then apply two coats of paint or a water-resistant clear finish. Let it cure thoroughly before installation in the bathroom.
Secure the Unit to the Wall
Position the shelf over the toilet, checking that it doesn’t interfere with plumbing or flush mechanisms. Use a stud finder to locate studs and secure the top of the unit to the wall with L-brackets or included hardware. If you can’t hit a stud, use solid wall anchors rated for the shelf and its contents. Test stability before loading items.
Project 5: Create a Pegboard Tool Station That Actually Stays Organized
A pegboard wall turns a messy work area into a clear, visible storage zone for tools and supplies.
Choose Location and Size
Pick a wall near your main work area with enough space to stand and reach comfortably. Measure the width and height you want to cover. Standard pegboard sheets are often 2x4 or 4x8 feet; plan cuts accordingly.
Build a Backer Frame for Clearance
Pegboard hooks need space behind the board to hang properly. Create a simple frame from 1x2 furring strips screwed directly into studs. Run horizontal or vertical strips around the perimeter and a couple through the middle for support. Use a level so your pegboard sits straight.
Cut and Mount the Pegboard
Cut the pegboard to size if needed, using a circular saw or jigsaw. Pre-drill holes through the pegboard where it will line up with your furring strips. Hold the board in place (a helper is useful), and fasten it with wood screws and washers to spread the load. Check that it’s snug but not bowing.
Plan Tool Zones Before Hanging Everything
Lay your most-used tools on a table and group them: cutting tools, measuring tools, screwdrivers, pliers, etc. Lightly sketch zones on paper or mark on blue painter’s tape placed on the pegboard. Put your most-used tools at eye to chest level; rarely used items can go higher or lower.
Install Hooks and Add Labels
Place pegboard hooks according to your plan and hang tools. Use specialized holders (for screwdrivers, pliers, and drills) where it makes sense. Once you like the layout, trace tool outlines with a marker or add small labels so everything has a “home.” This makes it obvious when something is missing and easier to put away.
Conclusion
Effective DIY isn’t about doing everything at once—it’s about choosing projects that make daily life smoother and your home feel more finished. These five builds focus on storage, organization, and visual upgrades that deliver real impact for the time and cost involved. Start with the project that solves your most annoying problem, take your time with measuring and mounting, and you’ll end up with results that look intentional, not improvised.
Sources
- [U.S. Consumer Product Safety Commission – Anchor It! Campaign](https://www.anchorit.gov) - Guidance on safely securing furniture and wall-mounted items to prevent tip-overs
- [Family Handyman – How to Install Floating Shelves](https://www.familyhandyman.com/project/how-to-install-floating-shelves) - Practical tips on shelf brackets, stud finding, and weight limits
- [Benjamin Moore – How to Paint Trim](https://www.benjaminmoore.com/en-us/interior-exterior-paints-stains/how-to-advice-and-inspiration/interior-painting-ideas/how-to-paint-trim) - Professional recommendations on surface prep, priming, and finish coats for trim
- [This Old House – How to Build a Pegboard Wall](https://www.thisoldhouse.com/garages/21016403/how-to-build-a-pegboard-wall) - Detailed instructions for framing and installing pegboard for tool storage
- [U.S. Department of Housing and Urban Development – Healthy Homes Basics](https://www.hud.gov/program_offices/healthy_homes/hhi) - General best practices for maintaining safe, healthy home environments
Key Takeaway
The most important thing to remember from this article is that this information can change how you think about DIY Projects.


