A full remodel isn’t always realistic, but living with a tired, dated room isn’t great either. The middle ground is a focused “room refresh” renovation: targeted updates that change how the space looks and works without gutting everything or draining your budget. This guide walks you through a practical, step-by-step approach any DIY-minded homeowner can follow, from planning to final touch-ups.
Instead of chasing trends or copying someone else’s style, you’ll learn how to decide what actually needs changing, where to spend, where to save, and how to complete each step safely and correctly.
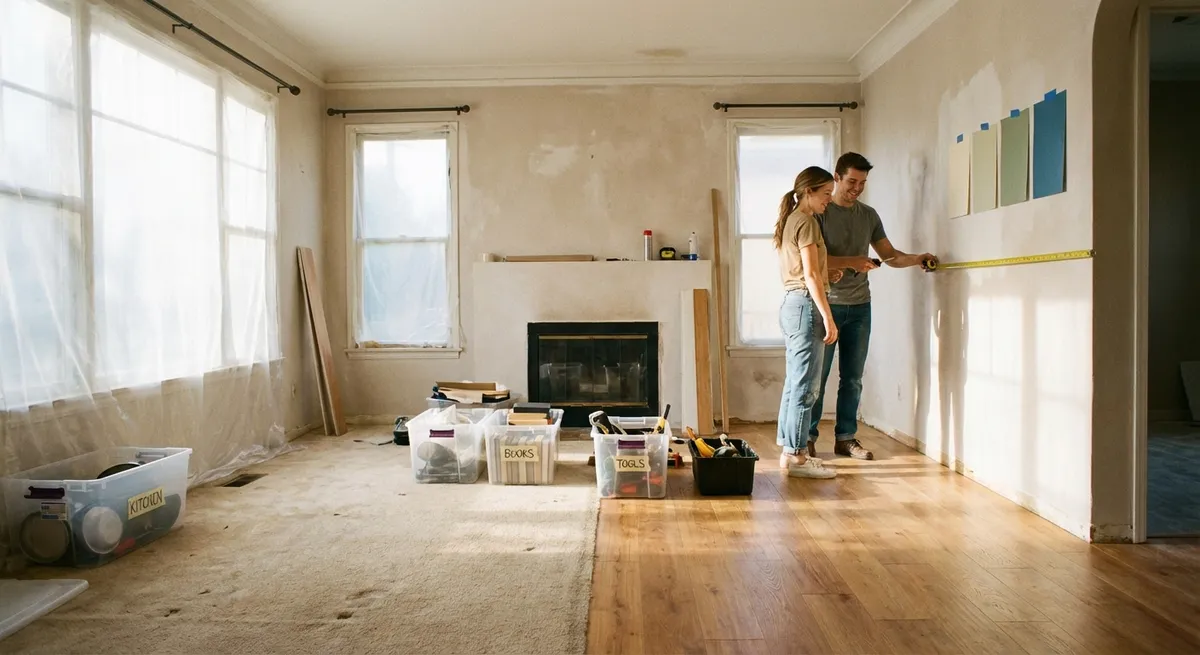
Step 1: Diagnose the Room Before You Touch a Tool
Before buying paint or ripping anything out, slow down and assess the space like an inspector.
Look at the room in daylight and at night. Notice what feels wrong: Is it too dark, cramped, noisy, cluttered, or just visually dated? Take photos from every corner—your phone camera will reveal awkward areas you ignore in person. Then make three short lists: “Function Problems” (storage, layout, traffic flow), “Comfort Problems” (temperature, sound, lighting), and “Visual Problems” (color, finishes, damage).
Measure the room: length, width, ceiling height, window sizes, and key wall sections. Sketch a simple floor plan with doors, windows, and outlets; this doesn’t need to be artistic, just accurate. As you write everything down, rank each issue by impact: what bothers you every single day vs. what you only notice occasionally. That ranking will guide what you tackle first and where you invest money and time.
Step 2: Set a Realistic Scope, Budget, and Timeline
Once you know what’s wrong, decide what you’re actually going to fix this round.
Define the scope in one clear sentence, like: “Update the living room’s lighting, wall color, and storage without moving walls or major electrical.” Keeping a tight scope helps you finish instead of living in a half-done space. Next, set a total budget and break it into buckets: materials (about 60–70%), tools (10–15%), contingency (10–15%), and disposal/incidentals (the rest).
Look up average project costs in your area for context, but remember you’re controlling the scope. Decide what must be done professionally (like moving electrical, major plumbing, or structural changes) and what’s safe and legal for you to DIY. Check local building codes and permit requirements if you’re considering anything more than surface updates. Finally, give yourself a realistic timeline with start and end dates for each phase—prep, paint, install, and finishing. Build in at least one “catch-up” day between phases so delays don’t derail the whole project.
Step 3: Plan the Visuals: Color, Materials, and Lighting
With your scope set, move into how the room will actually look and feel.
Start with function: how do you use this room most? A living room that’s mostly for TV needs different lighting and furniture placement than one used for reading or hosting. Choose a simple color palette: one main wall color, one or two accent/trim colors, and up to three main material tones (for floors, furniture, and key decor). Bring home sample cards and small paint testers, and view them on your walls in morning, afternoon, and evening light before committing.
Think about surfaces you can change without major work. Walls (paint or removable wall treatments), window coverings, lighting fixtures, hardware (handles, pulls, knobs), and a few larger textiles (rugs, curtains, main throw pillows) can radically change the feel of a room. For lighting, aim for three layers: ambient (ceiling fixtures), task (desk or reading lamps), and accent (wall sconces, picture lights, or LED strips). Pick finishes that coordinate but don’t have to match exactly—brushed nickel and matte black, for example, can coexist if repeated intentionally.
Document your choices in a simple “room plan” document or note with photos of each product, color names, and quantities you’ll need. This becomes your reference so you don’t impulse-buy things that don’t fit the plan.
Step 4: Execute the Core Upgrades in a Clean, Logical Order
Now you’re ready to do the work. The order you tackle tasks matters; it saves time and prevents rework.
Clear, Cover, and Protect
Remove as much from the room as possible: small furniture, decor, rugs, and curtains. Move large pieces to the center and cover with plastic or old sheets. Protect floors with rosin paper, drop cloths, or cardboard taped at seams. Take off outlet covers, switch plates, and vent covers, and label them as you go. Good prep keeps you from accidentally damaging what you’re trying to improve.
Repair Walls, Trim, and Surfaces
Fill nail holes and small dents with lightweight spackle, sand smooth once dry, and spot-prime patched areas. For slightly larger damage, use a patch kit sized appropriately. Re-caulk cracked gaps between trim and walls with paintable caulk; smooth it with a damp finger or caulk tool. Wipe down walls and trim to remove dust and grease, especially in kitchens and near light switches—paint adheres poorly to dirty surfaces.
Paint for Maximum Impact
Apply painter’s tape along baseboards, trim edges, and around fixtures you can’t remove. Cut in edges with a brush, then roll the main areas with a quality roller. Two thinner coats typically give a better, more durable finish than one heavy coat. Do ceilings first, then walls, then trim; this way, drips and minor mistakes get covered as you go. Let each coat dry fully according to the paint manufacturer’s directions.
Upgrade Lighting and Hardware Safely
Before changing any fixtures, turn off power at the breaker and test the circuit with a non-contact voltage tester—never rely on just the wall switch. Replace old or yellowed ceiling fixtures with modern, energy-efficient options that match your new style. Swap dated cabinet pulls, door handles, and even outlet covers for cleaner, cohesive finishes. Small hardware changes can make older cabinets or doors feel much newer.
Reorganize Layout and Storage
As you bring furniture back in, resist putting everything exactly where it was. Refer to your initial room diagnosis: fix traffic flow problems by leaving clear walking paths, avoiding blocking windows, and ensuring doors fully open. Add simple storage where clutter used to collect—wall hooks, small shelves, baskets, or a storage ottoman. Group similar items together (all remotes in one tray, all blankets in one basket) to keep the refreshed space from slipping back into chaos.
Step 5: Finish with Details That Make the Room Feel “Done”
The final step is what separates a room that looks like an in-progress project from one that feels intentionally renovated.
Start with lighting adjustments. Install bulbs with consistent color temperature (e.g., all 2700K warm white or all 3000K soft white) so the room doesn’t feel mismatched. Aim for dimmable options where possible, especially in living and bedroom spaces. Add one or two focused task lights in your most-used areas, like next to a reading chair or above a desk.
Hang artwork and wall decor at eye level—usually with the center of the piece around 57–60 inches from the floor—adjusting slightly for your ceiling height and furniture. Use a level and measure spacing so things line up cleanly. Introduce textiles that tie your color palette together: a rug that bridges your wall color and sofa, or curtains that echo accent hues in pillows or art.
Finally, do a slow walk-through with fresh eyes. Look for unpainted edges, missed nail holes, uneven caulk lines, or hardware that isn’t straight. Fix these small issues now; they’re quick to address but make a noticeable difference. Take new photos from the same angles you used in your initial assessment—you’ll see the transformation clearly, and you’ll have shareable before-and-after shots if you want to post your progress online.
Conclusion
A satisfying renovation doesn’t have to mean tearing a space down to the studs. By diagnosing what’s wrong, setting a clear scope, planning visuals, working in a smart order, and finishing with deliberate details, you can turn a worn-out room into a space that actually works for how you live. The key is being intentional: every change should solve a problem or support a purpose, not just follow a trend.
If you treat your next room refresh like a focused project instead of a vague wish list, you’ll finish faster, spend more wisely, and enjoy the results longer.
Sources
- [U.S. Department of Energy – Energy Saver: Lighting Choices](https://www.energy.gov/energysaver/lighting-choices-save-you-money) - Guidance on efficient lighting types, color temperature, and energy savings
- [Consumer Product Safety Commission – Electrical Safety in the Home](https://www.cpsc.gov/safety-education/safety-guides/home/electrical-safety-in-the-home) - Essential safety practices for working around household electrical systems
- [Benjamin Moore – How to Paint a Room](https://www.benjaminmoore.com/en-us/interior-exterior-paints-stains/how-to-advice/interior-painting-how-tos/how-to-paint-a-room) - Step-by-step instructions for surface prep and interior painting techniques
- [Mayo Clinic – Light and Your Health](https://www.mayoclinic.org/healthy-lifestyle/adult-health/expert-answers/blue-light/faq-20461286) - Explains how different types of light affect mood, sleep, and comfort at home
- [National Association of Home Builders – Remodeling Facts & Figures](https://www.nahb.org/News-and-Economics/Housing-Economics/National-Statistics/Remodeling) - Data and insights on remodeling spending and project planning
Key Takeaway
The most important thing to remember from this article is that this information can change how you think about Renovation.


