A pile of random tools won’t help much when a cabinet is falling off the wall or a shelf needs hanging. A focused, well‑chosen tool kit lets you handle most common home fixes safely and confidently. This guide walks you through what to buy, how to set it up, and how to keep everything ready so you’re not scrambling mid‑project. Follow these five step‑by‑step instructions and you’ll go from “Where’s the screwdriver?” to “I’ve got this” on your next DIY job.
Step 1: Choose the Right Tool Storage (So You Can Actually Find Things)
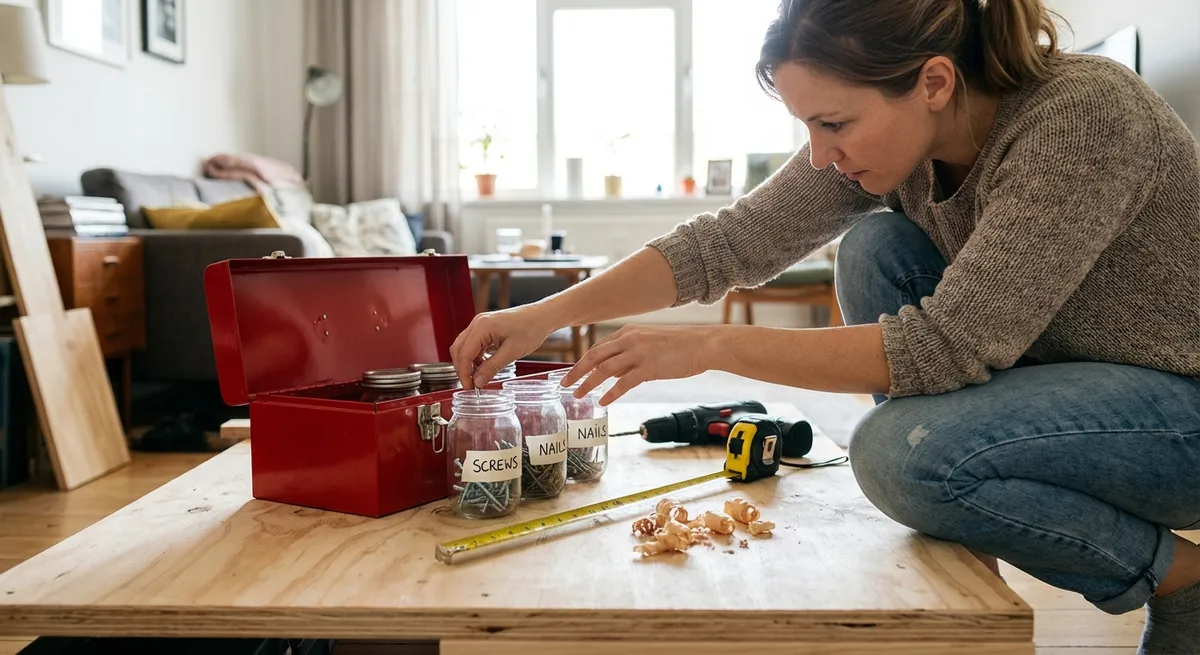
Before buying tools, decide where they’ll live. Good storage keeps tools organized, protected, and easy to grab.
Pick your main storage type:
- Small apartment or light DIY: a sturdy tool bag or medium tool box with a handle. - Garage or workshop: a toolbox plus a wall‑mounted pegboard or a rolling tool chest.
Look for smart organization features:
- Compartments for screws, anchors, and drill bits. - A removable tray for small hand tools. - Wide opening or lid that stays open so you’re not constantly moving things around.
Plan zones for different tool types:
- Fastening: screwdrivers, wrenches, pliers. - Measuring & marking: tape measure, level, pencil, stud finder. - Cutting: utility knife, handsaw, snips. - Power tools: drill/driver, batteries, charger, commonly used bits.
Label as you go:
Use masking tape and a marker to label compartments (e.g., “wood screws,” “drywall anchors,” “drill bits”). This saves time and keeps hardware from becoming a mixed, useless mess.
Assign a home spot in your house:
Choose one consistent location—a closet, laundry room, or garage corner. Everyone in the household should know “the tools live here,” so they’re easy to return and easy to find.
Step 2: Build a Core Hand Tool Set That Covers Everyday Jobs
Skip the 200‑piece bargain kits full of flimsy bits you’ll never use. Instead, assemble a lean, reliable set that can handle most household tasks.
Start with quality screwdrivers:
- One multi‑bit screwdriver with interchangeable tips (Phillips, flathead, square). - Or a small set with at least: #1 and #2 Phillips, 3/16" and 1/4" flathead. Choose cushioned handles and magnetic tips if possible—your hands and your patience will thank you.
Add gripping and cutting tools:
- 8" or 10" combination pliers (also called lineman’s pliers). - Needle‑nose pliers for tight spaces. - Adjustable wrench (8" or 10") for basic plumbing and hardware. - Utility knife with replaceable blades for cutting drywall, carpet, and packaging.
Include a solid hammer:
- A 16 oz. claw hammer is a great all‑around choice for hanging pictures, light framing, and pulling nails. - Look for a comfortable, non‑slip grip and a forged steel head.
Don’t forget measuring and marking tools:
- 25 ft. tape measure with a lock. - 9" torpedo level (fits easily in a tool bag) plus, if possible, a 24" level for shelves and larger jobs. - Carpenter’s pencil or mechanical pencil with strong leads.
Buy once, cry once:
When you can, choose trusted brands with solid reviews instead of the cheapest version. Better tools are safer, last longer, and are less likely to strip screws or slip in your hand.
Step 3: Set Up a Basic Power Tool Kit Safely and Smartly
You don’t need a full workshop of machines to handle home projects. A few well‑chosen cordless tools will cover most home improvement tasks.
Start with a cordless drill/driver:
- Choose 18V or 20V lithium‑ion for enough power without being too heavy. - Look for a variable speed trigger, multiple clutch settings, and a keyless chuck. - A kit with two batteries and a charger is ideal so one can charge while you work.
Add a multi‑tool or orbital sander as your second power tool:
- An oscillating multi‑tool is great for cutting trim, sanding in corners, and making small cutouts. - An orbital sander is perfect if you plan to refinish furniture, doors, or trim.
Standardize on one battery platform when possible:
Stick with one brand’s cordless system. That way your drill, multi‑tool, sander, and future tools can share batteries and chargers, saving money and space.
Set up a charging station:
- Mount or place chargers on a small shelf or in a crate so cables don’t tangle. - Label which battery goes with which tool brand if you mix systems. - Get in the habit of putting batteries back on the charger after weekend projects.
Store power tools safely:
- Keep tools dry, off the floor, and in their cases or a dedicated bin. - Remove batteries for long‑term storage. - Never hang power tools by their cords or leave them plugged in when not in use.
Step 4: Add Safety Gear and Use It Every Time
Your DIY kit isn’t complete without safety equipment. Simple protective gear prevents the injuries that ruin both projects and weekends.
Protect your eyes first:
- Keep at least one pair of wraparound safety glasses in your tool kit. - Choose ANSI‑rated eye protection that fits comfortably over regular glasses if you wear them.
Guard your hearing:
- For loud tools (saws, sanders, hammer drills), use earplugs or earmuff‑style hearing protection. - Store them with your power tools so you don’t forget to use them.
Use gloves appropriately:
- General work gloves for handling lumber, demolition, or moving heavy items. - Avoid loose gloves around spinning or rotating tools where they can get caught.
Keep a basic safety checklist nearby:
- Tool unplugged or battery removed when changing bits or blades. - Workpiece clamped or secured before cutting or drilling. - Work area clear of cords where you might trip. Print a small checklist and tape it inside your toolbox lid for quick reminders.
Add a small first‑aid setup:
- Adhesive bandages, antiseptic wipes, and disposable gloves. - Keep it in a clearly labeled zip bag or small box inside your tool storage. Quick access means small cuts and scrapes don’t stop the whole project.
Step 5: Maintain Your Tools So They’re Ready When You Need Them
A little maintenance makes your tools safer, more accurate, and much more pleasant to use. It also saves money by extending their life.
Clean up after each project:
- Wipe off dust, dirt, and debris with a dry cloth. - Use a slightly damp cloth for sticky residue, but dry metal surfaces thoroughly to prevent rust. - Remove sawdust from vents on power tools so they don’t overheat.
Check moving parts regularly:
- Open and close pliers, wrenches, and clamps to make sure they move smoothly. - Apply a light machine oil to stiff joints and wipe off any excess. - If a tool is cracked or badly bent, retire it—damaged tools can fail under load.
Sharpen or replace cutting edges:
- Snap‑off or replace dull utility knife blades instead of forcing cuts. - Replace worn drill bits and driver bits that slip or strip screws. - Dull tools require more force, which increases the risk of slips and injuries.
Check and refresh your consumables:
- Keep a small selection of common screws (wood and drywall), wall anchors, and picture hangers. - Refill items when you get low instead of waiting until you’re completely out in the middle of a project.
Do a quarterly tool check:
- Quickly inspect all tools for damage, missing parts, and rust. - Test batteries to make sure they hold a charge; replace failing ones before a major project. - Tidy up your organization system so you can continue to grab what you need in seconds.
Conclusion
A reliable DIY tool kit isn’t about owning every gadget—it’s about having the right tools, in the right place, ready to work. By setting up smart storage, choosing solid hand and power tools, prioritizing safety gear, and doing simple maintenance, you’ll be ready for most home repairs and improvement projects that come your way. The next time something breaks, squeaks, or needs upgrading, you won’t waste time hunting for tools or running to the store—you’ll just get it done.
Sources
- [Occupational Safety and Health Administration (OSHA) – Hand and Power Tools](https://www.osha.gov/hand-power-tools) - Official safety guidance on selecting and using hand and power tools
- [Consumer Product Safety Commission – Power Tool Safety Tips](https://www.cpsc.gov/s3fs-public/282.pdf) - Practical safety recommendations for homeowners using power tools
- [Family Handyman – Essential Tools for the Homeowner](https://www.familyhandyman.com/project/essential-tools-for-the-homeowner/) - Overview of useful tools for common home projects
- [This Old House – Must‑Have Tools for Homeowners](https://www.thisoldhouse.com/tools/21017658/28-must-have-tools-for-the-homeowner) - Expert recommendations on building a versatile tool kit
- [UL Research Institutes – Home Safety: Power Tools](https://insights.ul.com/home-safety-power-tools) - Guidance on safe setup and use of power tools in the home
Key Takeaway
The most important thing to remember from this article is that this information can change how you think about Tools & Equipment.


