A lot of DIY frustration doesn’t come from bad tools—it comes from a bad setup. If your tools are scattered, your extension cords are sketchy, and you’re guessing about safety, every project feels harder than it should. This guide walks you through building a safe, efficient tool zone at home with five practical, step‑by‑step moves you can start today, even in a small space.
Step 1: Choose and Prepare Your Work Area
Your “shop” doesn’t have to be a full garage. A corner of a basement, a section of a spare room, or a sturdy outdoor shed can work if you set it up right.
- Pick a stable, dry location. Avoid damp corners and areas with active leaks or major temperature swings. Moisture can rust tools and warp wood, and it’s a real hazard when combined with power tools and electricity.
- Check the power situation. Make sure you have at least one grounded outlet (three-prong) nearby. If you’ll be using heavier tools (miter saw, shop vac), plug them directly into the wall instead of daisy-chaining extension cords.
- Plan for ventilation. If you’ll ever sand, paint, or use adhesives, you’ll need airflow. A window with a fan, a box fan in a doorway, or working with the garage door partially open can pull dust and fumes away from you.
- Define a clear work zone. Mark out your workspace mentally (or with tape on the floor) where tools, materials, and people should and should not be. Keep walkways clear so you’re not stepping over cords or lumber.
- Add basic comfort elements. Good overhead lighting, a small mat to stand on, and a stool or chair for layout and planning will make you more likely to finish projects—and do them safely.
Step 2: Build a Safe Power and Lighting Setup
Before you focus on what tools you own, make sure the power feeding them is safe and your lighting lets you see what you’re doing.
- Use a quality surge-protecting power strip for small tools. Plug your drill, sander, and chargers into a strip with overload protection, not an ancient bargain-barrel extension. This helps protect your gear and lowers fire risk.
- Upgrade to LED work lights. Overhead LED shop lights or clamp-on work lights are affordable, bright, and cool to the touch. Aim for adjustable lights so you can move them to avoid harsh shadows on your work surface.
- Avoid running cords where you walk. Route cords along walls or tape them down temporarily using painter’s tape or gaffer’s tape. If a cord must cross a path, run it tight and flat, not looped or tangled.
- Match cords to the job. For outdoor or heavy-use tools, use a grounded, outdoor-rated extension cord of the correct gauge (thickness). Longer cords need thicker wire to safely carry the load; check the tool’s amperage and follow the cord’s rating.
- Test outlets and protect where required. In garages, basements, and outdoor locations, GFCI outlets are recommended or required by code for safety. If you’re unsure, a simple outlet tester can help you spot wiring issues before you plug in expensive tools.
Step 3: Set Up Smart Tool Storage and Organization
Good organization means less time hunting for tools and more time actually fixing and building things.
- Start with a basic work surface. A simple, sturdy table or DIY workbench is enough. It should be solid, not wobbly, and deep enough to hold a project plus tools (at least 24 inches deep is ideal).
- Divide tools into “everyday,” “occasional,” and “specialty.” Keep everyday tools (tape measure, utility knife, screwdrivers, drill, hammer, pliers) within arm’s reach. Less-used tools can live on higher shelves or in labeled boxes.
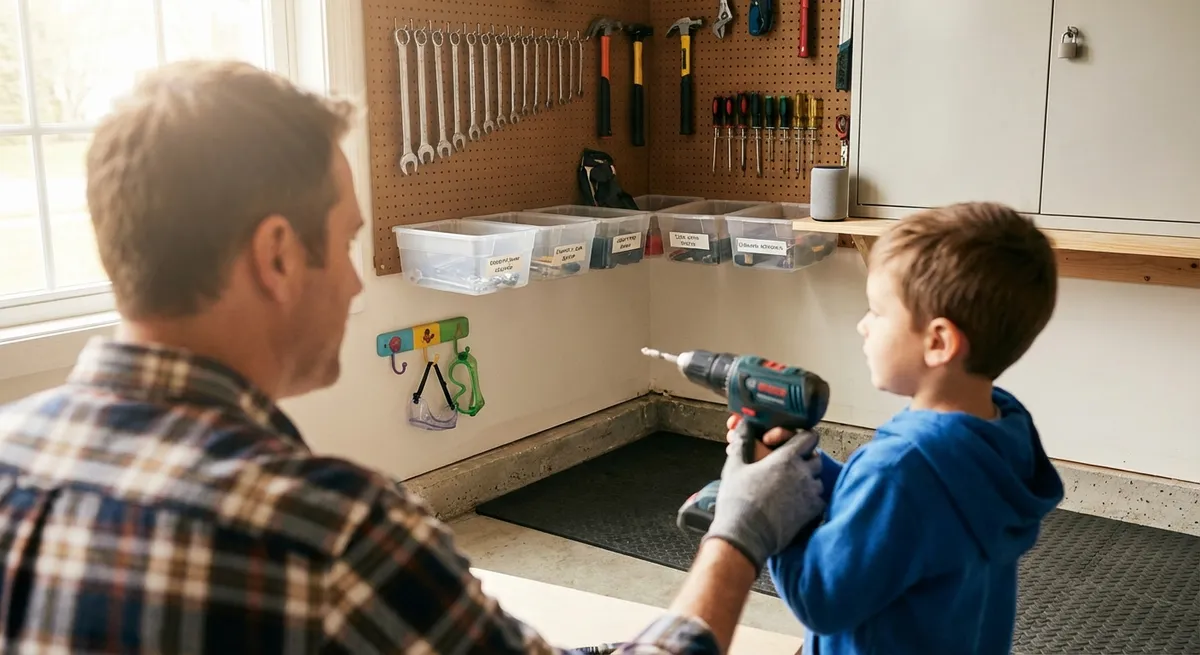
- Use vertical space. Pegboards, magnetic strips, and wall-mounted racks make a huge difference in small areas. Hang hand tools where you can see them. Outline or label hook locations so tools go back to the same spot.
- Create a “grab-and-go” kit. Keep a small toolbox or tote loaded with essentials: tape measure, pencil, small level, multi-bit screwdriver, utility knife, pliers, and a handful of common screws and anchors. This saves you from constant trips back to the main tool zone.
- Label everything you can. Clear labels on bins for fasteners (wood screws, drywall anchors, masonry bits), drill bits, sandpaper grits, and adhesives prevent guesswork. Over time, that organization saves both money and duplicates.
Step 4: Establish a Basic Maintenance Routine for Your Tools
Even a modest tool collection can last for years if you give it a little regular attention.
- Create a quick clean-up habit after every project. Wipe dust from tools with a dry cloth, knock debris off sanders and saws, and empty shop vacs or dust bags if they’re more than half full. Dirt is the enemy of moving parts.
- Keep metal tools dry and lightly protected. Store hand tools in a dry location. If you live in a humid climate, a light wipe with a rust-preventive oil or a silicone cloth on saw blades, wrenches, and pliers helps stop rust.
- Sharpen or replace dull bits and blades. A sharp drill bit or saw blade is safer and easier to control than a dull one. Watch for burning smells, slow cuts, or ragged edges on wood—these are signs your cutting edges need work.
- Check cords, batteries, and chargers regularly. Look for cracks, exposed wires, or damaged plugs. Retire anything suspect instead of taping it and hoping for the best. For cordless tools, avoid fully draining batteries; charge before they hit zero for longer life.
- Schedule deeper maintenance a few times a year. Blow dust out of vents on power tools using compressed air, check moving parts for looseness, and retighten any obvious screws or bolts. Keep manuals (or digital copies) handy for tool-specific instructions.
Step 5: Make Safety Gear and Habits Non-Negotiable
A proper tool zone isn’t complete without basic safety built in. This is what keeps a fun weekend project from turning into an emergency.
- Create a dedicated safety station. Store eye protection, hearing protection, dust masks or respirators, and work gloves together, right where you start working. If they’re easy to grab, you’re more likely to use them.
- Use eye and hearing protection with any cutting, drilling, or grinding. Flying chips and dust are unpredictable, and even a short cut on a circular saw or impact driver can spike your hearing. Simple safety glasses and earmuffs or plugs are cheap insurance.
- Control dust and fumes. Use a shop vac with a filter when sanding, cutting MDF, or drilling lots of holes. For paints, solvents, or strong adhesives, plan for better ventilation and consider a respirator rated for organic vapors if recommended by the product label.
- Store chemicals and flammables safely. Keep paints, solvents, oils, and spray cans away from heaters, pilot lights, and direct sunlight. Close lids tightly and store them up and out of reach of kids and pets, ideally in a ventilated cabinet or area.
- Keep a first-aid kit and fire extinguisher nearby. Stock bandages, antiseptic wipes, tweezers, and gauze. For the extinguisher, look for one rated for ordinary combustibles and electrical fires (commonly an ABC-rated extinguisher), and make sure you know how to use it (PASS: Pull, Aim, Squeeze, Sweep).
Conclusion
A well-thought-out tool zone is the foundation for every successful DIY project. By choosing the right spot, setting up safe power and lighting, organizing your tools, maintaining them, and locking in safety habits, you turn “chaotic corner” into a place where projects actually get finished. You don’t need a huge budget or a full workshop—just some intentional setup and consistent habits. Start with one of the steps above this week, and keep building from there.
Sources
- [U.S. Consumer Product Safety Commission – Power Tool Safety Tips](https://www.cpsc.gov/s3fs-public/2023-05/Power-Tools.pdf) - Guidance on safe use of power tools and preventing common injuries
- [Occupational Safety and Health Administration (OSHA) – Hand and Power Tools](https://www.osha.gov/hand-power-tools) - Official safety standards and recommendations for tool use and maintenance
- [National Fire Protection Association (NFPA) – Home Fire Safety](https://www.nfpa.org/Public-Education/Fire-causes-and-risks/Top-fire-causes/Electrical) - Information on electrical hazards, extension cords, and safe home setups
- [Mayo Clinic – Eye Safety](https://www.mayoclinic.org/healthy-lifestyle/adult-health/in-depth/eye-safety/art-20043946) - Why eye protection matters and how to choose the right kind for your tasks
- [Energy.gov – LED Lighting Basics](https://www.energy.gov/energysaver/led-lighting) - Overview of LED lighting benefits and options for bright, efficient workspaces
Key Takeaway
The most important thing to remember from this article is that this information can change how you think about Tools & Equipment.


