A small, well-organized workshop can make every project faster, safer, and less frustrating—whether your “shop” is a garage corner, a shed, or just a wall in your apartment. This guide walks you through a practical, step‑by‑step setup focused on real-world home projects, not fantasy dream shops. You’ll end up with a workspace that fits your space, your budget, and the kind of fixes you actually do.
Step 1: Define Your Projects Before You Buy Tools
Before you pick up a single tool, get clear on what you really plan to do. That determines everything: layout, tools, and storage.
Think about the next 6–12 months and write down specific projects: “hang shelves in bedroom,” “fix loose deck boards,” “assemble flat-pack furniture,” “patch a door frame,” “build a simple workbench.” From that list, underline the tasks that show up more than once: cutting wood, drilling holes, driving screws, sanding, painting, measuring, etc.
Now sort tools into three categories:
- Must-have now – Tools used across most of your planned projects (e.g., tape measure, drill/driver, stud finder, combination square, utility knife, basic set of drill and driver bits).
- Nice-to-have soon – Tools that unlock more precise or efficient work (e.g., circular saw, orbital sander, clamps).
- Borrow or rent – Tools used rarely or for big one-off jobs (e.g., miter saw, hammer drill, paint sprayer).
This project-first approach keeps you from buying gear you’ll never touch and ensures the tools you do buy actually earn their place in your limited space.
Step 2: Choose and Shape Your Workspace (Even If It’s Tiny)
You don’t need a full garage to have a functional workshop—but you do need to be intentional about how you use whatever space you have.
Start by picking a “home base” for your tools:
- Garage corner or shed: Best if you do cutting, sanding, or noisy work.
- Basement: Good for quieter tasks like assembly, light drilling, and small repairs. Check for ventilation and moisture.
- Apartment wall or closet: Use vertical storage and a fold-down work surface.
Then address the basics:
- Floor and stability: A reasonably flat, stable surface helps when assembling furniture and using power tools. If the floor is uneven, plan to add leveling feet to your workbench or use shims.
- Lighting: Overhead lighting plus a movable work light or clamp light is ideal. Aim for bright, diffused light over your main work surface. LED shop lights are efficient and stay cool.
- Power access: Ideally, you’ll have at least one grounded outlet nearby. Use a quality power strip with surge protection and a built-in breaker if you’re plugging in multiple tools. Avoid daisy-chaining cheap extension cords.
- Ventilation: For sanding, painting, or cutting treated materials, open windows and use a fan to move air out. In a garage, crack the door. Wear appropriate masks or respirators when needed.
Finally, decide where “dusty” work will happen (cutting, sanding) versus “clean” work (assembly, measuring, layout). Even a simple rule like “cut outside, assemble inside” can keep your space usable and your home cleaner.
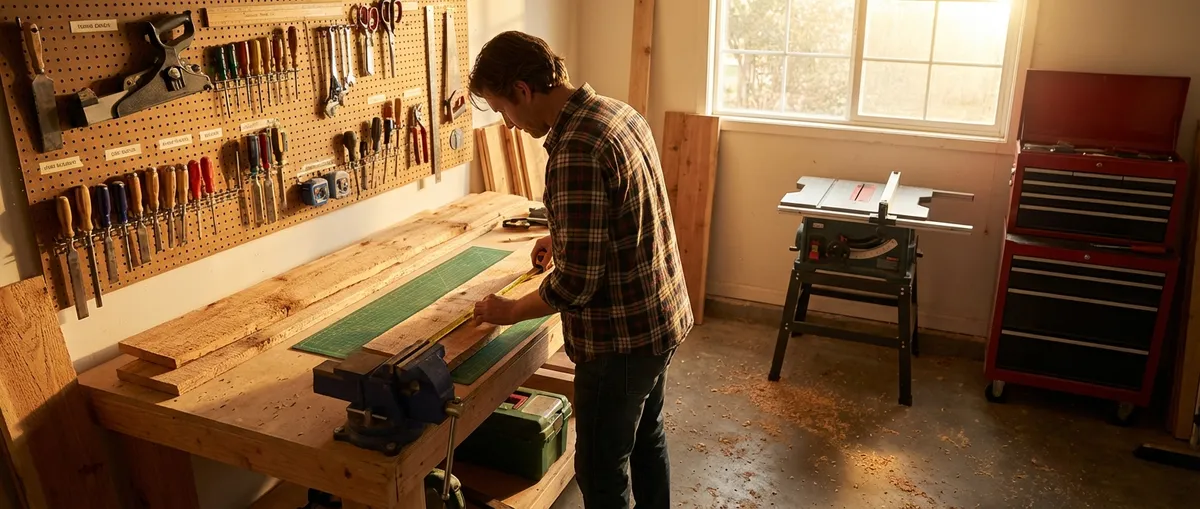
Step 3: Build or Set Up a Solid Work Surface
A stable work surface is the heart of a practical workshop. You don’t need a fancy bench; you need something flat, strong, and safe.
You have three realistic options:
- Buy a ready-made workbench: Look for one with at least a 1" thick top, a load rating over 500 lbs if possible, and leveled legs. Bonus features: integrated vise, power strip, pegboard back.
- Convert an old table or desk: Reinforce wobbly legs with corner braces, add a sheet of ¾" plywood on top, and screw it down. Add a sacrificial top (like hardboard) you can drill or cut into.
- Build a basic 2×4 bench: If you’re up for a starter project, build a simple rectangular frame from 2×4s with a ¾" plywood top. Use screws, not nails, and cross-brace the legs to reduce wobble.
Then tune it for real use:
- Bench height: For general DIY work, aim for about wrist height when your arms hang at your sides. Slightly taller is nicer for detailed work; slightly lower for heavy hand work.
- Clamping edges: Leave at least one edge of the bench clear for clamps—don’t line every side with storage or shelves.
- Mobility vs. stability: If your space is shared (like a parking spot), add locking casters. Remember: lock all wheels before using saws or applying heavy force.
- Protection: Cover the bench with a removable hardboard or MDF layer. When it gets too beat up, replace just that layer, not the whole bench.
This bench becomes the place where cutting, drilling, gluing, and assembling all feel easier because you’re not fighting a wobbly card table or the floor.
Step 4: Build a Core Tool Kit and Store It Smart
Once you know your projects and have a work surface, you can build a core tool kit that punches above its weight. Focus on tools that work across many tasks, not specialty gadgets.
A practical starter lineup:
- Measuring & layout: 25' tape measure, 6" or 12" combination square, speed square, torpedo level, pencil/marker.
- Cutting & shaping: Quality utility knife, handsaw or compact pull saw, sanding block, set of sandpapers (80, 120, 180+ grits).
- Fastening & drilling: Cordless drill/driver, drill bit set for wood and masonry, driver bit set (Phillips, square, Torx), claw hammer, adjustable wrench, set of screwdrivers.
- Holding & safety: At least four clamps (2 small, 2 medium), safety glasses, hearing protection, dust masks or respirator as needed, work gloves.
- Electrical basics (for minor tasks): Non-contact voltage tester, wire stripper/cutter, assorted wire nuts (only if you are comfortable and allowed to do basic electrical work in your area).
Then make those tools easy to find and put away:
- Wall storage: Pegboard, French cleats, or track systems keep tools visible and off the bench. Outline tool shapes or label hooks so everything has a home.
- Portable kits: Use a toolbox or organizer case for “go-to” items you often carry around the house: drill, bits, tape measure, stud finder, small level, driver bits, pencil, utility knife.
- Small parts: Clear bins or organizers for screws, anchors, nails, and brackets. Label by size and use (“drywall screws,” “concrete anchors,” “furniture bolts”).
- Zones: Group tools by function: “measuring,” “cutting,” “drilling/fastening,” “finishing.” This makes it easier to think in tasks instead of hunting randomly.
A small, well-thought-out kit you can reach in seconds beats a giant, jumbled toolbox every time.
Step 5: Create Simple Workflows for Common Home Projects
With your space and tools set up, the last step is organizing how you actually work. A few repeatable workflows can prevent half-finished projects and rework.
Use these practical patterns:
The 10-minute prep rule
Before you start, spend up to 10 minutes staging: pull the tools you’ll need, clear the bench, set a trash bin or box nearby, and plug in or charge anything needed. This reduces trips and mid-project frustration.
Layout → Dry-fit → Fasten
For hanging shelves, assembling furniture, or installing hardware: - Measure and mark carefully. - Dry-fit parts without screws or glue to check alignment. - Only then start drilling or fastening. This prevents extra holes in your wall and misaligned parts.
Cut, then clean, then assemble
When a project involves cutting and assembly: - Do all your cuts in one batch (ideally in your “dusty” area). - Vacuum or sweep dust from parts and the bench. - Move to your “clean” area for final assembly and finishing. This keeps dust out of hinges, drawer slides, and finishes.
End-of-project reset
At the end of every project—or day, for longer builds—do a 5–10 minute reset: - Return tools to their wall or drawer spots. - Sort fasteners back into labeled bins. - Sweep or vacuum the main work area. - Note any worn-out consumables to replace (blades, sandpaper, bits). This habit is what keeps your workshop useful instead of turning into a storage pile.
Upgrade with intent, not impulse
After several projects, review what slowed you down: - Were you constantly clamping awkwardly? Maybe a pair of bar clamps or a bench vise is next. - Lots of manual sanding? An orbital sander might be worth it. - Struggling with straight cuts? A circular saw with a straightedge guide could be your next big upgrade. Let your real experience decide which tool you buy next, not ads or social posts.
Over time, these small systems turn your workshop into a place where projects flow instead of stall. You’ll know where everything is, how you like to work, and which tools actually matter for the kind of fixes you take on.
Conclusion
A functional DIY workshop isn’t about expensive tools or massive space—it’s about clarity, layout, and habits. Start with the projects you actually plan to do, carve out a defined workspace, set up a stable bench, build a lean but capable tool kit, and use simple workflows you can repeat. As you complete more home fixes, your workshop will naturally evolve with you, one practical upgrade at a time. The result: less frustration, more finished projects, and a space that’s always ready for the next repair or build.
Sources
- [U.S. Consumer Product Safety Commission – Power Tool Safety Tips](https://www.cpsc.gov/s3fs-public/611.pdf) - Overview of safe setup and use practices for common power tools
- [OSHA – Woodworking ETool: Machine Setup and Layout](https://www.osha.gov/etools/woodworking/machine-setup-layout) - Guidance on arranging tools and workspaces for safer, more efficient work
- [The Family Handyman – Garage Workshop Ideas](https://www.familyhandyman.com/project/diy-garage-workshop-ideas/) - Practical examples of small workshop layouts and storage solutions
- [Fine Woodworking – Choosing the Right Workbench Height](https://www.finewoodworking.com/2008/11/13/choose-the-right-workbench-height) - Discussion of workbench height considerations for comfort and control
- [MIT Environment, Health & Safety – Respiratory Protection Basics](https://ehs.mit.edu/workplace-safety-program/respiratory-protection/) - Information on when and how to use respiratory protection in DIY and shop environments
Key Takeaway
The most important thing to remember from this article is that this information can change how you think about Tools & Equipment.


