A lot of DIY projects stall not because you lack skill, but because the tools you’re using make everything harder than it needs to be. You don’t have to buy a truckload of pro gear to level up. A few smart upgrades and setup tweaks can turn frustrating jobs into smooth, repeatable wins. This guide walks through practical, budget-conscious tool and equipment changes that immediately improve accuracy, safety, and speed—without needing a contractor’s workshop.
Step 1: Trade the “Random Bucket” for a Mobile Tool Core
If your tools live in random bins or scattered drawers, you waste time hunting instead of building. Start by building a compact, mobile “tool core” you can move from room to room.
- Pick a rolling toolbox or sturdy tool tote with a handle. Prioritize one that can fit in a closet or under a workbench.
- Decide on your “core tools” that go everywhere: tape measure, stud finder, utility knife, hammer, 6-in-1 screwdriver, adjustable wrench, pliers, pencil, and safety glasses.
- Add a small, divided organizer tray for hardware you constantly use: 1–2 screw sizes, drywall anchors, picture hangers, wire nuts, and a few zip ties.
- Label compartments or use color-coded containers so you can see when you’re low (e.g., blue cup = screws, red cup = anchors).
- Keep this core loaded and ready; don’t pull tools out and abandon them elsewhere. Whenever you finish, everything returns to this mobile base.
Why it helps: You stop wandering between basement, garage, and junk drawer for every fastener and screwdriver. When a project pops up, your essentials roll to the work, not the other way around.
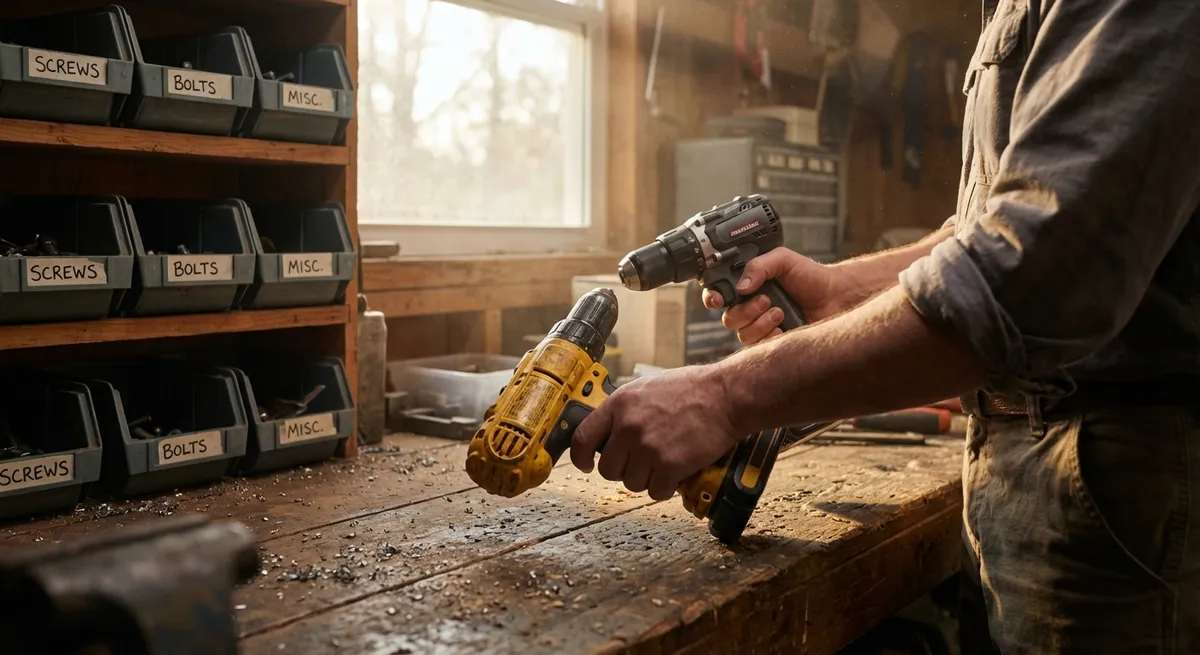
Step 2: Replace One-Time-Use Hand Tools with Versatile Power Basics
Muscling through jobs with only hand tools works—until you hit material that fights back. A few well-chosen power tools can handle most home upgrades without turning your place into a full shop.
- Start with three high-impact basics: a cordless drill/driver, an orbital sander, and a multi-tool (oscillating tool). These cover drilling, fastening, surface prep, trimming, and detail cutting.
- Pick a battery platform from a major brand (DeWalt, Milwaukee, Makita, Ryobi, etc.) and stick with it. This way, future tools can share batteries and chargers.
- Invest in quality bits and accessories, not just the tool: wood and masonry drill bits, a countersink bit, sanding discs in multiple grits, and a few multi-tool blades for wood, metal, and drywall.
- Practice on scrap first: drill pilot holes in offcuts, try different sanding grits on an old board, and test plunge cuts into a piece of scrap drywall before touching finished surfaces.
- Store these tools in one dedicated bin or shelf with their batteries and chargers—no loose batteries in random drawers. Mark one battery as “always charged” and put it back on the charger after every use.
Why it helps: Instead of fighting dense studs, tough paint, or old trim with hand tools, you let compact power tools do the heavy work. That reduces mistakes, fatigue, and mid-project quitting.
Step 3: Upgrade Your Measuring Game for Cleaner Fits and Fewer Do-Overs
A crooked shelf or misaligned cabinet usually starts with a rushed measurement. Tightening up your measuring and marking process is one of the cheapest ways to get “pro-looking” results.
- Standardize on one reliable tape measure—25 feet with clear, large markings—and keep a backup in your mobile tool core. Use the same tape for all measurements in a project to avoid tiny differences.
- Add three simple helpers: a torpedo level, a 2–4 ft level, and a chalk line. These give you straight, level reference lines instead of guessing by eye.
- Use a sharp carpenter’s pencil or fine-tip marker and mark with a small “V” or tick, not a fat line. The tip of the V or the side of the line is your cut/installation edge.
- Adopt a “measure twice, mark once, cut once” routine. After your first measurement, walk away for 10–20 seconds, then quickly re-measure. Treat any difference as a sign to slow down and confirm.
- For repetitive cuts (like multiple shelves the same length), make a simple story stick: cut a scrap board to your exact length and use that scrap to transfer the dimension instead of re-measuring each time.
Why it helps: You eliminate the tiny errors that add up to gaps, wobbly furniture, ill-fitting trim, and extra trips to the store for more material.
Step 4: Build a Safe, Stable Cutting Setup (Even in a Small Space)
Trying to cut wood or trim on makeshift supports—chairs, buckets, or your knee—is a recipe for bad cuts and close calls. A stable cutting station doesn’t need a giant shop or fancy workbench.
- Clear a 4x4 ft area where you can safely move around: garage, driveway, or even a living room with a drop cloth and the windows cracked.
- Use two sawhorses and a sacrificial top (a cheap sheet of plywood or a few 2x4s laid across). This gives you a flat, stable surface you’re allowed to cut into slightly.
- Clamp your work whenever possible using inexpensive quick clamps. If you don’t have clamps yet, at least brace the work firmly with your off-hand while keeping clear of the blade path.
- Always support both sides of a cut. For longer boards, use a roller stand or stack of scrap on the far side so the piece doesn’t drop and pinch the blade as you finish the cut.
Get in the habit of a “three-point check” before cutting: (1) Is the material secure? (2) Is the blade path clear of cords, fingers, and clamps? (3) Do you have a stable stance with both feet balanced?
Why it helps: A consistent cutting station improves accuracy and safety, and it prevents the binding, kickback, and rough edges that happen when material moves or drops mid-cut.
Step 5: Keep Dust, Noise, and Mess Under Control from Day One
Messy projects are the fastest way to burn out your enthusiasm—and everyone else’s patience. With a few simple equipment choices, you can keep your home livable while you work.
- Pair your tools with a shop vacuum (or a household vacuum with a good filter for light duty). Use tool adapters or universal couplers so you can hook the hose directly to sanders and saws when possible.
- Set up a “dirty zone” and a “clean zone.” Dirty zone = cutting, sanding, drilling. Clean zone = layout, assembly, and family areas. Use plastic sheeting or old sheets to curtain off the dirty zone when you can.
- Wear hearing protection and safety glasses as habit, not just when you “think it might get loud.” Keep them in your mobile tool core and put them on before you power any tool.
- Lay down rosin paper, builder’s paper, or old cardboard along paths where you’ll walk with dusty shoes or materials. Tape the edges so they don’t curl and trip you up.
- Finish by doing a 10-minute “reset” at the end of each work session: vacuum the work area, wipe your tools, coil cords, and return everything to its designated box or tote. Treat it as part of the project, not an optional extra.
Why it helps: Controlling dust and clutter keeps your home safer and makes it much easier to start the next day’s work without digging through piles of debris or dealing with complaints about the mess.
Conclusion
You don’t need a huge workshop or a full contractor’s toolbox to get solid, reliable DIY results. By organizing a mobile tool core, choosing a few versatile power tools, tightening up how you measure, stabilizing your cutting setup, and managing dust and noise, you dramatically reduce frustration and rework. Start with one step—often the mobile core or the cutting station—and build from there. Each small improvement compounds, so every future project feels more controlled, safer, and closer to the results you actually pictured in your head.
Sources
- [U.S. Consumer Product Safety Commission – Power Tool Safety](https://www.cpsc.gov/Safety-Education/Safety-Education-Centers/Power-Tool-Safety) - Official safety guidance for using common power tools at home
- [Occupational Safety and Health Administration (OSHA) – Hand and Power Tools](https://www.osha.gov/hand-power-tools) - Federal safety standards and best practices for tool use and maintenance
- [Family Handyman – Essential Power Tools for the Homeowner](https://www.familyhandyman.com/list/essential-power-tools-for-the-homeowner/) - Practical breakdown of which tools give the most value for typical home projects
- [This Old House – How to Build a Work Bench](https://www.thisoldhouse.com/workshops/21018235/how-to-build-a-work-bench) - Example of creating a stable work surface and cutting station
- [Fine Homebuilding – Measuring and Layout Tips](https://www.finehomebuilding.com/project-guides/framing/accurate-measuring-and-layout) - Detailed methods for more accurate measuring and layout in carpentry and DIY work
Key Takeaway
The most important thing to remember from this article is that this information can change how you think about Tools & Equipment.


