Every DIY project lives or dies on one thing: whether you can actually find and use your tools when you need them. You don’t need a fancy workshop or a huge budget to make this happen—you just need a simple, repeatable system. This guide walks you through setting up and maintaining a practical tools-and-equipment setup that makes projects smoother, faster, and less frustrating.
Know Your Core Tools Before You Organize Anything
Before you start buying pegboards or storage bins, you need to know what you actually own and use. Most DIYers have three types of tools: everyday tools, project-specific tools, and “why do I even have this?” tools.
Start with a simple table or clear floor space and lay everything out. Group tools by how you use them, not by brand or how they came in the box. For example, put all cutting tools together (handsaws, utility knives, snips), all measuring and layout tools together (tape measures, levels, squares), and all fastening tools together (screwdrivers, drills, nailers).
As you group items, be honest about what you really use. A single, dependable tape measure is more useful than three half-broken ones. This first pass helps you see what’s missing, what’s duplicated, and what needs replacing. It also makes the next steps—building a system you’ll actually maintain—much easier.
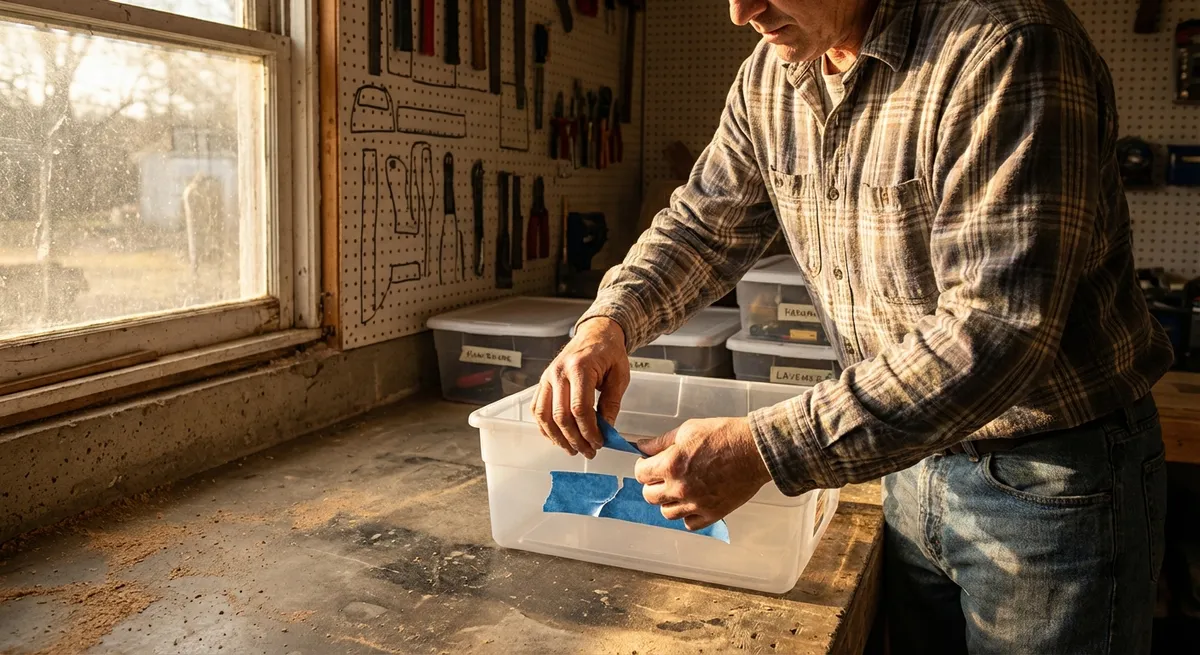
Step 1: Sort and Purge Your Tools With a Simple Rule
Your first action step is getting from “pile” to “purpose.” Use a no-nonsense rule: keep, fix, or get rid of it.
- Clear a working area. Use a bench, table, or clean floor. You need enough space to see everything at once.
- Create three zones. Label them: KEEP, FIX, LET GO. You can use painter’s tape and a marker on the floor or tabletop.
- Handle every tool once. For each tool, ask:
- Do I use this at least once a year?
- Is it safe to use in its current condition?
- Do I already own a better version?
- Place it in a zone.
- KEEP: Works well, you actually use it.
- FIX: Dull blades, frayed cords, sticky mechanisms—worth saving but needs attention.
- LET GO: Broken beyond simple repair, duplicates you never reach for, tools for tasks you no longer do.
- Deal with the “LET GO” pile right away.
- Recycle metal tools at a scrap or metal recycling facility where possible.
- Drop off power tools and batteries at an electronics or hazardous-waste collection point—don’t put them in the trash.
This step cuts down clutter and makes space for safer, more efficient work. It also shows you where to invest: maybe you need a proper set of screwdrivers more than another specialty bit set.
Step 2: Design Your Tool Zones Around How You Actually Work
Once you’ve pared down, build your storage around how you move through a project, not around what looks nice on a wall. Think in “zones” based on how often and where you use tools.
Identify three usage levels:
- High-use: Tape measure, utility knife, pencil, impact driver, most-used drill bits, pliers, hammer. - Medium-use: Saws, clamps, levels, stud finder, sanders, socket set. - Low-use: Specialty jigs, odd fasteners, niche tools you only use occasionally.
Assign storage zones:
- Grab Zone (chest to eye level): High-use tools—these should be reachable without bending or stretching. - Support Zone (waist to chest): Medium-use tools and small organizers. - Deep Storage (below waist / higher shelves): Low-use, bulky, or seasonal gear.
Pick storage types that match the tool, not the catalog:
- Wall: Pegboard, French cleats, or simple screw-in hooks for commonly grabbed tools. - Drawers: Bits, measuring tools, hand tools that can stack without damage. - Bins/Boxes: Extension cords, painting supplies, plumbing fittings.
Keep like with like, but by task:
- A “hanging and hardware” area: stud finder, level, hammer, screw assortment, anchors. - A “cutting and shaping” area: saws, blades, rasps, sandpaper. 5. Do a dry run: Walk through a typical project (e.g., hanging shelves) in your head. If you need to cross the room multiple times to grab basics, adjust your layout.
Designing zones around usage saves you steps on every project and makes it far easier to put things back in the right place—because the “right place” actually makes sense.
Step 3: Create a Portable Core Kit You Can Grab and Go
Even with a well-organized garage, many projects happen away from your main storage—upstairs, outside, or at a friend’s house. A portable core kit keeps you from running back and forth every five minutes.
Choose the right carrier:
- For most DIYers, a sturdy tool bag or medium toolbox (not huge) is best. - Make sure it has interior pockets for small items and a solid handle or shoulder strap.
Stock it with your true essentials:
- Measuring/layout: Tape measure (25 ft), carpenter’s pencil, small torpedo level. - Cutting: Utility knife with extra blades. - Fastening: Multibit screwdriver, small adjustable wrench, basic plier set. - Power: Drill/driver, two charged batteries, a compact bit set (Phillips, slotted, Torx, hex, common drill bit sizes). - Safety: Earplugs, safety glasses, light work gloves.
Add a mini hardware kit:
- Small compartment box with a mix of common screws, wall anchors, a few picture hangers, and a handful of zip ties.
Set a reset routine:
- After each project, empty the bag, return any “borrowed” tools from the garage, and restock anything used up. - Put the bag back in the same spot every time—near the door to the house or the main work area.
Label it clearly:
- A simple tag like “CORE KIT – DO NOT RAID” reminds you not to strip it for parts and then forget to restock it.
When everything essential lives in this one portable kit, small jobs feel easier to start and you’re far less likely to stall mid-project because you’re missing one tool.
Step 4: Set Up a Simple Recharge and Maintenance Station
Dead batteries, dull blades, and filthy tools derail projects more than anything else. A small, dedicated “maintenance corner” keeps your equipment ready without turning it into a full-time job.
Pick a safe spot with power:
- A shelf or bench near an outlet is ideal. - Keep this away from flammable materials—no chargers sitting in a pile of sawdust.
Mount or place chargers permanently:
- Secure your battery chargers so they’re not dangling by cords. - If you use multiple brands, label each charger and keep its matching batteries together.
Create an “inbox” for tired tools:
- Use a small bin labeled “TO BE SHARPENED / CLEANED.” - When a blade starts to drag or a tool feels off, it goes in this bin instead of back on the main wall.
Build a 10-minute maintenance habit:
- Once a week, spend 10 minutes: - Wiping down hand tools with a rag. - Blowing dust out of power tools (use compressed air or a vacuum with a brush). - Sharpening dull chisels or utility blades (or replacing blades). - Checking cords for nicks and plugs for damage.
Keep basic care supplies at the station:
- Rags, light machine oil, replacement blades, a small file, and a brush for cleaning.
Treating maintenance as a tiny, regular task instead of a giant weekend project keeps your tools safer, makes cuts cleaner, and extends the life of gear you’ve already paid for.
Step 5: Label Everything So Anyone Can Find (and Return) Tools
A system that only you understand will fall apart the first time someone helps you with a project—or the first time you’re tired and in a rush. Clear labeling turns your storage into a map anyone can follow.
Label the storage, not the tool:
- Mark shelves, drawers, bins, and wall sections clearly: “DRILL & DRIVER,” “CLAMPS,” “PAINT SUPPLIES,” “ELECTRICAL,” etc. - Use a label maker, painter’s tape, or index cards in clear sleeves—whatever you’ll actually maintain.
Create shadow outlines for key tools:
- On pegboard or wall racks, draw or tape an outline of the tool’s shape behind where it hangs. - When a spot is empty, it’s obvious which tool is missing.
Use simple categories for small parts:
- For screws and anchors, label both type and size range in plain language: “WOOD SCREWS – MEDIUM,” “ANCHORS – DRYWALL.” - Consider color-coding by category (e.g., blue labels for electrical, red for cutting tools).
Post a quick “put-back” checklist:
- On the wall by your main station, a short list: - Return tools to labeled spots. - Clear the work surface. - Move dull/broken tools to maintenance bin. - Put batteries on charger if below half.
Show your system to anyone who borrows tools:
- Take one minute to explain where things live. - Make it clear that returning tools to the labeled spot is part of “borrowing.”
Good labels turn your garage or workspace into a shared system that survives busy weekends, helpers, and long gaps between projects.
Conclusion
You don’t need a designer workshop to work like a pro. By sorting what you own, building zones around how you actually work, setting up a portable core kit, maintaining a small recharge station, and labeling everything clearly, you create a tool system that saves time on every project. The goal isn’t perfection; it’s a setup that helps you start faster, work safer, and finish without hunting for the one tool you swear you just had.
Pick one step from this guide—sorting, zoning, building a core kit, maintenance, or labeling—and complete it this week. Once that’s in place, layer in the next step. In a month, your tools and equipment will feel less like a headache and more like an asset that makes every DIY job easier.
Sources
- [Occupational Safety and Health Administration (OSHA) – Hand and Power Tools](https://www.osha.gov/hand-power-tools) - Guidance on safe use and maintenance of common tools, including storage and inspection practices
- [U.S. Department of Energy – Energy Saver: Using Portable Electric Power Tools](https://www.energy.gov/energysaver/articles/using-portable-electric-power-tools) - Covers safe and efficient use of portable power tools, including electrical and battery considerations
- [Lowe’s – How to Organize Tools](https://www.lowes.com/n/how-to/organize-tools) - Practical ideas for tool storage, zoning, and workspace setup in home garages and shops
- [Family Handyman – Garage Workshop Ideas](https://www.familyhandyman.com/project/garage-workshop-ideas/) - Real-world examples of functional tool storage, work zones, and layout tips for DIYers
- [Home Depot – Power Tool Maintenance Tips](https://www.homedepot.com/c/ab/power-tool-maintenance-tips/9ba683603be9fa5395fab90f4cfb5fd) - Step-by-step tips for keeping drills, saws, and other power tools in good working condition
Key Takeaway
The most important thing to remember from this article is that this information can change how you think about Tools & Equipment.


