An air compressor can turn a basic home workshop into a serious DIY setup. From powering nail guns and impact wrenches to blowing out dust and inflating tires, it’s one of the most versatile tools you can own. But if you just drag it home, plug it in, and hope for the best, you’re asking for poor performance, damaged tools, and potential safety issues.
This guide walks you through how to choose, set up, and safely use a portable air compressor in a home workshop. You’ll get five clear, step-by-step processes you can follow right away, plus practical tips to keep your compressor running smoothly for years.
Know Your Air Compressor (Before You Plug It In)
Before you ever hit the power switch, you need to understand what you’re working with. Not all air compressors are built for the same jobs, and mis-matching tools to the wrong compressor is one of the most common DIY mistakes.
Most homeowner-friendly compressors are:
- Pancake or hot-dog style: Small, portable, great for nailers and light tasks.
- Vertical or horizontal portable units: Larger tank sizes, more power, good for intermittent use of higher-demand tools like impact wrenches.
Key terms to know:
- PSI (Pounds per Square Inch) – How much pressure the compressor can deliver. Most home tools need 70–120 PSI.
- CFM (Cubic Feet per Minute) – How much air the compressor can deliver at a set PSI. This is the “strength” you match to your tools.
- SCFM (Standard CFM) – CFM measured under standard conditions; this is the number to compare with tool requirements.
Check the label on your compressor and your air tools:
- Make sure the compressor’s SCFM at 90 PSI meets or exceeds your tool’s requirements.
- If a tool “sort of works” but constantly bogs down or the compressor runs nonstop, you’re likely underpowered on CFM.
Taking a minute to match your tools to your compressor capacity will save you massive frustration and extend the life of both.
Step 1: Choose the Right Hose, Fittings, and Layout
How you connect your compressor to your tools matters. Undersized hoses and cheap fittings create pressure drop, leaks, and inconsistent performance.
Step-by-step: Set up an effective air line
Pick the right hose diameter and length
- For most home setups, a 3/8" hose is a good balance of flexibility and airflow. - Use the shortest hose that reasonably reaches your work area. Longer hoses mean more pressure drop, especially with smaller diameters.
Choose hose material for your environment
- Rubber hoses: Flexible, durable, but heavier. Good for garage workshops. - Hybrid/poly hoses: Lighter and stay flexible in cold weather; a strong choice for most DIY users.
Standardize on quick-connect fittings
- Use industrial-style (Type D) quick-connects unless your tools specify otherwise. - Stick with one standard type across your tools and hoses to avoid compatibility headaches.
Install thread tape correctly
- Wrap PTFE (Teflon) tape clockwise around male threads 2–3 times. - Keep tape off the first thread to prevent bits from entering the air line.
Plan your hose path for safety
- Route hoses away from sharp edges, hot surfaces, and trip paths. - If you frequently work in the same area, consider a wall-mounted hose reel to keep things tidy and reduce tripping hazards.
A well-planned air line setup feels “invisible” while you work: tools get consistent power, and hoses don’t fight or trip you.
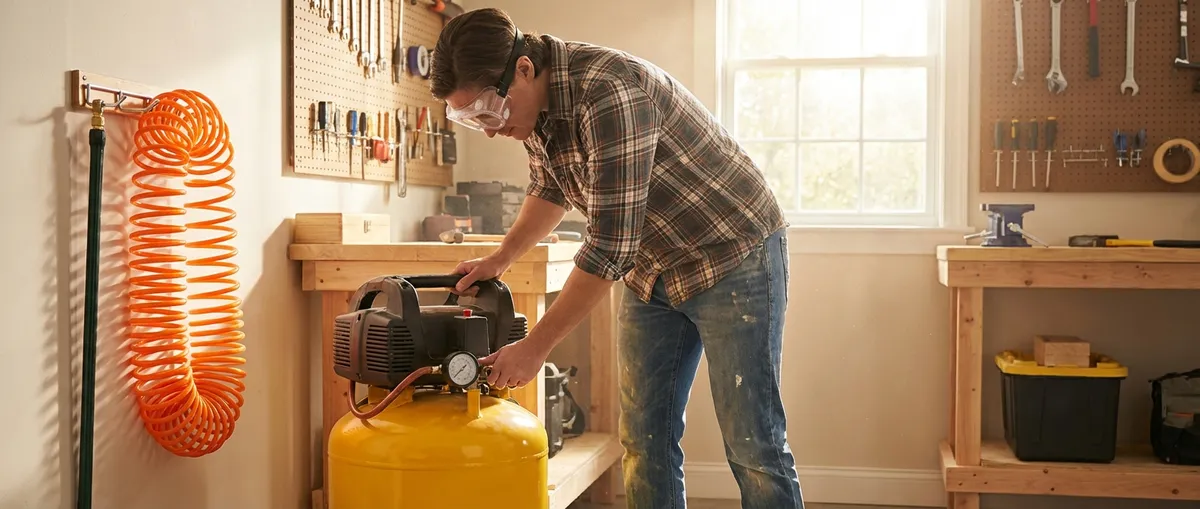
Step 2: Install and Adjust a Regulator and Filter the Right Way
Running tools directly off tank pressure is a fast way to damage them. Moisture and debris in the line can also wreck internal parts or ruin finishes when spraying.
Step-by-step: Regulate and clean your air
Mount the regulator near where you’ll use tools
- You can use the compressor’s built-in regulator, but an in-line regulator at your main work point gives you better control. - Install it in an accessible spot so you can adjust pressure without walking back to the compressor.
Add a basic filter/moisture separator
- Install a filter-regulator unit (often sold as FRLs) or a filter in front of the regulator if separate. - For painting or fine finish work, add a desiccant dryer or inline disposable filter near the spray gun as a final line of defense.
Connect with proper orientation
- Look for “IN” and “OUT” arrows on the regulator and filter body; install them in the correct direction of airflow. - Use thread tape or paste as recommended and snug fittings firmly without over-tightening.
Set the working pressure for each task
- Check your tool’s recommended pressure range (often printed on the tool or in the manual). - With the compressor running and the tool connected, squeeze the trigger (or run the tool) and adjust the regulator so pressure under load sits at the recommended PSI.
Create a quick reference chart for your tools
- Note typical working pressures: - Finish/brad nailer: ~70–90 PSI - Framing nailer: ~90–120 PSI - Impact wrench: ~90 PSI (but heavily depends on CFM and tool quality) - Spray gun: Often 20–50 PSI at the gun, depending on type - Tape this chart near the regulator so you don’t guess every time.
Proper pressure and filtration prevent blown seals, inconsistent tool performance, and moisture spitting out of your tools and onto your projects.
Step 3: Power and Start Up Safely Every Time
Compressors pull a lot of current when they start. Wrong cords or outlets can cause voltage drops, tripped breakers, or premature motor failure—plus noise and vibration can become a problem if the compressor isn’t placed well.
Step-by-step: Safe electrical setup and startup
Check the electrical requirements
- Confirm voltage and amperage on the compressor’s nameplate (common: 120V, 15A for smaller units; some require 240V). - Plug into a properly grounded outlet. Avoid using light-duty extension cords; if you must use one, follow the compressor manual’s minimum gauge and length guidelines.
Choose a safe location
- Place the compressor on a flat, stable surface, away from flammable liquids and dust piles. - Make sure the area is well-ventilated and at least a few inches from walls to allow airflow for cooling.
Inspect before each use
- Check that hoses are not cracked, fittings are tight, and the power cord is undamaged. - Verify that the tank drain valve is closed (you’ll open it later to release water).
Power up correctly
- Turn the regulator to minimum (all the way down) before starting. - Flip the power switch ON and let the compressor build up to its cut-out pressure (it will stop automatically). - Listen for air leaks around fittings—fix any hissing before putting the compressor into service.
Test under load briefly
- Connect a tool and slowly raise the regulator until you reach the working PSI. - Cycle the tool a few times to ensure the compressor restarts and stops normally and isn’t constantly running or struggling.
Treat the compressor like any power tool: respect the power draw, give it breathing room, and make a quick pre-use check part of your routine.
Step 4: Use Nailers and Other Air Tools Without Blowouts or Misfires
Pneumatic nailers and staplers are among the most useful air tools for home projects—but misfires, jams, and blowouts (nails punching through or bending) are common if you don’t set them up correctly.
Step-by-step: Dial in nailers and common air tools
Set the correct pressure for the material
- Start at the low end of the tool’s PSI range. - Fire test shots into scrap material of the same type and thickness you’ll be using. Increase PSI gradually until fasteners sit flush (or just below surface for finish work).
Adjust depth-of-drive on the tool (if available)
- Use the tool’s depth adjustment wheel or knob along with PSI—don’t just crank up pressure. - Aim to keep PSI moderate and fine-tune depth at the tool; this gives better control and less wear.
Hold the tool correctly
- Keep the nailer flat and firmly seated against the workpiece before pulling the trigger. - Avoid “bouncing” the tip or firing at an angle if you’re not using a bump-fire mode specifically designed for that.
Use the right fasteners and accessories
- Load only the fastener types and sizes specified in the tool manual. Wrong collation, gauge, or length can cause jamming or misalignment. - For other tools (like impact wrenches), use impact-rated sockets and accessories, not chrome hand sockets.
Stop and troubleshoot issues early
- Frequent jams: Check for bent fasteners, worn driver blades, or dirty internals—disconnect air before clearing jams. - Weak performance: Confirm PSI under load, check hose length/diameter, and verify the compressor CFM is sufficient.
Once you dial in your pressure and technique, air tools feel predictable and controlled instead of loud and unpredictable.
Step 5: Maintain the Compressor So It Lasts (and Stays Safe)
A neglected compressor can become rusty inside, throw water into your tools, or in extreme cases, be unsafe. Maintenance tasks are simple but easy to skip if you don’t make them routine.
Step-by-step: Basic ongoing maintenance
Drain the tank after every use
- Turn the compressor off and unplug it. - Slowly open the tank drain valve (usually on the bottom) until all air and moisture are released. - Tilt the compressor slightly if needed to help water fully exit, then close the valve snugly.
Check and change oil on oil-lubricated models
- If your compressor is oil-lubricated, check the oil sight glass or dipstick periodically. - Change oil following the manufacturer’s interval (often after break-in, then every 3–12 months, depending on use). Use the recommended oil type and viscosity.
Inspect and clean filters
- Remove and inspect the intake air filter. Clean it (if reusable) or replace it if clogged or damaged. - Check any in-line air filters; drain moisture bowls and replace filter elements as needed.
Monitor safety valves and gauges
- Periodically test the safety relief valve by briefly pulling its ring (do this only per manufacturer guidance, with the system pressurized but under control). You should hear a sharp release of air. - If a gauge seems stuck or inaccurate, replace it rather than guessing pressure.
Store properly between uses
- Always store with the tank drained and the unit in a dry, protected location. - Coil hoses loosely—don’t kink or crush them—and hang them off the floor to prevent damage.
A few minutes of maintenance after each use keeps your compressor efficient, safer, and ready when you need it.
Conclusion
An air compressor can feel intimidating if you’ve only used plug-in tools before, but once you understand the basics—CFM vs. PSI, proper hose and regulator setup, safe startup, and simple maintenance—it becomes one of the most powerful upgrades to your DIY toolkit.
Set your compressor up thoughtfully once, and you’ll get reliable power for nailers, impact tools, sprayers, and more, without constant leaks, misfires, or moisture problems. Follow the steps in this guide, keep a simple maintenance habit, and your compressor will quietly (and safely) support your home projects for years.
Sources
- [U.S. Consumer Product Safety Commission – Portable Air Compressor Safety Alert](https://www.cpsc.gov/Recalls/2004/cpsc-us-department-of-labor-osha-and-campbell-hausfeld-llc-announce-safety-alert-regarding-portable-air-compressors) - Covers key safety considerations and hazards associated with portable air compressors
- [Occupational Safety and Health Administration (OSHA) – Compressed Air Safety](https://www.osha.gov/laws-regs/standardinterpretations/1997-03-04) - Provides official guidance on safe use of compressed air in work environments
- [Ingersoll Rand – How to Size and Select an Air Compressor](https://www.ingersollrand.com/en-us/air-compressor/tools-and-resources/how-to-size-air-compressor) - Explains PSI, CFM, and how to match compressors to tool requirements
- [Quincy Compressor – Air Compressor Maintenance Checklist](https://www.quincycompressor.com/air-compressor-maintenance-checklist/) - Detailed breakdown of recommended maintenance tasks and intervals
- [Grainger – Understanding and Selecting Air Line Filters, Regulators, and Lubricators](https://www.grainger.com/know-how/equipment-information/kh-selecting-air-preparation-units) - Overview of filters and regulators and how to choose and set them up
Key Takeaway
The most important thing to remember from this article is that this information can change how you think about Tools & Equipment.


