A messy closet can make your whole home feel disorganized. The good news: you don’t need custom cabinetry or a full renovation to fix it. With basic tools, a weekend, and a plan, you can turn almost any standard closet into a smart, efficient storage nook that actually works for your life. This guide walks you through a practical, DIY-friendly makeover with step-by-step instructions you can follow even if you’re a beginner.
Step 1: Clear, Measure, and Diagnose the Closet
Before you buy a single bin or bracket, you need to know exactly what you’re working with and what’s not working now.
- Empty the entire closet. Take everything out—clothes, boxes, random junk. Sort items into three piles: keep, donate/sell, and trash/recycle. Be honest about what you actually use.
- Wipe everything down. Dust shelves, vacuum or sweep the floor, and wipe baseboards and walls with a mild cleaner. This gives you a clean slate and helps you spot any damage (like scuffs, nail pops, or loose trim).
- Take measurements. Use a tape measure to record:
- Width (side to side)
- Depth (front to back)
- Height (floor to ceiling)
- Door opening size (especially for bi-fold or sliding doors)
Note awkward spots: sloped ceilings, duct chases, or protruding walls.
- Note existing storage. Write down what’s already there: a single rod, a fixed shelf, wire shelving, nothing at all, etc. Decide what needs to stay or go. For example, a solid shelf in good shape might be worth keeping and working around.
- Identify your storage needs. Look at your keep pile and group by type:
- Long hanging (dresses, coats)
- Short hanging (shirts, pants, jackets)
- Folded items
- Shoes
- Boxes or seasonal items
- Household extras (vacuum, luggage, cleaning supplies)
This tells you what kind of storage you should prioritize.
Tip: Take photos and a quick video of the empty closet and your “keep” pile. This will help you plan layout and shop for supplies without constantly re-measuring.
Step 2: Sketch a Simple Layout and Choose a Storage System
A basic plan saves you from buying the wrong parts or ending up with wasted space.
- Create a simple sketch. On paper (or a notes app), draw the closet from the front and side. Mark:
- Overall width and height
- Door opening
- Any existing shelf or rod that will stay
- Block out zones. Decide how the space will be used:
- Upper zone (above eye level) for infrequently used items (seasonal clothes, spare bedding, keepsake boxes)
- Middle zone (eye to hip level) for daily-use items (shirts, jackets, baskets with small items)
- Lower zone (hip to floor) for shoes, bins, or short hanging space
- Choose your system style.
- Track-based or rail systems (ClosetMaid, Rubbermaid, Elfa-style): Flexible, good for most skill levels, easy to reconfigure.
- Basic rods and shelf brackets: Cheapest option, more measuring and level-checking required.
- Standalone units (cube organizers, drawer towers): Great when you can’t or don’t want to anchor into walls much (e.g., rentals, crumbly plaster).
- Plan for vertical efficiency. Common setups:
- One long hanging section + one double-hanging section (two rods, one above the other) in reach-in closets.
- Shelf space above all rods for bulky items.
- Floor-level cubes or shoe racks along at least one side.
- Make a shopping checklist. Based on your layout, list:
- Rods or rail system components
- Shelving (wood, laminate, or wire)
- Brackets and wall anchors (rated for your wall type)
- Storage bins, baskets, or cubes
- Hooks (for bags, belts, scarves)
- Optional: battery LED lights or motion lights for dark closets
Tip: Avoid over-complicating the layout. A simple double-hang on one side, long hang on the other, and one or two shelves is enough for most reach-in closets.
Step 3: Prep the Walls and Install the Main Structure
A little basic carpentry goes a long way toward a sturdy, long-lasting setup.
- Mark stud locations. Use a stud finder along the back and side walls. Mark their centers lightly with painter’s tape or pencil at multiple heights. Studs are your strongest mounting points.
- Patch old holes (if needed). If you’re removing old hardware:
- Unscrew brackets and rods.
- Fill larger holes with spackle or joint compound.
- Let dry, sand lightly, and spot-paint if you have matching paint. At minimum, smooth any rough spots so new hardware sits flat.
- Install the main support (rail or cleats).
- For track/rail systems, follow the manufacturer’s instructions. Commonly, you:
- Level a horizontal line across the wall 80–84 inches from the floor.
- Drive screws through the rail into studs where possible.
- Use proper wall anchors where no studs are available.
- For simple shelves/rods, you can use:
- Wood cleats (1x2 or 1x3 boards) anchored into studs as continuous support for shelves.
- Shelf brackets spaced every 16–24 inches, anchored into studs or heavy-duty anchors.
- Check level constantly. Use a 24-inch or longer level to make sure rails, cleats, and brackets are perfectly horizontal. A crooked base structure makes everything else harder.
- Install shelves and main rods.
- Cut shelves (if needed) to size with a circular saw or handsaw. Lightly sand cut edges.
- Secure shelves to brackets or cleats with short screws from below to prevent shifting.
- Install closet rods with end supports and occasional center supports for longer spans.
Tip: If you’re working alone, temporarily clamp or prop shelves at the correct height while you mark and mount brackets. Painter’s tape can also hold light pieces in place long enough to mark drilling spots.
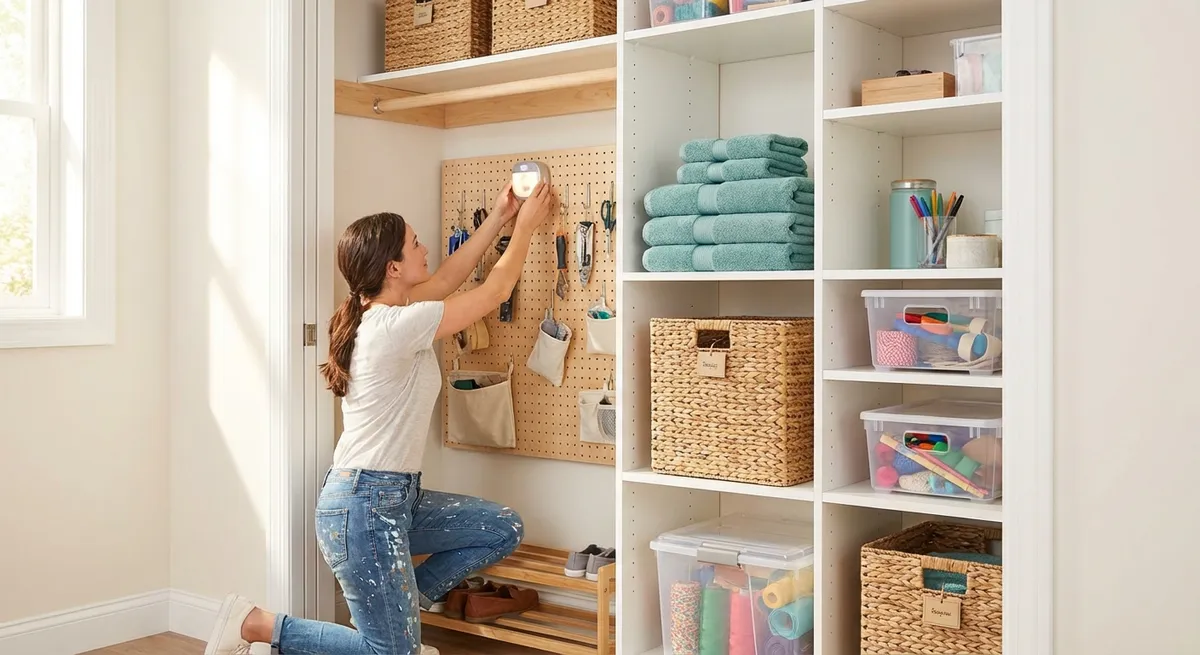
Step 4: Add Smart Organizers for Everyday Use
Once the main structure is up, add the details that make it practical day to day.
- Use consistent, labeled bins. Choose 2–3 bin sizes in the same style so they stack and fit efficiently. Use them on upper shelves for:
- Off-season clothes
- Holiday decor
- Extra toiletries, paper goods, or cleaning supplies
Label clearly on the front so you don’t forget what’s where.
- Install hooks and over-door storage.
- Hooks on the inside side walls are ideal for:
- Bags and backpacks
- Belts, scarves, hats
- Robes or dog leashes
- Use an over-the-door rack for items you grab often (tote bags, accessories, light jackets) if the door design allows.
- Create a shoe zone.
- Use a low shelf, cubby unit, or stacking shoe racks near the floor.
- Store off-season shoes in bins on a higher shelf.
- Keep shoes in a single layer when possible so you can see everything without digging.
- Add a “drop zone” basket. Place a medium basket or bin at arm’s height for “in-between” items:
- Clothing you’ll wear again before washing
- Items you need to remember to mend or dry-clean
- Odd accessories that need a home
Empty or sort this weekly so it doesn’t become a junk pile.
- Improve lighting. Many closets have poor or no lighting.
- Install battery-powered motion-sensor puck lights or LED strip lights.
- Place them near the front edge of shelves, aimed into the closet so you can actually see labels and colors.
Tip: Don’t pack your closet to 100% capacity. Aim for about 80–85% full. That breathing room makes it easier to slide hangers, see what you own, and keep things from quickly becoming chaos again.
Step 5: Refill the Closet with a Simple Maintenance System
Your new layout only works if your daily habits match it. Set up a simple, realistic system.
- Group by category, then color.
- Hang by type first: jackets, shirts, pants, dresses.
- Then loosely group by color within each type (light to dark). This makes it easier to find outfits and spot duplicates you don’t need.
- Use uniform hangers if possible.
- Thin, non-slip hangers save space and help everything hang at the same level.
- Reserve heavy-duty wooden or tubular hangers for coats and very heavy items.
- Assign every item a “home.”
- Shoes go to the shoe zone, not the floor.
- Belts go to a belt hook or bin.
- Seasonal items go in labeled upper bins.
If something doesn’t have a home, decide on one—or reconsider if you really need to keep it.
- Add a donation bag or box.
- Keep a dedicated bag or box on the floor or a low shelf marked “Donate.”
- Whenever you try something on and don’t like it or it doesn’t fit, drop it in right away.
- When it’s full, take it straight to your local donation center.
- Schedule quick resets.
- Weekly: 5–10 minutes to re-hang stray items, return shoes to the rack, and empty the “drop zone” basket.
- Seasonally (every 3–4 months): Swap seasonal items between main rods and upper bins; evaluate what to donate or store elsewhere.
Tip: Take an “after” photo once you’re done. It’s motivating, and it gives you a visual reference for how the closet should look when it’s reset.
Conclusion
Transforming a cluttered closet into a smart storage nook isn’t about buying the fanciest system—it’s about planning around what you actually own and how you really live. By clearing everything out, sketching a simple layout, anchoring sturdy shelves and rods, then layering in the right organizers, you can reclaim a space you use every single day. Stick to the maintenance steps and your upgraded closet will keep working for you long after the weekend project is done.
Sources
- [U.S. Department of Energy – Lighting Choices to Save You Money](https://www.energy.gov/energysaver/lighting-choices-save-you-money) - Guidance on efficient lighting options, useful when selecting LED closet lighting
- [Family Handyman – How to Install Wire Shelving](https://www.familyhandyman.com/project/how-to-install-wire-shelving/) - Practical instructions and visuals for installing common closet shelving systems
- [This Old House – Closet Organizing Ideas](https://www.thisoldhouse.com/storage-organization/21015093/closet-organizing-ideas) - Inspiration and layout concepts for maximizing closet space
- [Lowe’s – How to Install a Closet System](https://www.lowes.com/n/how-to/install-closet-system) - Step-by-step guide to planning and installing a track-based closet organizer
- [Consumer Reports – How to Declutter Your Home](https://www.consumerreports.org/home-organization/how-to-declutter-your-home-a7040352410/) - Strategies for sorting and reducing belongings before organizing spaces
Key Takeaway
The most important thing to remember from this article is that this information can change how you think about DIY Projects.


