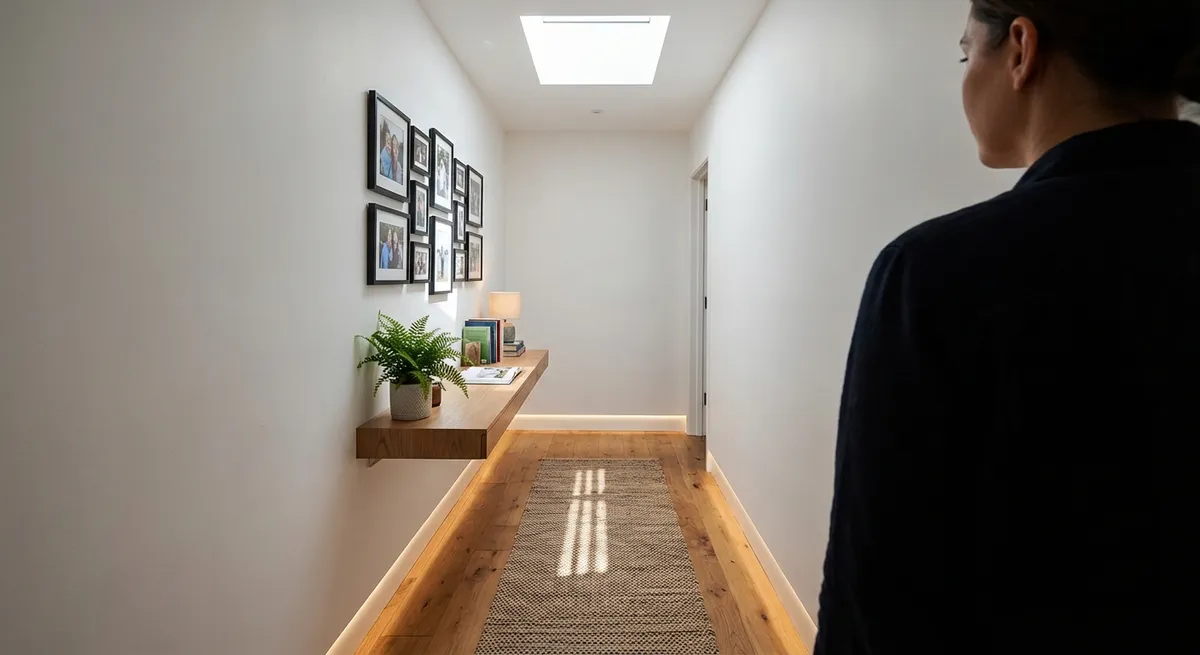
A dark, narrow hallway can make your whole home feel smaller and less inviting. The good news: you don’t need a full remodel to change that. With some smart DIY updates, you can brighten the space, add storage, and make it feel like part of your home instead of just a path between rooms.
This guide walks you through a focused hallway renovation: improving light, upgrading walls and trim, refreshing the floor, and adding practical storage. All five steps are DIY-friendly with basic tools and a modest budget.
Step 1: Evaluate the Space and Make a Simple Plan
Before you buy paint or pull out tools, take 20–30 minutes to really look at the hallway.
Walk the space at different times of day and notice:
- Where the light comes from (windows, nearby rooms, fixtures)
- Dark corners and shadows
- Any damage on walls, trim, or floor
- Existing outlets and switches
- How the hallway is used (just passage, or do people drop keys, shoes, bags?)
Then:
- Measure everything. Length, width, height, and door placements. Sketch a quick floor plan on paper with rough dimensions.
- Identify problem zones. Mark where it’s darkest, where the paint is chipped, or the floor squeaks.
- Set priorities. For most hallways, these are:
- Better lighting
- Fresher walls and trim
- Safer, cleaner flooring
- Smart storage without cluttering the walkway
- Decide your limits. Be honest about what you’ll DIY and what you’ll avoid (for example, you might replace fixtures but not move wiring).
- Make a short shopping list. Include paint, basic electrical supplies if you’re comfortable with them (like new fixtures), wall anchors, and any storage hardware.
A simple plan at this stage prevents impulse buys and projects that stall halfway.
Step 2: Upgrade Lighting for a Brighter, Safer Hallway
Hallways are often under-lit, which makes them feel cramped. Fixing the lighting is one of the highest-impact changes you can make.
- Choose the right brightness and color.
- Aim for 3000K–4000K LED bulbs for hallways (warm to neutral white).
- Use bulbs with at least 800 lumens per fixture for standard 8-foot ceilings.
- Update ceiling fixtures.
- Turn off power at the breaker, not just the switch.
- Remove old dome fixtures that trap light and dust.
- Install low-profile, flush-mount LED fixtures to spread light evenly.
- Add layered lighting if possible.
- If the hallway is very long, consider adding a second ceiling fixture or a row of smaller ones.
- Where wiring is limited, supplement with plug-in wall sconces or LED strip lighting along a shelf or rail.
- Improve control with switches.
- Replace old switches with rocker switches or motion-sensor switches to make lighting easier to use.
- For long hallways, ensure you have a 3-way switch at both ends if wiring already supports it.
- Bounce light off surfaces.
- Choose semi-gloss or satin for trim and doors so light reflects.
- Keep décor on walls light and minimal to avoid creating shadows.
If you’re not fully comfortable working with electrical wiring, limit yourself to bulb and shade changes, or consult a licensed electrician for fixture replacement.
Step 3: Refresh Walls and Trim for a Cleaner Look
Hallway walls and trim take a lot of abuse—scuffs, fingerprints, and dings. A focused refresh can make the whole area feel new.
- Prep the surfaces properly.
- Clean walls and trim with a mild detergent or a degreasing cleaner.
- Fill nail holes and small dings with lightweight spackle; let it dry, then sand smooth.
- For deeper cracks at corners or where trim meets walls, apply paintable caulk.
- Choose hallway-friendly paint.
- Use eggshell or satin finish for walls—easier to wipe clean than flat.
- Use semi-gloss for trim and doors for better durability.
- Lighter colors (soft whites, light grays, pale beiges) help enlarge the space visually.
- Paint in the right order.
- Paint ceilings first (if needed), then trim, then walls.
- Mask off trim with painter’s tape if you’re not confident cutting in.
- Use a short-nap roller (3/8") on smooth walls for a clean finish.
- Consider simple visual upgrades.
- Add a contrasting color on doors to define the space (for example, soft white walls with warm gray doors).
- If the hallway is very long, one slightly deeper color on the far wall can visually “shorten” it and make it feel less tunnel-like.
- Protect high-contact areas.
- Add a narrow chair rail or simple wood strip if bags and shoulders constantly scuff the walls.
- In homes with kids or pets, look at washable paints marketed for high-traffic areas.
Good prep is what separates a quick paint job from a durable, professional-looking finish. Don’t rush the cleaning, patching, and sanding.
Step 4: Improve the Flooring for Comfort and Durability
Hallway floors see constant traffic. Even small changes can improve safety, reduce noise, and pull the space together visually.
- Assess what you already have.
- For wood or laminate, look for scratches, gaps, or squeaks.
- For tile, check for loose tiles or cracked grout.
- For carpet, note stains, wear paths, and loose edges.
- Tighten and repair before you cover.
- On wood subfloors, drive deck screws into squeaky areas through the subfloor into joists (from above if you’re refinishing, or below if you have basement access).
- Re-glue loose tiles and re-grout cracked lines.
- Choose a hallway-suitable surface.
- Luxury vinyl plank (LVP) or tile: durable, water-resistant, and often DIY click-lock installation.
- Engineered wood: good for a warmer look with better stability than solid wood in variable climates.
- Runners and rugs: if you keep existing flooring, add a non-slip runner to soften noise and protect the surface.
- DIY install basics for click-lock flooring.
- Acclimate the flooring in the hallway for 24–48 hours.
- Start along the longest wall; stagger seams by at least 6 inches.
- Leave expansion gaps at walls (usually 1/4") using spacers; cover with baseboards or quarter-round.
- Make it safe.
- Use non-slip rug pads or runners with built-in grip.
- Ensure transitions between rooms (thresholds) are smooth and secured with proper trim pieces.
- Avoid thick rugs that create tripping hazards in narrow spaces.
Upgrading the floor is more work than paint, but it dramatically changes how the hallway feels underfoot and how sound travels through your home.
Step 5: Add Slim, Practical Storage Without Crowding the Space
Hallways can do more than connect rooms—they can quietly handle storage if you plan carefully. The key is to keep everything shallow and vertical so you don’t choke the walkway.
- Set a depth limit.
- For most hallways, keep any storage under 6–8 inches deep so you don’t create a bottleneck.
- Measure the narrowest part of the hallway; you should maintain at least 36 inches of clear walking space where possible.
- Use the vertical space.
- Install shallow wall shelves high up (above eye level) for baskets or rarely-used items.
- Add hooks or a short hook rail closer to the entry side of the hall for bags, scarves, and hats.
- Build into existing recesses.
- If your hallway has a niche or an old, shallow closet, use it:
- Add adjustable shelves and baskets.
- Install slim drawer units for mail, tools, or cleaning supplies.
- Choose multi-purpose pieces.
- A narrow wall bench with shoe storage (if hallway is near an entry).
- A shallow cabinet with a solid top to act as a display ledge and concealed storage.
- Keep it visually light.
- Use light colors for storage pieces so they blend into the walls.
- Limit open shelving to a few items; overloading them makes the hallway feel cramped.
- Use closed baskets or boxes to hide visual clutter.
After adding storage, walk the hallway a few times with arms full (like carrying laundry or boxes) to make sure nothing snags you or feels too tight.
Conclusion
Transforming a dark, forgettable hallway into a bright, useful part of your home doesn’t require a full renovation. By planning the space, upgrading lighting, refreshing walls and trim, improving the floor, and adding slim storage, you can tackle the project in manageable steps over a few weekends.
Focus on one step at a time, work safely, and keep the walkway clear and comfortable. The result is a hallway that looks better, works harder, and makes your whole home feel more connected and welcoming.
Sources
- [U.S. Department of Energy – Lighting Choices to Save You Money](https://www.energy.gov/energysaver/lighting-choices-save-you-money) - Guidance on efficient lighting types, brightness, and color temperature
- [Energy Star – Light Bulb Purchasing Guide](https://www.energystar.gov/products/lighting_fans/light_bulbs) - Explains lumens, color temperature, and choosing bulbs for different spaces
- [Sherwin-Williams – Paint Sheen and Finish Guide](https://www.sherwin-williams.com/en-us/paint-and-supplies/how-to-paint/paint-sheen-guide) - Details where to use different paint sheens (walls, trim, high-traffic areas)
- [National Association of Home Builders – Residential Hallway Width Recommendations](https://www.nahb.org/advocacy/industry-issues/building-codes) - Discusses building code considerations including minimum passage widths
- [The Family Handyman – How to Install Laminate or Vinyl Plank Flooring](https://www.familyhandyman.com/project/how-to-install-laminate-flooring/) - Step-by-step instructions and tips for DIY click-lock flooring installation
Key Takeaway
The most important thing to remember from this article is that this information can change how you think about Renovation.


