Misty, moody nature photos are everywhere in feeds right now—especially those foggy forest roads and paths from the Netherlands that are trending on photography sites. Those images aren’t just great to scroll past; they’re perfect inspiration for a calm, modern feature wall at home. Instead of just liking the post and moving on, you can bring that same atmosphere into your living room or hallway with a simple DIY photo panel project.
Using any high‑resolution forest photo (like the foggy Dutch forest roads that have been making the rounds this week), you can turn digital scenery into physical wall art that actually looks intentional—clean lines, no cheap-looking frames, and a finish that feels closer to gallery work than a taped-up print.
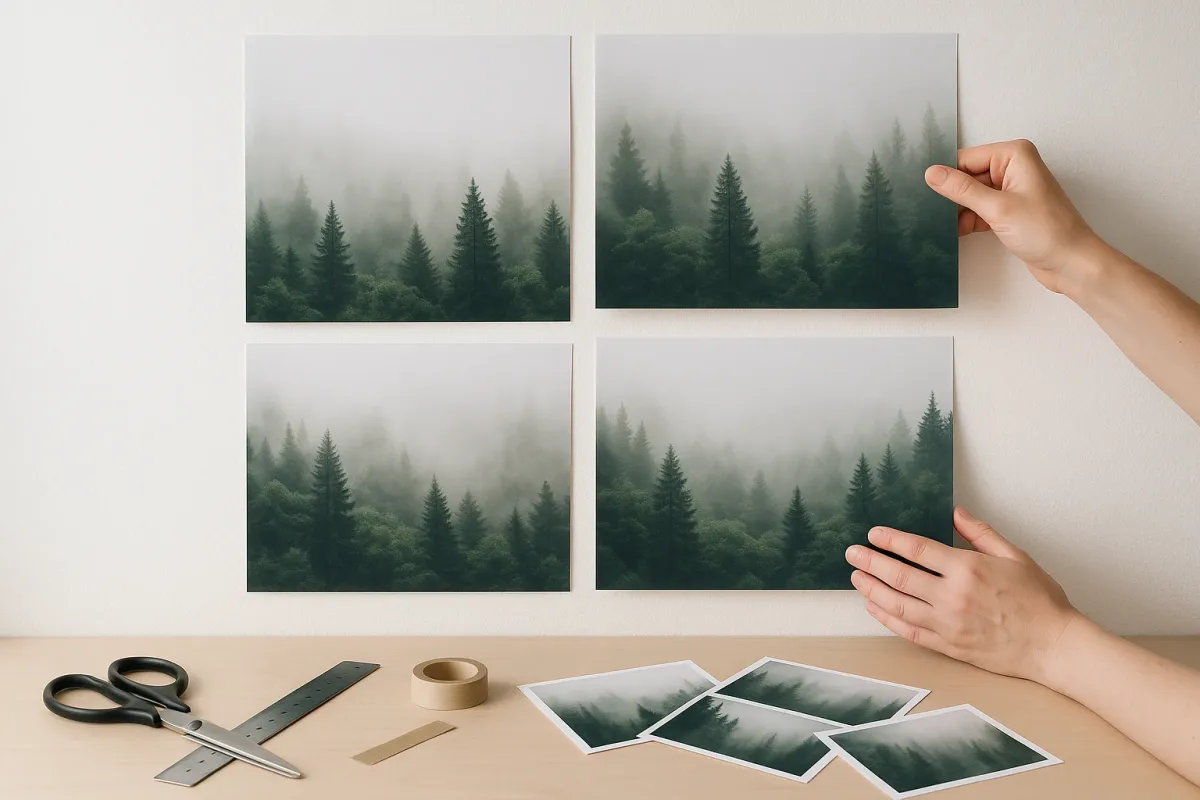
Below is a step‑by‑step guide to building your own foggy-forest-inspired wall panels using real printed photos, basic tools, and budget‑friendly materials you can get today.
1. Choose and Prepare Your Forest Photo
Start with image selection, because everything else depends on the quality of that one file. Look for a high‑resolution photo—ideally at least 3000 pixels on the shortest side. Those soft Dutch forest roads and misty tree tunnels that are trending work well because they’re naturally low-contrast and forgiving; small printing flaws are less noticeable in foggy scenes. You can use your own photo or purchase a licensed image from a reputable stock site so you’re not dealing with copyright issues.
Once you have the image, decide how you want it to fill your wall. One bold option is a single large panel (for example, 24" x 36"). Another is a grid of smaller panels that together form the full scene—think 3 or 4 panels in a row to mimic the depth of a forest path. Use a free tool like Canva, GIMP, or even built‑in photo apps to crop it to the correct aspect ratio. Before ordering prints, view the file at 100% zoom on your screen to make sure it’s sharp enough. If your printer or online print service offers “soft proofing” or paper previews, choose a matte or satin finish—these work best with foggy scenes and reduce glare on your wall.
2. Build Lightweight, Straight Backing Panels
Now you need something solid and flat to mount your image on. Pre‑made canvases are an option, but for a clean, modern look that matches those minimalist nature interiors you see online, use rigid panels. 1/4" plywood, MDF, or hardboard are all good choices and are easy to cut at a home center if you don’t have tools at home. For most living room walls, 16" x 24" or 18" x 24" panels are a nice balance between impact and ease of handling.
Cut your panels to size or have them cut for you, then sand all edges lightly with 120–220 grit sandpaper to remove splinters. If you want a frame‑less, “floating print” look, keep the edges square and clean. Wipe off sanding dust and seal the face and sides with a quick‑drying primer or a mix of wood glue and water (about 1:1) brushed on in a thin coat. This helps prevent warping and keeps adhesive from soaking unevenly into the wood when you attach the print. Let the panels dry flat, with weights on top if your material tends to bow.
3. Mount Your Forest Print Without Bubbles
To get a professional-looking result, the print needs to go on smooth and flat. Lay your dried panel on a clean, dust‑free surface. If you’re using standard poster paper, a spray adhesive (like 3M Photo Mount or similar) gives you even coverage. If you chose a heavier art print or a peel‑and‑stick photo, follow the manufacturer’s instructions instead. Start by doing a “dry fit”: place the print on the panel to check margins and alignment before any glue is involved.
When you’re ready, spray adhesive on the panel in a steady, overlapping pattern—don’t rush, but don’t linger in one spot. Let it go tacky per the can’s instructions (usually 30–60 seconds). Align one edge of the photo carefully, then slowly roll it down onto the panel, smoothing as you go with a clean, soft cloth or a plastic card wrapped in a microfiber cloth. Push air out from the center toward the edges to avoid bubbles. If a small bubble appears and doesn’t go away after a few minutes, you can prick it with a fine pin and smooth the air out gently. Weigh the panel flat with books or boards while it cures to keep it from bowing as the adhesive dries.
4. Seal, Protect, and Add Depth to the Image
Foggy forest images rely on subtle tones and soft transitions, so you don’t want a thick, glossy, plastic-looking coating. Instead, aim for a light protective layer that preserves the matte or satin feel. Once the adhesive is fully dry, use a spray clear coat designed for artwork—look for “matte” or “satin” in the finish. Test it first on a scrap print if possible so you know how it affects color and sheen.
Apply multiple very light coats rather than one heavy coat. Hold the can 10–12 inches away and move continuously across the surface, overlapping each pass slightly. Let each coat dry before adding the next. This helps protect the image from fingerprints and moisture, and gives it a more permanent, finished feel. If you want to add a bit of depth, you can lightly sand the final coat with ultra‑fine sandpaper (400–600 grit) and then apply one last mist coat—this evens out the surface and reduces any accidental streaks. Let the completed panel cure for at least 24 hours before hanging.
5. Hang Your Panels for Maximum “Forest Path” Impact
The way you hang the art is what makes it feel intentional, not like a random poster. For a single large panel, center it over a piece of furniture (like a sofa or console table) with the bottom edge roughly 6–10 inches above the furniture top. For a multi‑panel setup that recreates a long forest road, space panels evenly—typically 1.5–3 inches apart, depending on size. Use painter’s tape to mock up positions on the wall before committing to hardware.
For hanging hardware, keyhole hangers or French cleats work well for heavier panels and keep them flush to the wall. For lightweight panels (under a few pounds), sawtooth hangers plus wall anchors are usually enough. Use a level to align everything, especially with multi‑panel layouts where misalignment is obvious. Step back and check the effect in both natural daylight and at night with your regular lighting; foggy forest images can change mood dramatically under warm vs. cool bulbs. If you want to lean into the calm, spa‑like vibe that’s popular in current interior trends, pair the panels with soft, indirect lighting (like a floor lamp that washes the wall) and keep nearby décor simple so the forest scene has room to breathe.
Conclusion
Those foggy Dutch forest road photos trending online right now aren’t just inspiration—they’re ready-made art for your walls if you’re willing to turn them into something physical. With a single weekend, basic tools, and a bit of patience, you can transform a digital landscape into a clean, modern wall feature that looks far more expensive than it is.
This kind of DIY project sits right at the intersection of what’s happening online today and what you can build at home this week: taking real, current visual trends and turning them into practical, durable, everyday design. If you try this with another nature photo—like seasonal forest shots or your own local trails—you’ll already have the process dialed in for your next upgrade.
Key Takeaway
The most important thing to remember from this article is that this information can change how you think about DIY Projects.


