Scrolling through that viral “Real Estate Listings From Hell” gallery, it’s easy to laugh at carpeted bathrooms, cursed staircases, and kitchens that look like escape rooms. But behind every nightmare listing is a real house that someone either has to live in or fix up. If you’ve just moved into a weirdly designed place—or you’re eyeing a fixer‑upper—you’re not stuck with what the listing gave you.
Inspired by those infamously bad listings people are sharing right now, this guide walks through practical DIY ways to correct the most common “what were they thinking?” design choices. No gut renovation required.
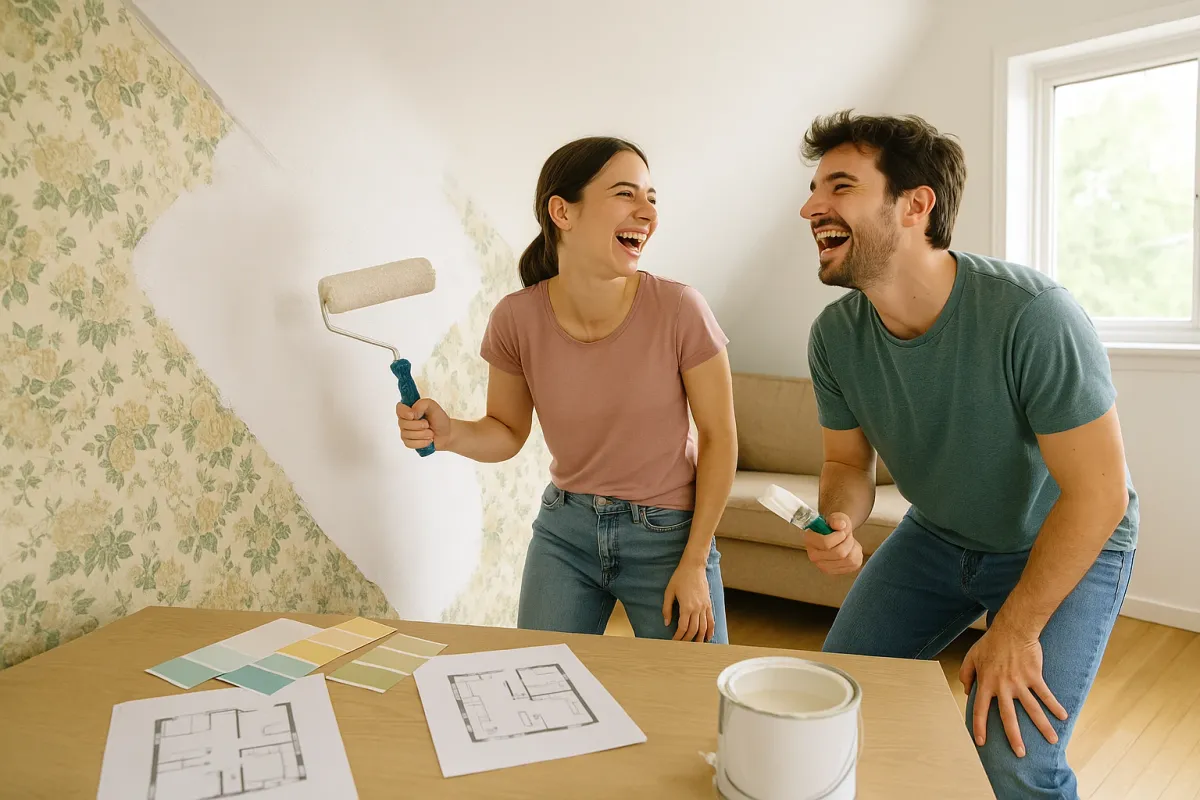
Below are five step‑by‑step projects you can realistically tackle on weekends, with clear instructions and budget‑friendly tips.
1. Fix the “Frankenstein Room” With a Simple Visual Reset
Nightmare listing version: four different wall colors, random accent wall, mismatched trim, and a ceiling that somehow makes the room feel smaller.
You can’t move walls easily, but you can completely change how a room feels with paint and layout.
Step 1: Strip the visual noise
- Remove everything you can: curtains, random shelves, outlet covers, art, wall hooks.
- Patch holes with spackle, let dry, sand smooth (220‑grit works well).
- Wipe walls down with a damp cloth or mild cleaner to remove dust and grease.
Step 2: Choose one calm base color
- Go for a light neutral: soft white, warm greige, or pale beige (look at current trends from brands like Benjamin Moore “White Dove,” Sherwin‑Williams “Agreeable Gray,” etc.).
- Avoid bold colors on big walls if the room is oddly shaped—you’re trying to unify, not highlight the weirdness.
- Pick a semi‑gloss or satin for trim, eggshell or matte for walls.
Step 3: Paint in the right order
- Cut in along ceilings, corners, and trim with a brush.
- Roll the walls in sections, keeping a wet edge to avoid lap marks.
- Paint trim last; it’s easier to clean trim drips off the new wall paint than the other way around.
Step 4: Use rugs and furniture to “square up” odd layouts
- In long or L‑shaped rooms, define a main rectangle with a rug and a seating area inside it.
- Keep big pieces (sofa, bed) as straight and aligned as possible; avoid angled furniture unless you’re hiding something fixed, like an off‑center window.
- Use a console or low shelf to visually separate weird nooks rather than leaving them as awkward empty spaces.
Step 5: Repeat materials to create calm
- Repeat 2–3 materials across the room: for example, black metal (lamps, curtain rods, frames) and light wood (coffee table, side table, frame).
- Keep patterns minimal; let texture (linen, jute, wood grain) do the work.
- Aim for “cohesive and simple”—this alone can make a once‑chaotic room feel intentional and move‑in ready.
2. Turn a “Kitchen From Hell” Into a Functional Workspace
Those viral listing photos of kitchens with no counter runs, random cabinets blocking windows, or appliances in bizarre places are entertaining—until you’re standing in one. Full kitchen remodels are expensive, but usability can jump with smart, targeted DIY changes.
Step 1: Map how you actually move
- Stand in your kitchen and note where you:
- Prep food
- Cook
- Clean
- Store dishes and food
- Identify what drives you most crazy: nowhere to chop, no landing zone near the stove, nowhere to set groceries, etc.
Step 2: Create a “prep zone” even if counters are limited
- Add a rolling kitchen cart or butcher block island where you naturally prep.
- Look for carts with:
- Locking casters
- At least one drawer or shelf
- A solid top you can cut on (or add a cutting board)
- Place it between fridge and stove if possible—this mimics the classic “work triangle” designers talk about.
Step 3: Boost counter space with over‑the‑sink and fold‑down solutions
- Install an over‑the‑sink cutting board or roll‑up drying rack that doubles as prep space.
- Mount a wall‑folding shelf or drop‑leaf table in tight galley kitchens to give yourself temporary extra workspace.
- Keep these additions at standard counter height (about 36" / 91 cm) so they feel natural to use.
Step 4: Make storage smarter, not bigger
- Add inexpensive pull‑out baskets inside lower cabinets to make deep spaces usable.
- Use vertical organizers for baking sheets and cutting boards instead of stacking them flat.
- Mount a magnetic strip for knives and commonly used metal tools (whisk, tongs) to free up drawer real estate.
Step 5: Use peel‑and‑stick as a “test drive” for bigger changes
- Current trend: peel‑and‑stick tiles and countertops are all over social media because they let renters and budget renovators fake a facelift.
- Use:
- Peel‑and‑stick backsplash to cover wild or stained existing tile.
- Counter film to temporarily hide damaged laminate.
- Clean thoroughly, measure twice, and use a sharp utility knife and squeegee to avoid bubbling and crooked lines.
3. Make a “Staircase From a Horror Movie” Safer and Less Ugly
Viral bad listings love showing steep, narrow, rail‑less stairs or ones carpeted in something unspeakable. Full rebuilds should be left to pros, but you can DIY safer, more solid, and more attractive stairs within limits.
Step 1: Start with safety basics
- Check local code (usually online) for:
- Required handrail height
- Spacing for balusters (often less than 4" apart)
- If you have no handrail at all, plan to add at least a simple wall‑mounted rail—this is a high‑impact, relatively simple DIY.
Step 2: Remove old carpet carefully
- Wear a mask and gloves (old stair carpets are often dusty or worse).
- Use pliers to pull the corner of each tread’s carpet, then cut it into sections with a utility knife.
- Pry up tack strips gently using a pry bar; pull staples with pliers.
Step 3: Assess and repair the treads
- Check each tread for flexing; screw squeaky or bouncy treads directly into the stringers with wood screws.
- Fill noticeable holes and gaps with wood filler; sand flush when dry.
- If the wood is in bad cosmetic shape but structurally sound, paint can hide a lot.
Step 4: Refinish or paint for a clean look
- For exposed wood:
- Sand with 80‑grit, then 120‑grit, then 180‑grit.
- Apply stain (if desired), then 2–3 coats of clear, non‑slip poly.
- For paint:
- Prime with a bonding primer.
- Use durable floor or porch paint.
- Consider darker treads and lighter risers to hide scuffs and brighten the stairwell.
Step 5: Install a simple, solid handrail
- Buy a pre‑finished rail and brackets from a big‑box store.
- Find studs using a stud finder; mark them on the wall.
- Mount rail brackets into studs, then attach the rail.
- Ensure it’s continuous from roughly the first step to the last for real safety, not just looks.
4. Rescue a “Bathroom Disaster” Without a Full Remodel
We’ve all seen listing photos with carpeted bathrooms, mismatched tiles, and vanities jammed halfway across the doorway. You don’t have to live with that forever, even if you’re not ready to call a contractor.
Step 1: Deal with the floor first
- If it’s carpet:
- Pull it up like you would in any room, but be prepared for old adhesive and possible subfloor damage.
- Scrape off glue with a floor scraper and adhesive remover, then clean thoroughly.
- Install DIY‑friendly flooring:
- Click‑lock vinyl plank (water‑resistant, floating installation).
- Peel‑and‑stick vinyl tiles (budget‑friendly; the subfloor must be smooth).
Step 2: Refresh the vanity instead of replacing it (if it’s solid)
- Remove doors and drawers; label hinges so they go back correctly.
- Degrease thoroughly, then sand lightly.
- Prime with a bonding primer, then paint with durable cabinet paint.
- Swap hardware for simple, modern pulls or knobs—this alone can drag a 1990s orange‑oak vanity into this decade.
Step 3: Re‑caulk and re‑grout for instant “clean”
- Use a caulk remover tool to strip moldy or cracked caulk around tub, shower, and sink.
- Clean with a mildew remover and let fully dry.
- Run a smooth bead of bathroom‑rated silicone caulk; smooth with a damp finger or caulk tool.
- For dingy grout, use a grout pen or re‑grout small sections instead of re‑tiling everything.
Step 4: Address the lighting and mirror
- Swap any harsh or dated fixture for a simple, modern LED vanity light.
- Make sure the new fixture’s base covers the old electrical box opening.
- If the mirror is glued to the wall and huge, frame it:
- Use lightweight trim or pre‑made mirror framing kits.
- Cut to size, paint or stain, and attach with strong construction adhesive rated for mirrors.
Step 5: Add smart storage that doesn’t eat floor space
- Use over‑the‑toilet shelving units or floating shelves instead of bulky cabinets.
- Install a simple shower caddy that mounts to the wall instead of piling bottles on the tub ledge.
- Use hooks instead of towel bars in tiny spaces—they hold more and are easier to place.
5. Hide “Listing From Hell” Eyesores With Simple DIY Tricks
Many viral listings go viral because of one awful focal point: exposed pipes, weird soffits, random support posts in the middle of rooms, or ugly utility panels. You can’t always move them, but you can disguise them.
Step 1: Identify what’s structural vs. optional
- Do not cut, move, or drill heavily into:
- Support posts or beams
- Large electrical panels
- Gas lines
- If in doubt, assume it’s critical and focus on non‑invasive covers.
Step 2: Build a simple box around exposed pipes or columns
- Measure the height and circumference of the pipe or post.
- Use 1x lumber or plywood to build a three‑ or four‑sided box that slips around it.
- Attach box sides to each other, not directly to the pipe.
- Paint to match the wall (to make it disappear) or stain as a faux “beam” or column.
Step 3: Turn an electrical panel into “intentional art”
- Mount a shallow, hinged frame or cabinet over the panel:
- Use French cleats, so the whole thing lifts off easily for access.
- Fill the frame with a corkboard, art print, or slim shelves for keys and mail.
- Ensure clearance so the panel door can still open fully when needed.
Step 4: Disguise soffits and bulkheads with function
- Turn a low soffit into a “ceiling line” by:
- Running a curtain rod just in front of it and hanging floor‑length curtains (great near windows).
- Adding shallow shelves underneath it along a wall for books or decor.
- Paint soffits the same color as the ceiling, not the walls, to help them recede.
Step 5: Use lighting to control where people look
- Place brighter, warmer light near what you do like (art, plants, a reading corner).
- Keep light softer near awkward elements.
- Simple plug‑in wall lights, LED strips on shelves, or a floor lamp can pull the eye away from a weird corner quickly and cheaply.
Conclusion
The internet loves to roast “real estate listings from hell,” but those homes are also a reminder: layout mistakes, odd design choices, and dated finishes are fixable more often than they look. With some paint, smart storage, careful safety upgrades, and a few strategic disguises, you can turn a nightmare photo into a livable, even impressive, space.
If you’re staring at your own “what were they thinking?” corner right now, start with one project from this list. Pick the one that bothers you daily, tackle it over a weekend, and you’ll see how quickly a bad listing can become a solid home on your terms.
Key Takeaway
The most important thing to remember from this article is that this information can change how you think about DIY Projects.


