A tired bathroom can drag down your whole home, but a complete remodel can be expensive, messy, and time‑consuming. The good news: you can dramatically upgrade the look and function of a dated bathroom without tearing everything down to the studs. With smart planning and a handful of focused projects, you can get a “new bathroom” feel on a DIY‑friendly budget.
This guide walks you through five practical, step‑by‑step upgrades you can tackle yourself. Each one works on its own, but together they add up to a bathroom that feels cleaner, brighter, and more modern.
Step 1: Refresh the Walls for an Instant Visual Reset
Old paint, scuffed walls, or outdated colors make any bathroom feel more worn than it actually is. A wall refresh is one of the fastest ways to change the entire mood of the space.
Assess and prep the walls
Walk around the bathroom with good light. Mark peeling paint, nail holes, hairline cracks, or spots with moisture damage. Scrape any loose paint with a putty knife and lightly sand rough edges so the wall feels smooth to the touch.
Deal with moisture issues before painting
If you see bubbling paint, mildew stains, or persistent damp spots, investigate the source. Check for leaks around the tub, shower, and toilet, and make sure your exhaust fan works and vents outside. Fix moisture problems first or your new paint job won’t last.
Clean thoroughly for proper adhesion
Mix a mild degreaser or TSP substitute with water and wipe down all walls and trim, especially near the vanity and shower. Soap scum, hairspray, and residue can keep paint from sticking. Let everything dry completely.
Patch, sand, and prime where needed
Use joint compound or spackle to fill holes and shallow dents. Once dry, sand smooth and wipe away dust. Spot‑prime repaired areas with a quality primer, or prime full walls if you’re painting over a very dark or glossy color.
Choose the right paint and apply carefully
For bathrooms, look for paint labeled “bath” or “mold/mildew resistant” in a satin or semi‑gloss finish—it cleans easily and handles humidity better than flat paint. Cut in around edges with a brush, then roll the main areas in two thin coats, allowing full dry time between coats. Aim for light, neutral colors if the room is small or lacks natural light.
Step 2: Update Fixtures and Hardware for a Modern Look
You can leave the big pieces (tub, toilet, vanity) in place and still get a major style upgrade by swapping the “jewelry” of the room: faucets, showerheads, cabinet pulls, and towel bars.
Inventory existing fixtures and finishes
List what you have: sink faucet, showerhead, tub spout, handles, cabinet pulls, towel bars, toilet paper holder, robe hooks, and light switch covers. Note the existing metal finish (chrome, brushed nickel, brass, black, etc.) and decide whether you’ll match it or intentionally change it.
Choose a cohesive finish and style
Pick one main metal finish for all the new pieces to keep the space looking intentional. Modern bathrooms often use brushed nickel, matte black, or brushed brass. Stick with simple, clean lines if you want a timeless look that won’t feel dated in a few years.
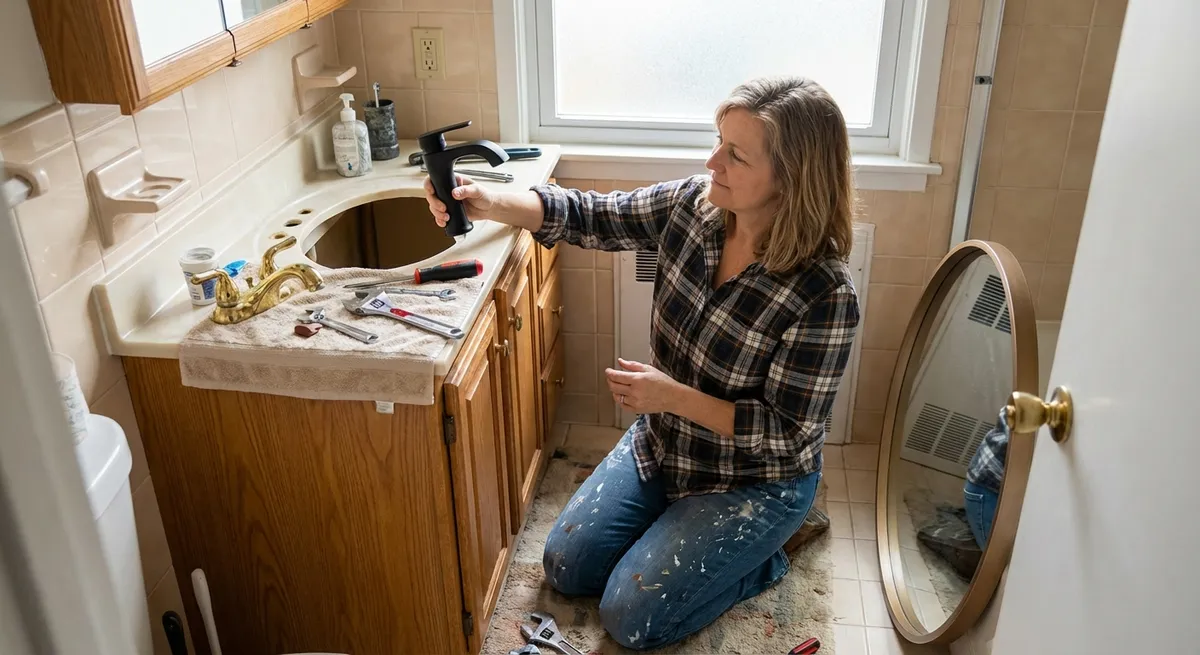
Replace the faucet and showerhead
Turn off water at the shutoff valves under the sink (or at the main if needed). Follow the manufacturer’s instructions to remove the old faucet and install the new one, using plumber’s putty or silicone and Teflon tape where recommended. For the showerhead, simply unscrew the old one with an adjustable wrench, wrap the arm threads with Teflon tape, and screw on the new head snugly.
Swap out cabinet hardware and accessories
For cabinet pulls, measure the distance between screw holes and buy replacements with the same spacing to avoid drilling new holes. Use a screwdriver to remove old pulls and install new ones. Replace towel bars, toilet paper holder, and robe hooks with sturdier, better‑looking pieces, making sure you anchor them into studs or use appropriate wall anchors.
Tidy up details for a finished appearance
Replace yellowed switch plates and outlet covers with fresh, matching ones. Touch up any chipped paint around where you removed old hardware. Group your metal finishes intentionally—if you mix finishes (for example, black hardware with a chrome faucet), repeat each finish at least twice so it looks like a design choice, not a mistake.
Step 3: Improve Lighting and Ventilation for Comfort and Safety
Bad lighting and poor ventilation make even a clean bathroom feel grimy and uncomfortable. Improving these two systems can make daily routines easier and extend the life of your finishes.
Evaluate your current lighting and fan setup
Note the type and location of fixtures: one over‑mirror light? A ceiling fixture? Recessed lights? Also, time how long it takes for steam to clear after a hot shower. If mirrors stay foggy and paint peels, your fan is underpowered or not used enough.
Replace or add a vanity light for better task lighting
Turn off power at the breaker panel before working on any electrical. Remove the existing light fixture, check that the electrical box is secure, and install a new vanity light that’s appropriately sized for your mirror width (usually about ¾ the width of the mirror). Position fixtures so light hits your face evenly—either two sconces at eye level on each side of the mirror or a wide bar light above.
Upgrade to efficient, bathroom‑friendly bulbs
Use LED bulbs labeled for damp or wet locations. Aim for a color temperature between 2700K–3000K for a warm, flattering look or 3500K–4000K for a crisp, daylight feel. Choose a brightness that gives you clear visibility for shaving, makeup, and grooming—often around 800–1100 lumens per fixture, depending on your setup.
Assess and upgrade the exhaust fan if necessary
Check your fan’s CFM rating (cubic feet per minute). A typical small bathroom needs at least 50 CFM; larger bathrooms require more. If your fan is noisy, weak, or very old, consider replacing it with a quieter, higher‑capacity model. Always follow local electrical codes and manufacturer instructions, and if duct work or wiring seems beyond your comfort level, bring in a licensed electrician.
Use the fan correctly and maintain it
Run the exhaust fan during showers and for at least 15–20 minutes afterward to clear moisture. Clean the fan cover regularly—turn off power, remove the cover, and vacuum dust from the grill and motor area. This simple habit makes a big difference in preventing mold and preserving your new paint and finishes.
Step 4: Give Existing Surfaces a Deep Clean and Cosmetic Upgrade
Before you decide a tub or tile has to go, see how far cleaning and cosmetic touch‑ups can take you. You can often reclaim a surprising amount of “newness” this way.
Start with a serious deep clean
Use a dedicated bathroom cleaner or a mix of vinegar and water (not on natural stone) for tile, grout, and glass. Scrub grout lines with a stiff brush. For tough soap scum or hard water stains on glass and fixtures, use products designed for that purpose and follow instructions carefully. Rinse thoroughly and dry surfaces with a microfiber cloth.
Refresh or recolor grout
If grout is stained but intact, use a grout cleaner or mild bleach solution (with good ventilation and gloves) and rinse well. Once dry, apply a grout colorant or sealer that matches your tile; this can make old tile look nearly new. If grout is crumbling or missing in spots, chip out the loose areas carefully and regrout, then seal after it cures.
Repair chipped caulk and seal joints properly
Cut and scrape away old, moldy, or cracked caulk around the tub, shower, and sink using a caulk removal tool. Clean and dry the joint completely. Apply a smooth bead of 100% silicone caulk labeled for kitchen and bath, then tool it with a caulk‑smoothing tool or a damp finger for a clean finish. Let it cure per the product directions before exposing it to water.
Consider refinishing instead of replacing
If your tub or shower is structurally sound but cosmetically rough, look into refinishing kits specifically designed for tubs and tile. Follow ventilation and safety instructions closely—these products can be strong. For best results and longevity, a professional refinisher is often worth the cost, but a careful DIY job can still extend the life of an old surface.
Protect your work with ongoing maintenance
Once everything is clean and repaired, keep it that way with simple routines: squeegee shower walls and glass after use, leave the curtain or door open to dry, and wipe down counters regularly. These habits protect your upgrades and delay the need for major renovations.
Step 5: Re‑Think Storage and Layout Without Moving Walls
You don’t have to rearrange plumbing or knock down walls to get a more functional bathroom. Clever storage and layout tweaks can make a small or awkward bathroom feel much more usable.
Audit what actually lives in the bathroom
Take everything out of drawers, cabinets, and shelves. Sort into daily use, weekly use, rarely used, and “why is this in here?” Toss expired products and relocate items that don’t belong in the bathroom (extra cleaning supplies, random tools, etc.).
Maximize vertical space and underused zones
Look for blank wall areas above the toilet, next to the vanity, or behind the door. Install simple shelves, a narrow cabinet, or over‑the‑toilet storage to keep essentials within reach. Behind‑door hooks or racks can hold towels or robes without taking up floor space.
Organize inside the vanity and drawers
Use drawer organizers, small bins, and stacking trays to separate items by category—daily skincare, dental care, hair tools, backup supplies. Place the things you reach for every day in the easiest‑to‑access spots and group backup products in labeled bins.
Consider small‑scale furniture or fixture changes
If your bathroom feels cramped, consider swapping a bulky vanity for a slimmer model or a pedestal/small console sink with smart storage underneath. Replacing an outswing bathroom door with a pocket door or a door that swings out into the hallway can also free up valuable floor space, though that may require pro help.
Set up zones for smoother daily routines
Think of your bathroom in mini‑stations: a grooming zone at the sink, a shower zone, and a storage/linen zone. Store what you need at each station as close as possible to where you use it. This simple re‑organization can make the room feel more “designed” and less cluttered, even if you haven’t moved a single wall.
Conclusion
You don’t need a demolition crew or a five‑figure budget to transform a tired bathroom. By focusing on what you can refresh—walls, fixtures, lighting, surfaces, and storage—you can dramatically improve how the room looks and works in just a few weekends.
Work through these five steps at your own pace, starting with the changes that will make the biggest difference for you. The more intentional you are with each upgrade, the more your “old” bathroom will start to feel like a fresh, functional space you actually enjoy using.
Sources
- [U.S. Department of Energy: Bathroom Ventilation Fans](https://www.energy.gov/energysaver/bathroom-ventilation-fans) - Guidance on sizing and using exhaust fans to control moisture
- [Mayo Clinic: Mold and Mildew in the Home](https://www.mayoclinic.org/diseases-conditions/asthma-attack/in-depth/mold-and-mildew/art-20047401) - Explains health impacts of moisture and mold, and why ventilation and cleaning matter
- [Sherwin-Williams: Paint Finishes for Bathrooms](https://www.sherwin-williams.com/en-us/homeowners/color/paint-finishes) - Details on finish types and where to use them, including high‑humidity areas
- [Family Handyman: How to Replace a Bathroom Faucet](https://www.familyhandyman.com/project/how-to-install-a-bathroom-faucet/) - Step‑by‑step walkthrough of DIY faucet replacement
- [This Old House: How to Regrout Tile](https://www.thisoldhouse.com/tile/21017963/how-to-regrout-tile) - Practical instructions for refreshing old grout and improving tile appearance
Key Takeaway
The most important thing to remember from this article is that this information can change how you think about Renovation.


