Renovating a small kitchen doesn’t have to mean tearing everything down to the studs or spending thousands on custom cabinets. With a focused plan, a few tools, and some patience, you can dramatically improve how your kitchen looks and functions in a series of manageable DIY steps. This guide walks you through a practical, budget‑friendly upgrade path that keeps your layout but transforms your day‑to‑day experience in the space.
Start With a Functional Plan (Before You Buy Anything)
Before you touch a tool, get clear on how you actually use your kitchen. Good planning prevents wasted money and half-finished projects.
Ask yourself:
- Where do you prep most often?
- What always ends up on the counter because it has no “home”?
- Which cabinet or drawer annoys you every single day?
Stand in the kitchen and walk through a typical meal: grabbing ingredients, prepping, cooking, plating, and cleaning. Note what slows you down—poor lighting, cramped counter space, no trash access, or awkward storage. Take quick measurements of your walls, countertop lengths, cabinet widths, and appliance openings. Snap reference photos on your phone. This planning session will drive all your decisions, from storage add-ons to lighting changes, and keep you from buying items that don’t fit or solve real problems.
Step 1: Refresh Cabinets With Paint and New Hardware
Replacing cabinets is expensive; painting them and swapping hardware delivers a huge visual upgrade for a fraction of the cost.
What you’ll need: Screwdriver, drill, sandpaper (120–220 grit), degreaser or TSP substitute, painter’s tape, primer suitable for cabinets, enamel or cabinet paint, small foam rollers, angled brush, new knobs/pulls.
How to do it:
- Remove doors and hardware. Label each door and its matching cabinet box with tape so everything goes back in the right spot. Remove hinges and knobs/pulls and store the screws in labeled bags.
- Clean thoroughly. Kitchen cabinets accumulate grease. Wash all surfaces with a degreaser or TSP substitute. Rinse and let dry completely to avoid paint adhesion problems.
- Sand and prime. Lightly sand doors and frames to dull the existing finish and wipe off dust. Apply a bonding primer that’s made for glossy or previously finished surfaces. This helps prevent peeling and stain bleed-through.
- Apply paint in thin coats. Use a foam roller on flat areas and a brush for details. Two to three thin coats are better than one thick coat. Lightly sand between coats if the surface feels rough.
- Update hardware. Once dry and cured (follow paint instructions), install modern knobs or pulls. If your new hardware has a different hole spacing, fill the old holes with wood filler, sand smooth, and drill new ones using a template for consistent placement.
Practical tip: Paint cabinet frames and doors on different days so you can still access essentials. Work in sections to keep your kitchen usable.
Step 2: Install a Budget-Friendly Backsplash
A backsplash makes a small kitchen feel finished and protects the walls from cooking splatter. You don’t need tile skills to get a big impact.
What you’ll need (option A – peel-and-stick): Peel-and-stick backsplash tiles, utility knife, straight edge, level, cleaning supplies.
What you’ll need (option B – traditional tile): Tile, tile adhesive or thinset, notched trowel, spacers, tile cutter or wet saw, grout, float, sponge.
How to do it (peel-and-stick option for most DIYers):
- Prep the wall. Clean with a degreaser and ensure the surface is smooth, dry, and free of loose paint. Glossy walls may need a light sanding.
- Plan your layout. Dry-fit a row along the counter to see where full tiles will land. Try to avoid tiny slivers near visible edges or around outlets; you might shift your start point to hide cuts in less noticeable areas.
- Mark a level line. Use a level to draw a straight reference line above the counter. Don’t assume the countertop itself is perfectly level.
- Apply tiles from the center out. Peel the backing and carefully press tiles from your center line outwards, smoothing as you go. Use a straight edge and utility knife to cut around outlets and at corners.
- Finish edges. Use finishing strips, caulk, or a clean cut line at the end of your run. Reinstall outlet covers with longer screws if needed to account for the thickness of the backsplash.
Practical tip: If you cook a lot or have a gas range, choose peel-and-stick tiles rated for higher temperatures or consider traditional ceramic/porcelain tile behind the stove area.
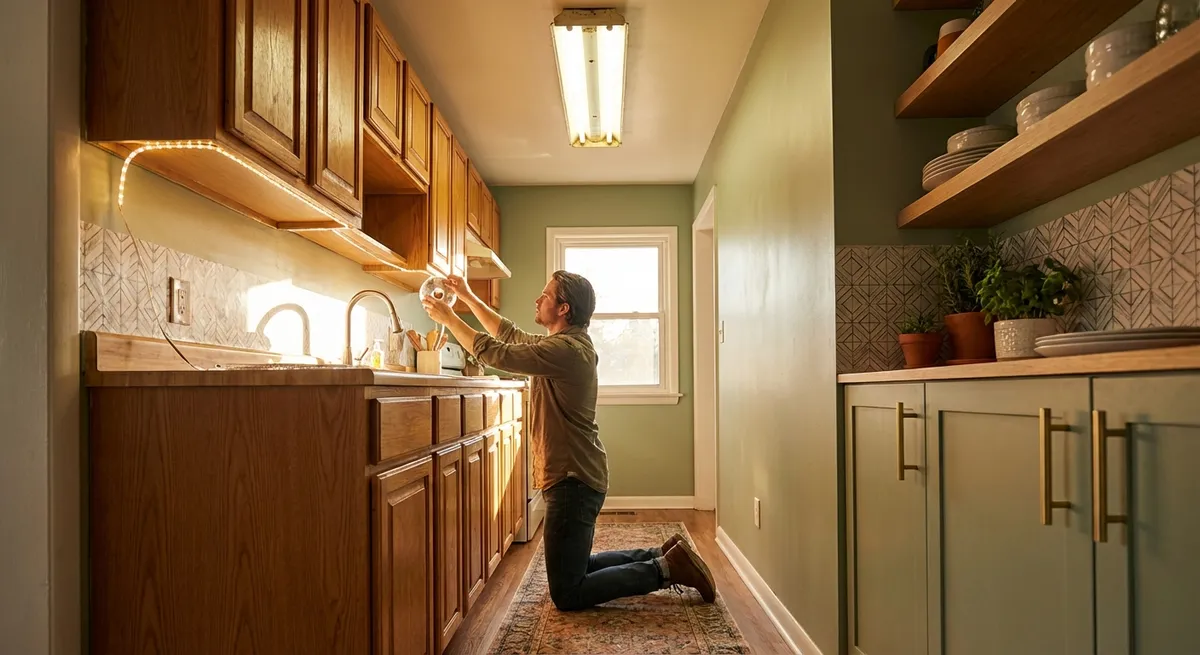
Step 3: Upgrade Lighting for Better Task Visibility
Many older kitchens rely on a single ceiling fixture that leaves counters in shadow. Adding task and accent lighting improves safety and makes the space feel larger.
What you’ll need: Under-cabinet LED light bars or puck lights (plug-in or battery), drill or adhesive strips (depending on mounting type), cable clips, and optionally a new LED ceiling fixture.
How to do it:
- Assess dark zones. Stand in the kitchen at night and note which counters are hard to see. These spots are top priority for under-cabinet lighting.
- Choose the right lights. Plug-in LED strips are a good balance of brightness and ease of installation. For renters or those avoiding wires, battery-powered motion-sensor lights can work well.
- Mount under cabinets. Install light bars toward the front underside of the cabinet to shine on the counter, not the backsplash. Use screws or strong adhesive according to the manufacturer’s instructions.
- Hide cords. Route cords along the underside of the cabinet and down corners, securing with cable clips or adhesive raceways. Aim for one hidden outlet powering multiple lights, if possible.
- Consider the ceiling fixture. If your existing ceiling light is dated or dim, replace it with an LED flush mount or semi-flush fixture. Always shut off power at the breaker first, confirm with a non-contact voltage tester, and follow the fixture’s wiring diagram.
Practical tip: Look for LED lights in the 2700K–3000K range for a warm feel or 3500K–4000K for a neutral-white, “clean” cooking environment.
Step 4: Reclaim Counter Space With Smart Storage Add‑Ons
Cluttered counters make a small kitchen feel cramped. Instead of ripping out cabinets, add targeted storage that maximizes what you already have.
What you’ll need: Pull-out organizers, drawer dividers, tension rods, hooks, wall-mounted rails, and a measuring tape.
How to do it:
- Empty and sort one zone at a time. Start with the most chaotic area—often under the sink or the utensil drawer. Group items by how often you use them: daily, weekly, rarely.
- Measure interior spaces. Measure width, depth, and height of cabinets and drawers. Note obstructions like hinges, plumbing, or garbage disposals.
- Add pull-outs or bins. Install pull-out trays or sliding baskets in deep base cabinets so you can access the back without crawling on the floor. For under-sink areas, choose organizers that fit around plumbing.
- Use vertical space. Inside cabinet doors, add slim racks for cutting boards, lids, spices, or cleaning supplies. On walls or sides of cabinets, mount rails with hooks for utensils, mugs, or small pans.
- Create a “drop zone.” Designate a small section of counter or a wall-mounted shelf for mail, keys, and miscellaneous items so they don’t spread across your prep area.
Practical tip: Be ruthless about what stays on the counter permanently. Aim to limit it to your coffee maker, one often-used appliance, and perhaps a frequently used utensil crock.
Step 5: Update the Faucet and Sink Area for Everyday Comfort
You interact with your sink constantly. Improving this single station can make your kitchen feel more modern and functional without changing the entire layout.
What you’ll need: New faucet (ideally with a pull-down sprayer), adjustable wrench, plumber’s putty (if required), bucket, towels, and possibly a new soap dispenser or air gap cover.
How to do it:
- Shut off water and clear space. Turn off hot and cold shutoff valves under the sink. If they don’t work or are corroded, shut off the main water supply and consider replacing the valves later. Clear out everything from under the sink and place a towel and bucket there.
- Disconnect old faucet. Use an adjustable wrench to loosen supply lines and mounting nuts. Have the bucket ready for any leftover water in the lines. Remove the old faucet from above.
- Prep the mounting surface. Clean around the faucet holes. If you’re going from a three-hole faucet to a single-hole faucet, use an escutcheon plate (often included) to cover extra openings.
- Install the new faucet. Follow the manufacturer’s instructions—usually this means placing a gasket or plumber’s putty under the base, feeding hoses through the holes, tightening mounting hardware from below, and connecting supply lines.
- Check for leaks. Turn the water back on slowly while watching all connections under the sink. Let the faucet run on hot and cold, and operate the sprayer. Tighten any fittings that weep.
Practical tip: While you’re under the sink, add a simple pull-out trash bin or caddy for dish supplies to keep the sink area more orderly.
Conclusion
Transforming a small kitchen doesn’t require demolition or a contractor. By planning around how you actually use the space, then methodically refreshing cabinets, adding a backsplash, improving lighting, optimizing storage, and upgrading the sink area, you can get a kitchen that looks better and works harder for you. Tackle these steps one weekend at a time, keep your layout, and focus your energy (and budget) on the details you interact with every day. The result is a kitchen that feels newly renovated—without the full renovation price tag.
Sources
- [U.S. Department of Energy – Kitchen Lighting Tips](https://www.energy.gov/energysaver/lighting-choices-save-you-money) - Guidance on efficient lighting choices and brightness for task areas
- [This Old House – How to Paint Kitchen Cabinets](https://www.thisoldhouse.com/cabinets/21015124/how-to-paint-kitchen-cabinets) - Step-by-step techniques for durable cabinet painting
- [Family Handyman – How to Install a Kitchen Faucet](https://www.familyhandyman.com/project/how-to-install-a-kitchen-faucet/) - Detailed faucet replacement instructions and diagrams
- [Consumer Reports – Kitchen Remodeling Guide](https://www.consumerreports.org/home-garden/kitchen-remodeling-guide/) - Overview of where upgrades have the most impact in a kitchen
- [UL Solutions – LED Lighting Safety and Performance](https://code-authorities.ul.com/about-led-lighting/) - Information on selecting safe, certified LED fixtures
Key Takeaway
The most important thing to remember from this article is that this information can change how you think about Renovation.


