A full renovation can eat up time, money, and your sanity. But you don’t always need to tear down walls or hire a contractor to make a room feel new. With a bit of planning and a handful of smart upgrades, you can pull off a “mini-reno” that changes how a space looks and works—without gutting anything. This guide walks you through a practical, five-part plan DIYers can tackle on evenings and weekends.
Step 1: Map the Room You Actually Need, Not the One You Have
Before you pick up a tool, decide what you want this room to do.
Spend 20–30 minutes just observing the space at different times of day. Where does clutter pile up? Which corners feel dark or unused? Do you avoid certain areas because they feel cramped or awkward?
Grab a notebook or your phone and:
- List the room’s top 3 jobs (for example: “relaxing,” “working from home,” “kid play area”).
- Note the pain points: poor lighting, no storage, bad layout, worn surfaces.
- Take photos from each corner of the room. This helps you see it more objectively.
- Measure the room and major furniture (length, width, and height where relevant). Record these; they’ll matter for everything that follows.
Then create a simple “must-have” list and a “nice-to-have” list. Examples:
- Must-have: a workspace with an actual chair, better lighting over the sofa, hidden storage for toys.
- Nice-to-have: new curtains, upgraded outlet covers, a better rug.
Use this to set a realistic scope so your mini-reno doesn’t turn into a full renovation halfway through.
Step 2: Refresh the Surfaces That Steal the Most Attention
You don’t have to rebuild a room to make it look new—updating key surfaces can do most of the visual heavy lifting.
Focus on what the eye notices first:
Walls
- Patch nail holes and hairline cracks with spackle, sand smooth once dry, and spot-prime. - If a full repaint is realistic, choose a durable, washable paint in a neutral or soft tone that works in different lighting. - If repainting the whole room isn’t feasible, repaint just the most visible wall or touch up high-scuff areas around doors and switches.
Trim and Doors
- Clean with a degreasing cleaner, lightly sand glossy trim, and apply a fresh coat of semi-gloss paint. - Repainting just the doors and baseboards can make old walls look sharper, even if you leave the wall color alone.
Floors
- Deep-clean: vacuum, wash, or mop as appropriate. Use wood-safe cleaners on hardwood and follow the manufacturer’s instructions on laminate and vinyl. - Add or swap a rug sized correctly (front legs of major furniture on the rug in living areas, for example) to visually anchor the room and hide mild imperfections.
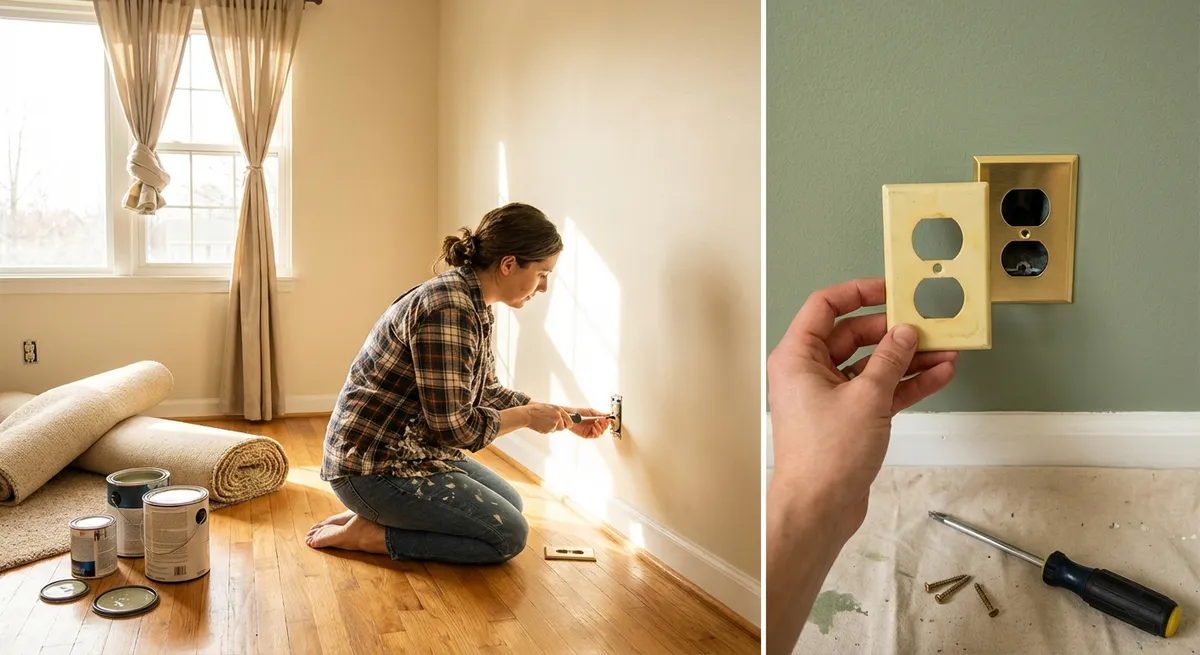
Switch Plates and Vents
- Replace yellowed or cracked switch plates and outlet covers with clean, matching ones. - Remove vent covers, clean them thoroughly or spray-paint them (if metal) with a durable spray paint.
Work systematically: start at the ceiling line, move down the walls, then trim, then floors. This keeps you from having to re-clean or re-paint what you just finished.
Step 3: Reorganize the Layout for Function and Flow
Most rooms feel cramped or awkward not because they’re small, but because the layout doesn’t match how they’re used.
Use your measurements from Step 1 and:
- Clear as much as you reasonably can from the room (small furniture, decor, loose items).
- Identify the “primary zone” (e.g., TV viewing, desk/work zone, bed area) and center your layout around that.
- Maintain practical walkways: aim for at least 30–36 inches of clear path where people walk often.
- Avoid blocking natural light. Keep taller pieces (bookcases, wardrobes) away from windows when possible.
- Pull furniture off the walls slightly—8–12 inches is often enough to make a room feel more intentional and less like a waiting room.
A simple approach:
- Place the largest anchor piece first (sofa, bed, or desk).
- Add secondary seating or storage within easy reach of that anchor.
- Use smaller pieces (side tables, small shelves) to fill in gaps, not traffic routes.
- Sit in each main seat and check sightlines to the door, TV, windows, and other people.
Temporarily mark out potential layouts with painter’s tape on the floor before moving heavy items. This lets you test pathways and clearances without lifting a thing.
Step 4: Build Smart Storage Without Major Construction
Storage is often the difference between a room that always looks messy and one that looks “done.” You can add a surprising amount without opening up walls.
Think vertical and modular:
- Wall-mounted shelves:
- Use floating shelves or simple brackets anchored into studs or with appropriate wall anchors.
- Place them above eye level in tighter rooms to free floor space while keeping access easy.
- Multi-purpose furniture:
- Storage ottomans, benches with hidden compartments, or coffee tables with shelves can swallow daily clutter.
- In bedrooms, under-bed bins or drawers add a whole “hidden” storage zone.
- Hooks and rails:
- Install sturdy hooks near entry doors, in hall corners, or on the back of doors for bags, coats, or frequently used items.
- Use a wall rail with movable hooks in kitchens or craft areas to organize tools without eating counter space.
- Closet tune-up:
- Add a second hanging rod below the first for shorter items like shirts.
- Use slim, matching hangers to gain a few extra inches in crowded closets.
- Add a shelf or stackable bins at the bottom for shoes and small items.
Plan each storage addition around a specific category (e.g., “remote controls and chargers,” “kids’ art supplies,” “winter accessories”) so the system stays intuitive and sustainable, not random.
Step 5: Tune the Lighting and Small Details for a Finished Look
Lighting and details are what separate “we did some work” from “this room feels intentionally updated.”
Think of lighting in three layers:
Ambient (general light)
- Replace dull or outdated ceiling fixtures with a simple, modern upgrade that fits your room size and ceiling height. - Use bright, diffused light for general coverage—consider LED fixtures with a warm-to-neutral color temperature (around 2700K–3000K for living spaces).
Task lighting
- Add desk lamps where you actually work, reading lamps near seating, and brighter focused light in hobby or craft zones. - Clamp-on or plug-in wall lamps are good options if you can’t hardwire new fixtures.
Accent lighting
- Use LED strips behind TV units or under shelves, or small table lamps in dark corners to add depth and reduce harsh shadows. - Put frequently used lamps on smart plugs or simple timers so the room feels inviting automatically.
Then finish with small, strategic upgrades:
- Replace mismatched or dated curtain rods and hang curtains a bit higher and wider than the window to make it feel larger.
- Swap old, yellowed blinds for clean, functional ones that control light but don’t dominate the room.
- Update a few high-touch items: door handles, cabinet pulls, and even a worn thermostat cover if it’s visually prominent.
- Edit decor: keep only items you like looking at every day, and group smaller pieces instead of scattering them everywhere.
Walk in from your hallway like a guest. Are there any eyesores your attention lands on immediately? Address those one by one—often it’s as simple as hiding cords with cable covers, relocating a trash can, or centering a piece of art.
Conclusion
You don’t need demolition or a big budget to make a room feel renewed. By planning around how you actually use the space, updating the most visible surfaces, improving the layout, adding smart storage, and refining lighting and details, you can pull off a focused mini-renovation that looks intentional and feels better to live in.
The key is to move step by step: define the room’s job, fix what stands out, and stop before the project snowballs into something you can’t finish. Tackle one room at a time, capture before-and-after photos, and share your progress—you might be surprised how much of a “reno” you can achieve with nothing more than tools you already own and a solid weekend plan.
Sources
- [U.S. Department of Energy – Energy Saver: Lighting Choices to Save You Money](https://www.energy.gov/energysaver/lighting-choices-save-you-money) - Guidance on efficient lighting types, brightness, and color temperature
- [Mayo Clinic – Light and Mental Health](https://www.mayoclinic.org/diseases-conditions/seasonal-affective-disorder/in-depth/seasonal-affective-disorder-treatment/art-20048298) - Explains how light affects mood and comfort in living spaces
- [National Association of Home Builders – Home Remodeling Trends](https://www.nahb.org/news-and-economics/housing-economics/home-building-trends) - Insight into popular, value-adding home improvement approaches
- [Consumer Reports – Interior Paint Buying Guide](https://www.consumerreports.org/home-garden/painting/interior-paint-buying-guide/) - Details on paint types, finishes, and durability for interior walls and trim
- [IKEA – Small Space Living Ideas](https://www.ikea.com/us/en/rooms/small-space-living/) - Practical examples of layout and storage solutions in compact rooms
Key Takeaway
The most important thing to remember from this article is that this information can change how you think about Renovation.


