Old, dinged-up baseboards can make an otherwise nice room look tired. The good news: you don’t need a full remodel to make a big visual difference. Updating or replacing baseboards is a DIY-friendly renovation that instantly sharpens up any space. With some planning, basic tools, and a free weekend, you can get pro-looking results without hiring out.
This guide walks you through the process step by step, from planning and prep to clean caulk lines and final touch-ups.
Plan Your New Look and Measure the Space
Before you touch a saw or pry bar, you’ll get better results by planning the style, height, and finish of your new baseboards.
Start by deciding on the overall look. Taller baseboards (4–6 inches) add a more custom feel than the thin builder-grade trim found in many homes. Simple square or stepped profiles create a modern look; more detailed, curved profiles feel more traditional. Check a few rooms in your home so whatever you choose doesn’t clash with existing trim around doors and windows.
Once you settle on a style, measure each wall. Measure from corner to corner at floor level and write down each measurement, rounding up slightly to allow for angled cuts. If a room is longer than typical 8- or 12-foot boards, plan your joints: it’s better to use two longer pieces with a single angled “scarf joint” than multiple small pieces.
Consider the material as well. MDF is smooth, easy to paint, and budget-friendly, but it doesn’t like moisture. Solid wood handles minor bumps better and is a safer choice for bathrooms or basements. Primed boards save you time later; raw wood or MDF will need primer before paint.
Finally, check transitions: note where baseboards will meet door casings, stairs, or existing trim. Taking a few photos and measurements before you shop makes it easier to buy enough material without repeated trips to the store.
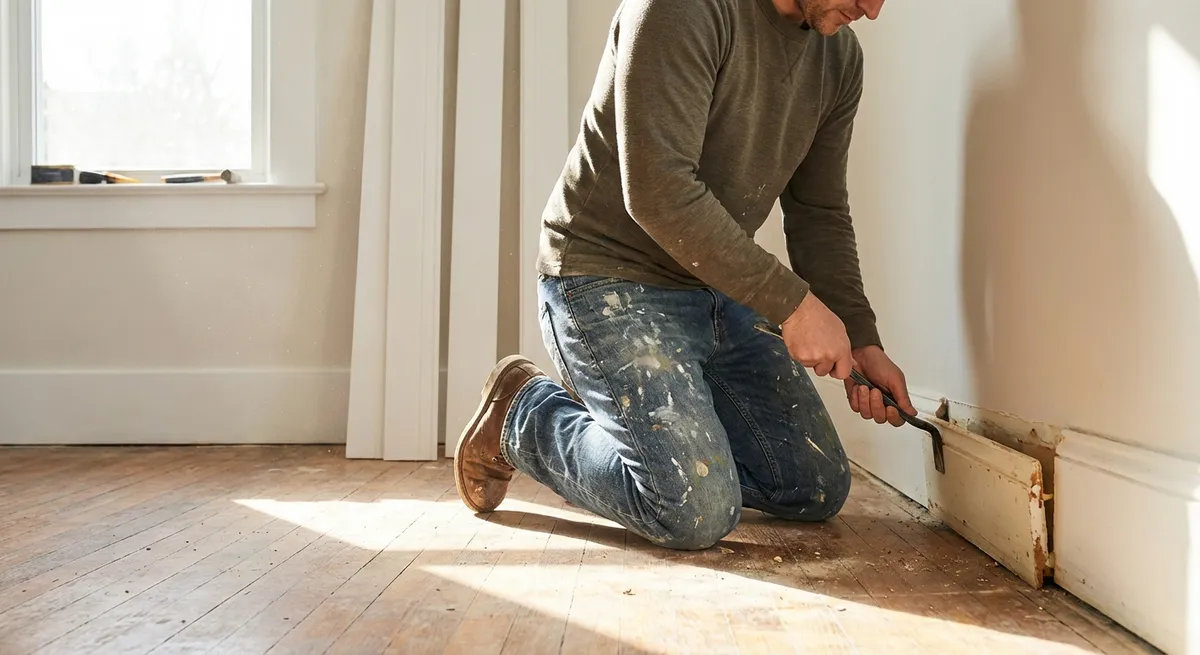
Step 1: Remove Old Baseboards Without Destroying Your Walls
Getting the old trim off cleanly is the first real hands-on task, and it sets you up for a smoother install.
Start by scoring the top edge of the existing baseboard where it meets the wall with a sharp utility knife. This cuts through paint and caulk so you don’t peel off chunks of drywall paper as you pry. Work slowly and follow the entire length of each board.
Next, look for any visible finish nails. You don’t need to remove them yet, but noting where they are will help you pry in the right spots. Slide a thin putty knife or painter’s tool between the wall and baseboard to begin loosening it. Once you’ve created a small gap, slip in a flat pry bar.
To avoid damaging the drywall, place a scrap piece of cardboard or wood between your pry bar and the wall. Gently lever the baseboard away from the wall a little at a time, moving along the length instead of yanking from one spot. If a board resists, re-score the caulk line and try again rather than forcing it.
When the trim is off, use pliers to pull out any remaining nails driven through the drywall into the studs. If the nail heads tore through the face, tap them slightly below the surface with a nail set and hammer instead of trying to yank them out. Finish by scraping away old caulk and loose paint; a clean, smooth wall edge makes the new install much easier and cleaner.
Step 2: Prep Walls and Floors for a Smoother Install
Solid prep turns an average DIY job into something that looks intentional and professional. This stage is about giving your new baseboards a flat, even surface to sit against.
Inspect the lower portion of the wall where the old baseboard came off. Fill any gouges, nail holes, or torn drywall paper with a lightweight spackle or joint compound. Apply with a putty knife, smooth it level, and let it dry as directed by the product. Once dry, sand the patched areas lightly with fine-grit sandpaper until they feel smooth to the touch.
Check the floor where the baseboard will sit. Vacuum or sweep along the perimeter of the room to remove dust and debris; leftover grit can hold baseboards off the wall or floor, creating uneven gaps. If you have carpet, gently pull it back from the wall an inch or two so you can install the baseboard against the subfloor or tack strip. The carpet will later tuck under the trim for a cleaner edge.
It’s also wise to locate your wall studs at this stage. Use a stud finder and mark stud locations lightly with painter’s tape or a pencil about 3–4 inches above the floor. Nailing into studs gives your baseboards a much more secure hold and helps prevent gaps over time, especially in high-traffic areas or where furniture may bump the walls.
If your room is older or the walls are notably wavy, use a long straightedge or level to spot-check the wall’s flatness. Knowing where there are dips or bows will help you decide where to flex the trim slightly, where to add extra nails, and where you’ll rely more on caulk later to bridge small gaps.
Step 3: Cut New Baseboards to Fit (Including Corners and Joints)
Cutting baseboards accurately is where the project starts to feel like real carpentry, but it’s manageable with a bit of patience and a basic miter saw.
Begin with the longest walls so you can use full-length pieces where they’re most visible. Transfer your wall measurements to the new baseboard, marking the back side lightly with pencil. For straight end-to-end walls that meet inside corners, you’ll typically cut 45-degree miters so two boards meet cleanly in the corner. Set your miter saw to 45 degrees and cut slowly, keeping your hands clear and the board firmly held in place.
For a more professional look, consider “coping” one side of inside corners rather than using two 45-degree cuts. With coping, one board runs straight into the corner with a square cut, and the other is cut and shaped to match the profile of the first. This method is more forgiving of slightly out-of-square corners and reduces visible gaps over time. It takes a bit of practice with a coping saw, but many DIYers find it worth learning.
For outside corners (where the trim wraps around a corner into another room or hall), you’ll also use miters, but the cuts angle the other way to follow the outside edge. Always test-fit corner pieces before cutting additional boards; small adjustments to your angle (like 44 or 46 degrees) may be needed in older homes where corners aren’t perfectly square.
When a wall is longer than your baseboard stock, use a scarf joint instead of a simple butt joint. To do this, cut both adjoining ends at a 45-degree angle so they overlap slightly along the wall. Position the overlap so the top corner of the joint faces away from the room’s main viewing position; this helps hide the seam after caulking and painting.
Label the back of each cut piece with its intended location (for example, “Window wall left” or “North wall 1”) so you don’t waste time guessing during installation.
Step 4: Attach Baseboards Cleanly and Securely
With pieces cut and test-fit, you’re ready to attach the new baseboards. This step is all about making them sit snug and straight with a minimum of visible fasteners.
A brad nailer or finish nailer (corded, cordless, or pneumatic) speeds up installation and reduces damage compared to hand nailing. If you don’t own one, many hardware stores rent them for the day. Load nails that are long enough to go through the baseboard and at least 1 inch into the stud—usually 2 to 2.5 inches, depending on the trim thickness and wall.
Start at a corner and work along the wall, holding each piece tight to the floor and wall. Nail into stud locations first, then add one or two nails between studs if the board wants to bow. Place nails slightly above the centerline of the board’s height and angle them slightly downward so they bite into solid material. Avoid nailing too close to the edges, which can cause splitting.
For scarf joints on long walls, add a bead of wood glue along the angled cut before overlapping the two pieces. Nail just above and below the joint to pull it tight. For inside corners—especially coped joints—push the coped end firmly into the square-cut piece in the corner before nailing to lock it in place.
If you’re working with carpet, make sure the baseboard sits just above the carpet backing or tack strip, not pressing hard on the pile. Later, a carpet kicker or tucking tool can push the carpet edge neatly under the baseboard lip. For hard flooring like wood or tile, a small shadow line (1–2 mm) between floor and baseboard can look intentional and helps account for slight floor variations.
As you go, step back occasionally and sight along the installed boards. Checking for wavy runs or obvious gaps now is easier than dealing with them after caulking and painting.
Step 5: Fill, Caulk, and Paint for a Finished Look
The final stage—filling holes, caulking gaps, and painting—turns good carpentry into a polished result that looks like it’s always been part of the house.
Begin by filling nail holes and any small dents. Use a paintable wood filler or spackle, applying a small amount over each nail hole and smoothing it flush with a putty knife. Let it dry fully, then sand lightly with fine-grit sandpaper until the surface is smooth and level with the surrounding trim. Wipe away dust with a slightly damp cloth.
Next, run a thin bead of paintable caulk along the top edge of the baseboard where it meets the wall, and at inside and outside corners. Cut the caulk tube tip at a small angle and apply light, even pressure. Immediately smooth the bead with a damp finger or a caulking tool for a clean, slightly concave line. Wipe away excess before it skins over. Caulk fills small gaps and distinguishes a professional-looking job from an amateur one.
If your baseboards are not pre-primed, apply a coat of primer suitable for your material (MDF, pine, etc.). Primer helps paint adhere better and reduces blotchiness. For pre-primed trim, you can often go straight to paint. Use a high-quality, semi-gloss or satin trim paint for durability and easier cleaning, especially in high-traffic areas.
Cut in along the top of the baseboard with a good angled brush, then fill the face with smooth, even strokes. Avoid over-brushing as the paint begins to set; that’s what causes visible brush marks. Two thin coats usually give better coverage and durability than one heavy coat. Allow proper drying time between coats as recommended on the paint can.
When everything is dry, re-install any displaced carpet edges by tucking them under the baseboard, clean up your workspace, and do a final walkthrough. You’ll notice the room feels sharper and more “finished,” even if you haven’t changed anything else.
Conclusion
Upgrading baseboards is a manageable renovation that delivers a surprisingly big visual payoff. By carefully removing old trim, prepping the walls, making accurate cuts, securing the boards properly, and finishing with clean caulk lines and fresh paint, you can transform the feel of a room in a single weekend.
This is the kind of project that builds confidence: once you’ve handled corners, joints, and finish work on baseboards, you’ll be better prepared for other trim and renovation projects throughout your home.
Sources
- [U.S. Department of Housing and Urban Development – Rehab a Home](https://www.hud.gov/program_offices/housing/sfh/rehab/rehabprog) - General guidance and considerations for home rehabilitation projects
- [Family Handyman – How to Install Baseboard Trim for a Smooth Finish](https://www.familyhandyman.com/project/how-to-install-baseboard-trim-for-smooth-walls-and-floors/) - Practical tips and photos for baseboard installation and finishing
- [This Old House – Installing Baseboard Molding](https://www.thisoldhouse.com/carpentry/21014924/installing-baseboard-molding) - Step-by-step instructions and expert tricks for cutting and fitting trim
- [Lowe’s – How to Install Baseboards](https://www.lowes.com/n/how-to/install-baseboards) - Tool lists, material options, and beginner-friendly guidance for DIYers
Key Takeaway
The most important thing to remember from this article is that this information can change how you think about Renovation.


