DIY projects don’t have to be huge renovations to make a real difference. With a few focused weekend builds, you can add storage, improve comfort, and make your home look more finished—without blowing your budget or patience.
This guide walks through five practical, step-by-step projects that almost any DIYer can tackle with basic tools and some planning.
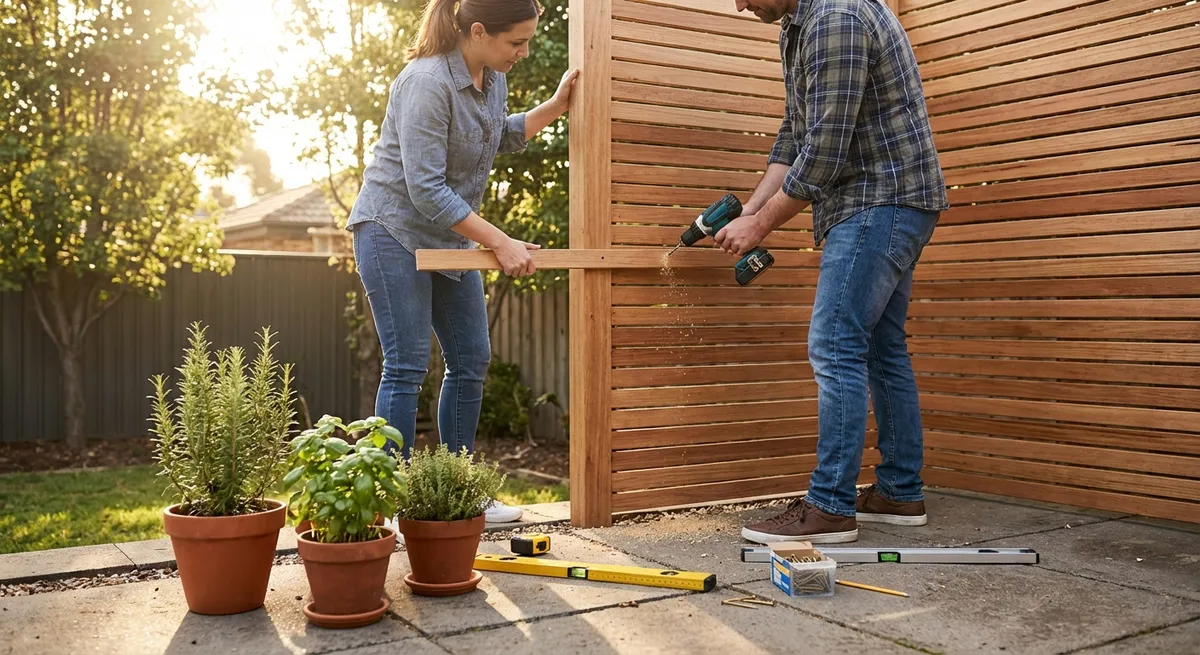
Project 1: Install a Sturdy, Level Floating Shelf
Floating shelves are one of the fastest ways to add storage and style. The key is getting them level and strong enough to hold serious weight.
Step 1: Plan the Location and Load
Decide what you’ll store: books, decor, dishes, or plants. Heavier items need stronger anchors and ideally at least one stud.
Measure the wall space, mark the ideal height with painter’s tape, and check that the shelf won’t interfere with doors, switches, or windows. Stand back and visually confirm the height feels right.
Step 2: Find Studs and Mark the Bracket Line
Use a stud finder to locate studs along the wall. Mark each stud center lightly with a pencil.
Use a level to draw a light horizontal line at your chosen height. This will be your reference for mounting the bracket or cleat.
Step 3: Pre-Drill and Anchor
If your shelf bracket holes line up with studs, pre-drill pilot holes into the studs and use wood screws.
If they don’t align with studs, use heavy-duty wall anchors rated for more than the total load you expect. Follow the anchor instructions carefully—many require a specific hole size.
Step 4: Mount the Bracket or Cleat
Hold the bracket or French cleat to the wall along your level line. Start by loosely installing the center screw, then re-check level before tightening fully.
Add remaining screws, checking level one last time after everything is snug.
Step 5: Attach the Shelf and Test
Slide the shelf onto the bracket/cleat and secure any hidden set screws if provided.
Gently apply pressure downward and side-to-side. Start with lighter items and watch for sagging or wobble. If it flexes more than a few millimeters, reduce the load or upgrade your anchors.
Project 2: Upgrade a Drafty Door with Weatherstripping
Air leaks around doors waste energy and make rooms uncomfortable. Weatherstripping is cheap, fast, and pays off immediately in comfort and utility bills.
Step 1: Identify Drafts
On a windy day or with your HVAC running, hold your hand or a lit stick of incense near the door edges. Notice where air moves the smoke or feels noticeably cool.
Check the sides, top, and bottom of the door, especially around the door stop and threshold.
Step 2: Choose the Right Weatherstripping
Common types:
- Adhesive foam tape: Easy to install, good for small gaps.
- V-strip (tension seal): Durable and great for door jambs.
- Door sweeps: Attach to the bottom of the door to block under-door drafts.
Measure the gap size and door width to make sure you buy the correct size and length.
Step 3: Clean the Surfaces
Wipe down door jambs and the bottom of the door with a cleaner that removes dust and grease. Let everything dry completely.
If old weatherstripping is present and damaged, remove it fully and scrape away any adhesive.
Step 4: Install the Weatherstripping
For foam tape or V-strip:
Measure, cut cleanly with scissors, peel backing, and press firmly into place along the door stop or jamb. Avoid stretching it—it should sit relaxed so it doesn’t peel back.
For a door sweep:
Hold it against the bottom of the closed door so the rubber or brush just touches the threshold. Mark screw locations, pre-drill small pilot holes if needed, and screw it in place.
Step 5: Test the Seal
Close the door and check that it closes firmly but not with excessive force. From the inside at night, turn lights on and look from the dark hallway or outside—light leaks often show air leaks.
Re-adjust or trim where the door binds or doesn’t latch smoothly.
Project 3: Create a Simple Entryway Wall Organizer
An organized entry eliminates “Where are my keys?” moments and stacks of mail on the table. This project gives everything a place: keys, mail, coats, bags, and even dog leashes.
Step 1: Measure the Space and Sketch a Simple Layout
Measure the width and height of the wall area near your entry door.
Decide what you need to store:
- Hooks for coats/bags
- Small shelf for mail
- Key hooks
- A small corkboard or magnetic strip for notes
Sketch a rectangle approximating your wall and “block in” where each element will go.
Step 2: Gather Materials
Common options:
- 1x6 or 1x8 boards for a backing panel and small shelf
- Sturdy hooks (coat-rated, not tiny cup hooks)
- Small L-brackets or pre-made shelf brackets
- Wood screws and wall anchors
- Sandpaper and paint or stain if you want a finished look
Cut boards to width if needed (many hardware stores will cut for you).
Step 3: Prepare and Finish the Wood
Lightly sand all surfaces and edges until smooth. Wipe away dust.
Apply paint, stain, or clear polyurethane. Let it dry fully between coats and follow manufacturer’s instructions for ventilation and drying time.
Step 4: Assemble the Organizer
Attach hooks to the backing board at comfortable reach height (usually between 60–66 inches from the floor for adults).
If adding a shelf, mount small brackets to the board or directly to the wall, ensuring they’re level. Attach the shelf from underneath with short wood screws that won’t poke through.
Step 5: Mount to the Wall
Locate at least one stud behind the organizer for solid anchoring. If no stud aligns, use heavy-duty wall anchors suited for your wall type (drywall, plaster, etc.).
Screw the organizer into studs where possible, and anchors where not. Test by hanging a heavy bag or coat and gently pulling downward. Adjust if anything flexes or loosens.
Project 4: Replace a Basic Light Switch with a Dimmer
Swapping a standard light switch for a compatible dimmer can instantly improve room comfort and ambiance. The key is safety and compatibility.
Step 1: Choose the Right Dimmer
Check:
- Bulb type: LED, CFL, incandescent, halogen. Buy a dimmer specifically rated for your bulb type (especially important for LEDs).
- Wattage: Add up total wattage of all bulbs controlled by the switch and ensure the dimmer exceeds that total.
- Style: Single-pole (one switch) or three-way (controlled from two locations).
Take a photo of your current switch wiring before you start.
Step 2: Turn Off Power Safely
At your breaker panel, turn off the circuit controlling that switch. Don’t rely on just flipping the wall switch.
Use a non-contact voltage tester at the switch wires to confirm there’s no power. Only proceed once you’ve verified it’s off.
Step 3: Remove the Old Switch
Unscrew the switch cover plate, then the switch itself.
Gently pull the switch forward without straining the wires. Loosen terminal screws or release push-in connectors to detach the wires, noting which was connected where (your photo helps here).
Step 4: Wire the New Dimmer
Most dimmers have labeled wires:
- “Common” or “Line” (often black)
- “Load” to the light fixture
- Ground (green or bare copper)
- Plus an extra traveler wire if it’s a three-way setup
Connect wires using wire nuts, matching them to your original configuration. Make sure no bare copper is exposed outside the connectors.
Step 5: Mount, Test, and Reassemble
Carefully tuck wires back into the box, avoiding sharp bends. Screw the dimmer into place, then reinstall the cover plate.
Turn the circuit breaker back on. Test the dimmer through its full range—lights should come on smoothly without flicker or buzzing. If they flicker, double-check bulb compatibility and all wire connections.
Project 5: Build a Basic Plywood Garage or Basement Shelf
A sturdy storage shelf clears floor space and helps you actually find your stuff. This basic build uses simple cuts and screws—no fancy joinery required.
Step 1: Plan Size and Load
Measure the space where the shelf will sit—height, width, and depth.
Consider what you’ll store: heavy bins vs. paint cans vs. lighter boxes. For heavy loads, aim for 2x4 framing and 3/4" plywood shelves with vertical supports every 2–4 feet.
Sketch a simple front and side view with measurements.
Step 2: Cut Structural Pieces
Typical simple design:
- Four vertical legs (2x4s), cut to desired height
- Two or three horizontal “frames” per shelf level (front and back pieces)
- Short side pieces to link front and back frames
- Plywood cut for each shelf surface
If you don’t have a saw, most home centers can cut plywood and boards to basic dimensions for you.
Step 3: Assemble the Frames
On a flat surface, build rectangular frames from 2x4s for each shelf level. Use wood screws and pre-drill pilot holes to prevent splitting.
Check each frame for square by measuring diagonals—if both diagonals match, it’s square.
Step 4: Attach Legs and Shelves
Stand the frames up and attach legs at the corners, starting with the top frame so it’s easier to work. Use clamps if you have them to keep things aligned.
Once the frame structure is secure, lay pre-cut plywood on top of each frame. Screw it down with evenly spaced wood screws.
Step 5: Level and Anchor (If Needed)
Move the unit into place. Use shims under legs if your floor is uneven and check for wobble.
If the shelf is tall or loaded with heavy items, screw it into wall studs using metal brackets or long screws through the back frame. Load heavy items on the bottom shelves to lower the center of gravity.
Conclusion
You don’t need a full renovation or a truckload of tools to make your home work better. Well-chosen, straightforward DIY projects like shelving, sealing drafts, organizing entries, installing dimmers, and building strong storage can all be done in a weekend and used for years.
Start with the project that solves your most annoying daily problem, gather your tools and materials in advance, and take each step slowly and deliberately. The more you build, the more confident—and capable—you’ll become.
Sources
- [U.S. Department of Energy – Air Sealing Your Home](https://www.energy.gov/energysaver/air-sealing-your-home) - Explains where air leaks commonly occur and effective ways to seal them
- [Energy Star – Doors and Windows](https://www.energystar.gov/campaign/seal_insulate/do_it_yourself) - Guidance on DIY sealing and insulating around doors and windows
- [Family Handyman – How to Install a Dimmer Switch](https://www.familyhandyman.com/project/how-to-install-a-dimmer-switch/) - Step-by-step instructions and safety tips for dimmer installation
- [Lowe’s – How to Build Shelves](https://www.lowes.com/n/how-to/build-shelves) - Practical advice and diagrams for building simple shelving units
- [Home Depot – How to Install Floating Shelves](https://www.homedepot.com/c/ah/how-to-install-floating-shelves/9ba683603be9fa5395fab901bcb3b94) - Detailed guidance on planning and safely installing floating shelves
Key Takeaway
The most important thing to remember from this article is that this information can change how you think about DIY Projects.


