An accent wall is one of the fastest, most affordable ways to change how a room feels—without a full remodel. Whether your space looks flat, dated, or just boring, a well-planned feature wall can pull everything together and make the whole room feel intentional. This guide walks you through a practical, step‑by‑step project you can actually finish in a weekend, even if you’re not a pro.
We’ll focus on a painted wood trim accent wall (often called a “grid” or “board and batten” style) because it’s forgiving, customizable, and works in bedrooms, living rooms, and entryways. You’ll get clear steps, tool tips, and small details that people usually find out the hard way.
Step 1: Choose the Right Wall and Plan the Design
Before you buy a single board, you need a plan. A good accent wall is about placement and proportion, not just color.
Pick a wall with:
- Minimal interruptions (few doors or windows if possible)
- A clear “anchor” in the room (behind the bed, sofa, or dining table)
- Nearby outlets or switches you can work around, not fight with
Stand back and look at how furniture interacts with that wall. The accent wall should frame the main piece of furniture, not compete with it. For example, in a bedroom, the headboard should be centered on the wall you’re upgrading.
Next, sketch your design on paper or in a simple app:
- Decide if you want a simple grid (even rectangles), vertical battens (tall panels), or a modern geometric look (angles and varying spaces).
- Measure wall width and height in inches, then note these numbers on your sketch.
- Choose a general spacing, like 16–24 inches between vertical boards. Adjust as needed so you end with similar‑sized panels at both ends.
- Check for obstacles: outlets, vents, switches, and baseboard heaters. Decide whether trim will surround them or be cut around them.
- Darker colors (deep blue, charcoal, forest green) add drama and are great behind a TV or bed.
- Lighter colors (warm white, greige, soft sage) brighten and quietly add texture.
- Hold sample cards against the wall at different times of day to see how light affects them.
Finally, choose a paint color that fits the room:
Write down final measurements and spacing. This will guide every cut and keep the project from drifting off track.
Step 2: Gather Materials and Tools That Make the Job Easier
You don’t need a full workshop to pull this off, but you do need a few core tools and the right materials. Buying the right stuff up front saves a lot of frustration mid‑project.
Typical materials:
- 1x2, 1x3, or 1x4 primed MDF or pine boards (for the trim pattern)
- Painter’s tape
- Construction adhesive (optional, but useful on tricky walls)
- 2" brad nails or finish nails (sized to your trim and wall)
- Wood filler or spackle
- Paintable caulk
- Primer (if your boards aren’t pre‑primed)
- Interior paint (eggshell or satin works well for walls)
- Tape measure and pencil
- Stud finder
- Level (2–4 ft level is ideal; a laser level is even better)
- Miter saw or miter box with hand saw
- Nail gun (brad nailer) and compressor, or a hammer and finish nails
- Sanding sponge or 120–220 grit sandpaper
- Putty knife and caulk gun
- Paint roller, brushes, and paint tray
- Check each one for straightness by looking down the length of it at eye level. Avoid boards that bow or twist.
- Consider MDF for smooth, modern looks and interior spaces; use pine or PVC in moisture‑prone areas like bathrooms.
- Get a little extra material (about 10–15%) to cover mistakes and miscuts.
Basic tools:
When you buy boards:
Before leaving the store, ask them to cut any very long boards down to manageable lengths if you’re driving a small vehicle. Most big box stores will do a few cuts free or for a small fee.
Step 3: Prep the Wall So Your Finish Looks Professional
A few small prep steps separate “weekend project” from “builder‑grade finish.” Rushing this part usually makes the final result look sloppy.
Start with a clean surface:
- Remove everything from the wall: art, shelves, hooks, nails, and outlet covers.
- Lightly wipe the wall with a damp cloth or mild cleaner to remove dust and oils. Let it dry completely.
- Fill nail holes, small dents, and cracks with spackle or lightweight joint compound.
- Once dry, sand the patched spots smooth with a sanding sponge.
- If the wall has a very glossy finish, lightly scuff sand to help new paint and caulk grip better.
- For a cleaner look, many people butt the trim directly against the existing baseboard and crown. This avoids removing them and keeps the project simpler.
- If your baseboard is very thin or decorative, you might add a “cap” board at the bottom of the design and treat it as the new base for your grid.
- Use a stud finder and mark stud locations lightly with pencil. This helps you land nails in solid framing where possible.
- Use your level to draw light, straight reference lines for the top of your design, bottom row of panels, or major verticals.
- If your ceiling or floor isn’t perfectly level (very common), trust your level, not the ceiling. Straight lines look better than lines that follow a crooked ceiling.
- Use painter’s tape along adjacent walls, ceiling, and baseboards if you want a crisp paint line and to protect trim from scuffs and caulk smears.
Inspect the wall:
Decide how to handle baseboards and crown:
Mark reference lines:
Finally, tape off edges:
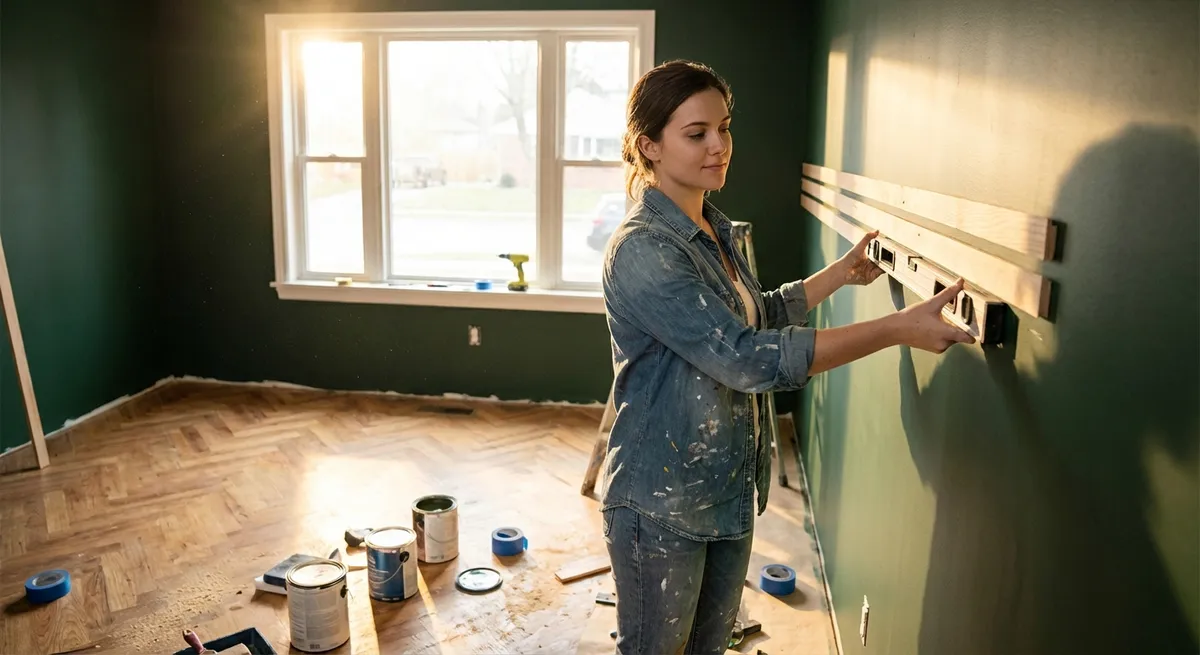
Step 4: Install the Trim Pattern in a Logical Order
This is where the wall starts to change visibly. Working in the right sequence keeps everything lined up and reduces rework.
Start with the “frame”:
- If your design includes a top header and bottom rail (horizontal boards forming a frame), install those first.
- Use your level to ensure they’re dead straight, even if the ceiling or baseboard isn’t.
- Apply a thin bead of construction adhesive to the back if the wall is uneven, then press in place and secure with brad nails into studs when possible.
- Measure from one corner to the other and lay out your spacing according to your plan.
- Mark each location lightly on the wall.
- Cut each vertical to length, test‑fit, and adjust as needed for slightly out‑of‑square corners.
- Install the first vertical using your level; this becomes your reference for the rest.
- Nail into studs where you can; where you can’t, use a combination of nails into drywall and light adhesive for extra hold.
- Measure the actual distance between installed verticals, not just your original plan—walls are rarely perfect.
- Cut horizontal pieces slightly long, then shave them down if needed for a snug fit.
- Use your level again; do not assume the floor or ceiling is straight.
- Work your way across the wall, constantly checking alignment with the level and stepping back every few pieces to check the overall pattern.
Add the primary vertical boards:
Fill in with horizontals or smaller pieces:
Around outlets and switches:
- Turn off power to the room at the breaker before working near electrical.
- Mark where the trim intersects outlets/switches and cut notches in the boards with a jigsaw or handsaw.
- Keep electrical boxes accessible and flush with the finish surface; you can use box extenders if needed.
Aim for tight joints, but don’t panic over tiny gaps—they’ll be handled in the next step.
Step 5: Fill, Caulk, and Paint for a Seamless Finish
This step is where the wall goes from “pieces of wood stuck up there” to a single, smooth accent feature. Don’t rush; most of the polished look comes from careful finishing.
Fill nail holes and seams:
- Use wood filler or spackle to fill all nail holes and any small gaps at joints between trim pieces.
- Slightly overfill, as most fillers shrink a bit as they dry.
- Once dry, sand smooth with a fine‑grit sanding sponge. Wipe off dust with a clean, dry cloth.
- Use paintable caulk only.
- Run a thin, steady bead where the trim meets the wall and at the joints between trim and baseboard or crown.
- Immediately smooth with a damp finger or a caulk tool, keeping the bead small and even.
- Wipe any excess with a damp cloth before it skins over.
Caulk where trim meets wall:
Prime if needed:
- If you used raw MDF or bare wood, apply primer to the trim and any patched wall areas.
- Priming helps achieve an even sheen and color, especially with darker paints or when painting over repairs.
Paint the wall:
- Cut in around edges and inside the grid with a brush.
- Use a small roller for the flat areas between trim and a brush on the trim faces.
- Apply at least two coats, allowing proper dry time between each (follow the paint can instructions).
- Maintain a “wet edge” when rolling to avoid lap marks—work in small sections and don’t overwork areas that have started to dry.
When the last coat dries, remove painter’s tape carefully at a low angle. Reinstall outlet covers and put your furniture back against the wall. Add decor that compliments the new feature—simple artwork, a headboard, a mirror, or a TV setup centered on the design.
Conclusion
A trim accent wall is a realistic weekend project that delivers a big visual upgrade for a relatively small cost. By planning your layout, using the right materials, and taking your time with filling, caulking, and painting, you end up with a custom look that feels built‑in, not slapped on.
This kind of project is also flexible: you can adjust the pattern, board size, and color to match almost any style—from modern minimal to classic farmhouse. Once you’ve done one accent wall, you’ll have the confidence to tackle other DIY upgrades around your home with the same step‑by‑step approach.
Sources
- [The Family Handyman – How to Install Board and Batten](https://www.familyhandyman.com/project/how-to-install-board-and-batten/) - Detailed overview of board and batten wall installation techniques and tools
- [This Old House – How to Create a Board-and-Batten Wall](https://www.thisoldhouse.com/walls/21015024/how-to-create-a-board-and-batten-wall) - Step-by-step instructions and layout tips from renovation professionals
- [Lowe’s – How to Install a DIY Accent Wall](https://www.lowes.com/n/how-to/install-an-accent-wall) - General guidance on planning and installing different types of accent walls
- [Sherwin-Williams – Interior Paint Guide](https://www.sherwin-williams.com/en-us/homeowners/how-to/painting-interior-walls) - Information on interior paint types, finishes, and application best practices
- [U.S. Consumer Product Safety Commission – Electrical Outlet Safety](https://www.cpsc.gov/Safety-Education/Safety-Education-Centers/Electrical-Safety-Center) - Safety recommendations for working around electrical outlets and switches
Key Takeaway
The most important thing to remember from this article is that this information can change how you think about DIY Projects.


