A room can feel flat even when it’s clean and freshly painted. Built-in features—like shelving, a basic bench, or a framed “feature wall”—add real character without a full remodel. You don’t need a workshop or advanced carpentry skills to pull this off. With basic tools, smart planning, and a free weekend, you can turn a plain room into a more functional, custom-looking space.
This guide walks you through five step-by-step DIY upgrades that work together or on their own: planning, simple wall prep, building a basic built-in shelf unit, adding a low bench, and finishing everything so it looks polished.
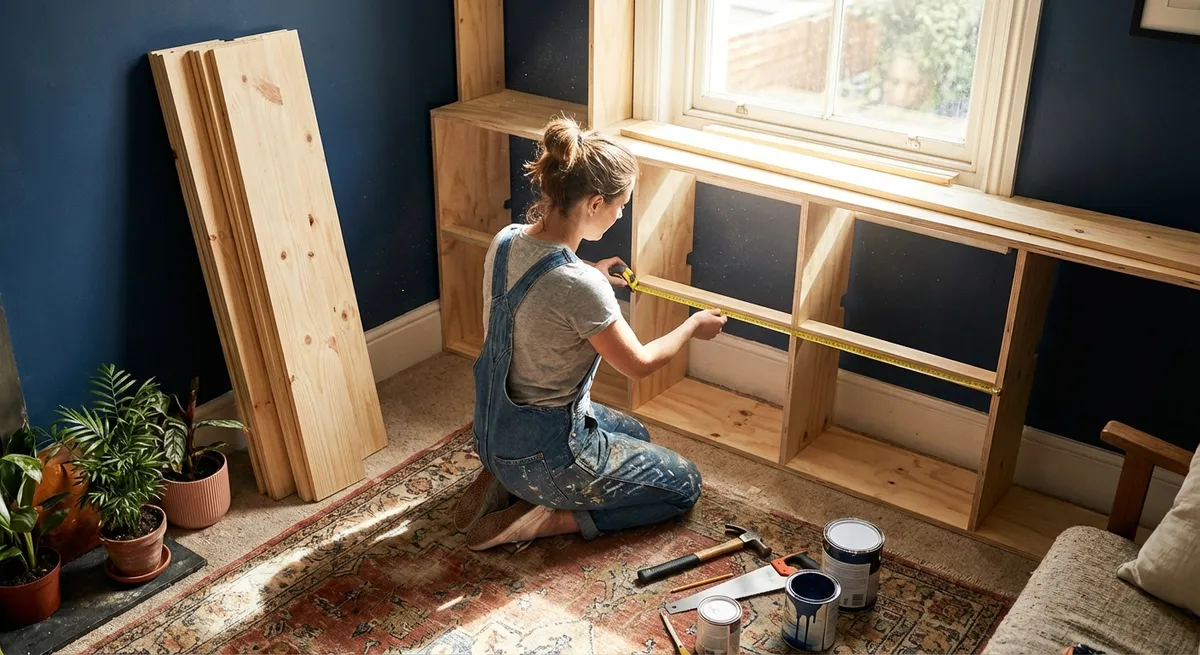
Plan the Built-In Layout Before You Touch a Tool
Rushing into cutting lumber is the fastest way to waste time and money. A simple plan keeps everything aligned, sized correctly, and visually balanced.
Start by choosing your wall. Look for a relatively clear wall without major obstructions: avoid large vents, electrical panels, or multiple doors/windows that would force awkward cuts. Take a few photos of the wall and room from different angles—this will help you “see” how tall and wide the built-in should be.
Measure the wall carefully: total width, height, and the distance from corners, doors, and windows. Write the numbers down and sketch a rough elevation (front view) on paper. Draw where you’d like shelves, a bench, or storage cubbies to go. Don’t worry about being artistic; boxes and lines are enough.
Think about function before style. Do you need book storage, toy storage, a place to sit and put on shoes, or display space for plants and art? That decision will guide shelf spacing and bench depth. As a rule of thumb, plan for:
- Book shelves: 10–12 inches deep
- Display shelves: 8–10 inches deep
- Bench seating: 15–18 inches deep and about 17–19 inches high
Step back and question your idea: Will this block outlets or switches? Can you still open doors and windows fully? Once your layout feels realistic on paper, mark major dimensions (overall width, height, and depths) so you can translate them directly into cuts later.
Prep the Wall So Your Built-Ins Sit Solid and Square
Good prep prevents wobbly shelves, crooked lines, and finishing headaches. This step is about getting the wall ready, not about perfection.
Clear the wall area completely—furniture, artwork, hooks, and shelves all need to go. If there are existing wall anchors or nails, remove them and scrape off any loose paint or caulk. Wipe the wall with a damp cloth to remove dust, especially near the baseboard.
Use a stud finder to locate and mark the studs from floor to about 6 feet up. Lightly mark them with painter’s tape or a pencil line. These marks will be your anchors for attaching cleats and frames later. If your stud finder has deep scan mode, use it to check for pipes or electrical lines where you might drive longer screws.
Put a 4-foot level or a reliable smaller level on the floor against the wall where your built-in will sit. If the bubble drifts off-center, your floor isn’t perfectly level—which is common. Note which side is higher. This matters because you may need to slightly adjust the height of your base or shim under one side to keep the finished piece level.
If the wall has major dings or holes, patch them now with lightweight spackle and a putty knife. Let it dry and sand lightly; you don’t need a perfect finish where shelves will cover it, but smoother walls make caulking and painting easier.
Finally, tape out your planned built-in on the wall and floor with painter’s tape. Mark the top of your highest shelf and the front edge of the bench. Stand back and look from across the room—this is your last chance to adjust proportions without cutting a single board.
Build and Install Simple Wall Cleats as a Strong Foundation
Cleats are horizontal boards screwed into studs that support shelves, benches, and vertical panels. They’re hidden in the final design but do most of the structural work.
Use 1x3 or 1x4 boards (pine or poplar are affordable and easy to work with). Cut cleats to fit the width of your planned bench and the back edges of your lower shelves. Lightly sand the cut edges to avoid splinters.
Mark the height of your bench top on the wall (usually 17–19 inches from the finished floor). Use your level to draw a light, straight horizontal line at that height. This is where your main bench cleat will sit. Hold the cleat against the wall, align its top edge with your line, and mark where it crosses studs.
Pre-drill screw holes through the cleat at each stud location. Pre-drilling helps prevent splitting and makes installation easier. Hold the cleat in place again, level it, and drive 2½–3 inch wood screws directly into the studs. Check level once more as you tighten the screws.
Repeat this process for any additional support cleats under planned shelves, especially for deeper or heavier shelves. A simple pattern works well: a main bench-height cleat, plus one or two higher cleats to support vertical side panels.
If your floor is out of level, don’t fight it with angled cuts yet. Keep your cleats level (using the level, not the floor), then plan to use shims under the bench front later to match your level cleat.
At this stage, you should have solid, horizontal cleats firmly attached to studs wherever the back of your bench and key shelves will sit. Push on them with some force; they shouldn’t move. This backing is what allows your built-in to feel sturdy and permanent.
Build a Basic Bench and Shelf Frame with Off-the-Shelf Panels
You don’t need complex joinery or custom cabinets. A clean, built-in look is achievable with simple rectangles, pocket screws (if you have a jig), or just wood screws and wood glue.
For a straightforward design, use pre-primed 1x12 boards or plywood cut to width at the store. Big box home centers can make straight cuts for you; bring your measurements and a cut list so you leave with pieces ready to assemble.
A classic layout: a low bench with open cubbies below, framed by two vertical “towers” that hold shelves. Start with the bench:
- Cut the bench top to your planned width and depth (for example, 60 inches wide by 16 inches deep).
- Cut side panels and any vertical dividers for cubbies from the same material.
- Dry-fit pieces on the floor against the cleat: top resting on the cleat, sides standing at each end, and dividers spaced evenly.
Attach the sides and dividers to the bench top from above with wood screws and construction adhesive or wood glue. Pre-drill holes to avoid splitting, and countersink the screw heads slightly so they can be filled later. The back edge of the bench top should rest on your cleat; the front can be supported by the side panels and dividers.
Check for level across the bench. If one side is low because of an uneven floor, slide thin shims under the side panel until the top reads level. Once it’s level, you can trim any visible shim ends later with a utility knife.
For the side “towers,” cut two tall vertical panels and position them at the ends of the bench, extending up the wall to your desired height. Secure each panel to the bench with screws from below and into the wall cleats with screws through the panel into the cleats. Again, pre-drill and check for plumb with a level.
Add fixed shelves between the towers using the same process: shelf rests on small side cleats or pocket screws, then is fastened into the side panels. Keep shelf spacing consistent by using a scrap block as a spacer when you install each shelf.
By now, you should have a simple but solid structure: a bench at the bottom, vertical sides on each end, and one or more shelves above. The proportions should match what you taped out earlier.
Finish Like a Pro: Fill, Sand, Caulk, and Paint for a Built-In Look
The difference between “DIY project” and “built-in feature” is often in the finish work. Taking your time here pays off visually.
Start by filling all visible screw holes with wood filler or spackle designed for trim. Use a putty knife and overfill slightly; filler shrinks as it dries. Once dry, sand those spots smooth with fine-grit sandpaper (120–220 grit) until the surface feels even with the surrounding wood.
Lightly sand any rough edges or surfaces, then vacuum or wipe everything down with a damp cloth to remove dust. Dust left behind will ruin your paint finish.
Next, run a thin bead of paintable caulk along every seam where wood meets the wall and where boards meet each other (for example, along the side panels, bench top edges, and shelf joints). Smooth the caulk with a damp finger or caulk tool. Caulking hides small gaps and makes the unit look like it was built with the house, not just set against the wall.
Prime any raw wood or bare patches with a quality primer. If you used pre-primed trim or boards, you can spot-prime filled areas. Primer helps paint adhere and gives a more even color, especially on end grain and patched areas.
Choose a durable, scrubbable paint in satin or semi-gloss for the built-in itself. Many homeowners match their trim color for a cohesive look, but using a slightly deeper tone than the walls can also make the built-in stand out just enough. Use a brush for edges and seams and a small roller for larger flat surfaces to minimize brush marks.
Let the first coat dry, lightly sand any drips or rough spots, then apply a second coat for even coverage. Once fully dry, carefully score along any painter’s tape with a utility knife before removing it to avoid peeling the fresh paint.
After the paint cures, style your new built-in: baskets in cubbies, books on shelves, a cushion on the bench, a hook rail above if you need hanging storage. Because you built it onto studs and cleats, you can confidently load it with real, everyday items—not just a few lightweight decorations.
Conclusion
Upgrading a plain room with simple built-ins is less about fancy carpentry and more about good planning, solid fastening, and careful finishing. By mapping out your layout, prepping your wall, installing sturdy cleats, and building clean, simple frames, you can create storage and seating that feels tailored to your space. The final caulking and paint tie everything together so it looks like it’s always been there. Take it one step at a time, measure twice before you cut, and you can transform a blank wall into one of the most useful features in your home—over a focused weekend.
Sources
- [U.S. Department of Energy – Energy Saver: Home Design](https://www.energy.gov/energysaver/home-design) – Background on how built-in features can influence room function and layout considerations
- [Family Handyman – How to Build a Window Bench Seat](https://www.familyhandyman.com/project/how-to-build-a-window-bench-seat/) – Practical reference for basic bench construction, framing, and fastening methods
- [This Old House – How to Build Built-In Bookcases](https://www.thisoldhouse.com/cabinets/21018057/how-to-build-built-in-bookcases) – Examples of built-in planning, support cleats, and finishing techniques
- [Lowe’s – How to Use a Stud Finder](https://www.lowes.com/n/how-to/use-a-stud-finder) – Guidance on safely locating studs and avoiding utilities in walls
- [Sherwin-Williams – Tips for Caulking and Filling Gaps](https://www.sherwin-williams.com/en-us/homeowners/how-to/caulking-gaps) – Detailed advice on caulking seams for a professional, built-in appearance
Key Takeaway
The most important thing to remember from this article is that this information can change how you think about DIY Projects.


