A fresh coat of paint can make a room feel new, but if your walls are dented, cracked, or uneven, that new color will only highlight every flaw. Before you pick a paint swatch, it pays to get the surface right. This step-by-step guide walks you through a practical, DIY-friendly wall tune-up so your next paint job looks clean and professional—without hiring a contractor.
Get to Know Your Walls Before You Grab a Roller
Before you patch anything, take a slow walk around the room and really study the walls. You’re looking for more than just obvious nail holes.
Stand back and glance along the surface at a sharp angle; this side lighting reveals ripples, raised tape seams, nail pops, and hairline cracks you might miss head‑on. Run your hand lightly over suspicious areas—high spots, rough texture, or soft, crumbly sections need extra attention. Note where trim meets the wall; gaps or cracking caulk here will show up after painting. If you see yellow or brown stains, that often signals water issues; you should track down and fix the source before you paint. Mark trouble spots with painter’s tape or a pencil so you can find them easily when you start repairs.
Step 1: Make the Room “Renovation Ready”
A little prep upfront makes everything else easier and cleaner.
Start by clearing as much furniture as possible out of the room. Move anything you can’t remove to the center and cover it with plastic or old sheets. Take artwork, mirrors, and shelves off the walls, and remove outlet and switch covers—drop them in a labeled bag so you don’t lose screws. Lay down a drop cloth or rosin paper along the baseboards to catch dust and drips.
Next, clean the walls. Dust them with a microfiber duster, then remove grime in high-contact areas (around light switches, door frames, and near kids’ zones) with a bucket of warm water and a small amount of mild detergent or a degreaser. Rinse lightly with clean water and let everything dry completely. Turn off power at the breaker before working around open electrical boxes; test with a non-contact voltage tester if you have one. Good prep is what separates a quick paint job from a durable, long-lasting finish.
Step 2: Fix Dings, Holes, and Cracks the Right Way
Wall damage ranges from pinholes to fist‑sized gaps, and the repair method matters if you want a seamless result.
For tiny nail and screw holes, use a lightweight spackle. Press it into the hole with a putty knife at a slight angle, then scrape off excess so the patch is just barely proud of the wall. Let it dry, then sand flat. For larger holes (bigger than a dime but smaller than a few inches), use a patch kit: it usually includes a self-adhesive mesh patch and a joint compound. Center the mesh over the hole, press firmly, then spread joint compound over it in thin, even layers, feathering the edges out 2–3 inches beyond the patch. Allow each layer to dry before adding the next to avoid cracking.
Cracks along seams or inside corners often come from movement in the framing. For these, use joint compound and, if needed, paper or fiberglass mesh tape. Widen hairline cracks slightly with a utility knife to create a “V” shape so the compound has something to grip, then fill and smooth. At trim and along where the wall meets the ceiling (if there’s a visible gap), use a paintable acrylic latex caulk, applied in a thin bead and smoothed with a damp finger or caulk tool. The goal is to remove sudden transitions so your eye doesn’t catch them when the wall is painted.
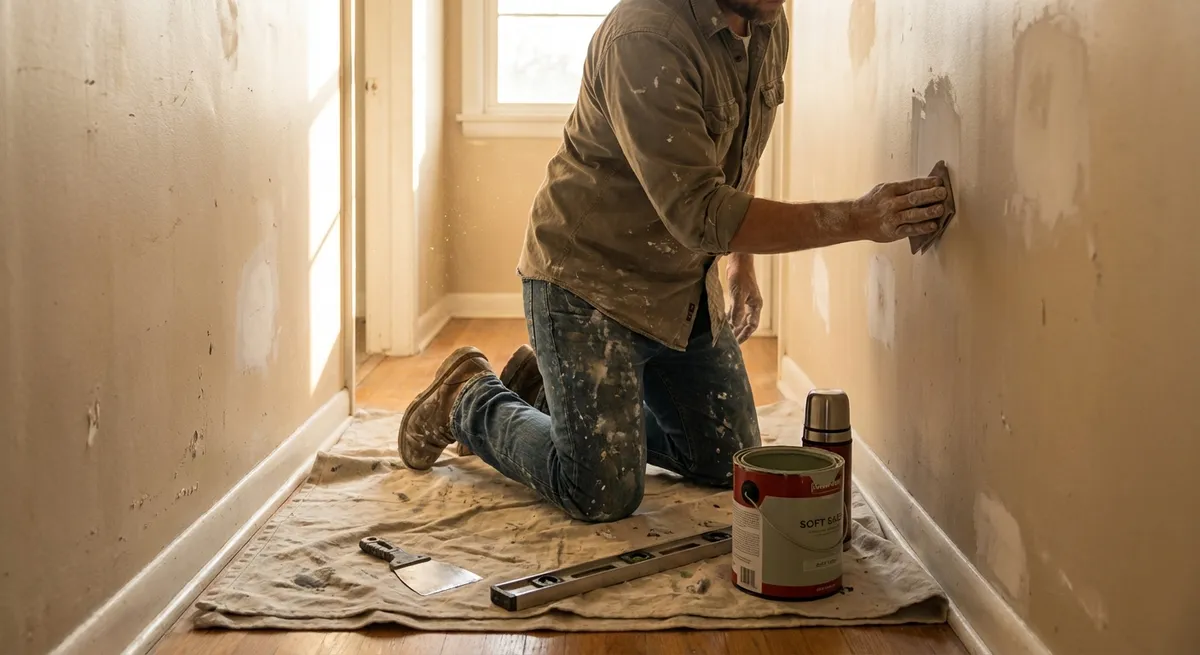
Step 3: Sand and Smooth Without Destroying Your Drywall
Sanding is where most DIYers make or break the finish. Too aggressive and you’ll gouge paper; too timid and your patches will flash through paint.
Once all repairs are completely dry, sand patches with a fine to medium‑fine grit (120–180) sanding sponge or sanding block. Work in light, circular motions, blending patch edges into the surrounding wall. You’re not trying to flatten the entire wall—just smooth transitions so you can’t feel where the patch begins or ends when you run your hand over it. For bigger areas or multiple patches, a sanding pole helps you reach higher zones and keep things even.
Avoid over‑sanding to the point where you expose the brown layer under the drywall paper—that area will absorb paint differently and may need sealing with a stain‑blocking or shellac‑based primer. Wear a dust mask or respirator and safety glasses, especially in older homes where underlying materials could be questionable. When you’re done, vacuum the dust from walls, baseboards, and floors, then wipe the walls with a barely damp microfiber cloth to remove remaining fine dust. A clean, dull, even surface is exactly what you’re aiming for before any primer or paint goes on.
Step 4: Prime for a Consistent, Long-Lasting Finish
Primer is not just “extra paint.” It seals repairs, evens out porosity, and helps paint adhere and look uniform.
Start by spot-priming all patched and sanded areas with a quality drywall or multi-surface primer. This prevents patches from flashing (showing up as dull or shiny spots under your topcoat). If you’ve repaired many areas, are covering a high-contrast color, or dealing with stains or smoke, plan on priming the entire wall. Use a brush to cut in around corners, trim, and outlets, then roll the field of the wall with a 3/8"–1/2" nap roller, depending on texture.
For water stains, crayon marks, or nicotine, use a stain-blocking primer (often shellac- or oil-based) directly over the problem area before general priming; otherwise, the stain can bleed through fresh paint. Let primer dry fully according to the manufacturer’s instructions—rushing this step can lead to peeling or uneven sheen later. Once dry, lightly sand any rough spots or raised fibers with a fine (220 grit) sanding sponge, then wipe away dust. Your walls should now look consistently dull, with no visible edges where you patched.
Step 5: Paint Like a Pro—Order, Technique, and Clean Edges
With the wall itself fixed and primed, your paint will finally have a fair chance to look good.
Start by cutting in along the ceiling, corners, and trim using an angled sash brush. Load your brush about a third to halfway up the bristles, tap off excess, and work in smooth strokes, slightly overlapping onto the area you’ll roll. Avoid overworking; once the paint starts to tack up, leave it alone. If you’re worried about getting a clean line at the ceiling or trim, use a high-quality painter’s tape rated for delicate surfaces and press the edge down firmly with a plastic putty knife for a crisp seal.
Next, roll the main sections of the wall in manageable areas about 3' x 3'. Apply paint in a “W” or “M” pattern, then fill in without pressing too hard—let the roller do the work. Keep a wet edge by overlapping slightly into the last section you painted, which reduces lap marks. For most wall colors, two coats provide better coverage and durability than one heavy coat; allow proper dry time between coats per the paint label.
Pull painter’s tape while the final coat is still slightly tacky—not fully dry—to avoid peeling. Inspect your work after everything dries in both natural and artificial light; touch up any missed spots with a small brush. When you’re satisfied, reinstall outlet covers, rehang decor, and remove floor protection. You’ve effectively given your room a renovation‑grade reset with nothing more than careful surface prep and well-applied paint.
Conclusion
A “new” room doesn’t always require new floors, windows, or a full gut. By methodically repairing, smoothing, priming, and painting your walls, you can transform how a space looks and feels in one focused weekend. The key is treating the wall surface like a project in its own right—not just something you rush past on the way to color. If you follow these steps and take your time with prep, your next paint job will go on easier, look sharper, and stay looking good longer.
Sources
- [U.S. Department of Housing and Urban Development – Healthy Homes: Walls and Ceilings](https://www.hud.gov/program_offices/healthy_homes/hhi) - General guidance on maintaining safe, sound interior surfaces
- [Benjamin Moore – How to Repair Drywall](https://www.benjaminmoore.com/en-us/interior-exterior-paints-stains/how-to-advice/interior-how-to-advice/how-to-repair-drywall) - Manufacturer tips on patching and preparing drywall before painting
- [Sherwin-Williams – The Ultimate Guide to Prep Before Painting](https://www.sherwin-williams.com/en-us/homeowners/how-to/paint-and-stain-prep) - Detailed overview of cleaning, sanding, and priming for best paint performance
- [Behr – How to Prime Walls](https://www.behr.com/consumer/how-to/priming) - Practical advice on when and how to use primer on interior walls
- [Family Handyman – Fixing Drywall Problem Areas](https://www.familyhandyman.com/project/fixing-drywall-problem-areas/) - Step-by-step examples of common wall repairs DIYers encounter
Key Takeaway
The most important thing to remember from this article is that this information can change how you think about Renovation.


