A single wall can completely change how a room feels—without tearing the whole place apart or draining your budget. An accent wall is one of the most satisfying DIY projects you can tackle in a weekend: it’s visible, practical, and instantly upgrades your space. This guide walks you through five different ways to create a standout wall, from simple paint tricks to renter‑friendly options, with clear steps and practical tips for getting it done right.
Plan Your Accent Wall Like a Pro
Before you pick up a brush or drill, a bit of planning will save you time and rework.
Start by choosing the right wall. Usually, this is the first wall you see when you walk into the room or the one that naturally frames a key feature—behind the bed, sofa, dining table, or TV. Avoid walls with lots of doors or windows; too many breaks can ruin the effect.
Think about the room’s light. Dark colors or busy patterns can look dramatic in bright rooms but may feel cave‑like in dim spaces. In small or low‑light rooms, consider mid‑tones, lighter colors, or textures instead of very dark paint.
Measure your wall and write the numbers down: width, height, and the location of outlets, switches, and vents. These measurements will guide you on how much paint, wood, or wallpaper you need, and whether you’ll have to cut around anything.
Decide what you want the accent wall to do: add color, add texture, hide minor wall imperfections, or act as a backdrop for shelves, art, or a TV. This helps narrow the project type.
Finally, set a realistic timeline. Most of these projects can be done over a weekend, but factor in drying times and cleanup. Plan to live with some disruption—move furniture, protect floors, and clear the area before you start.
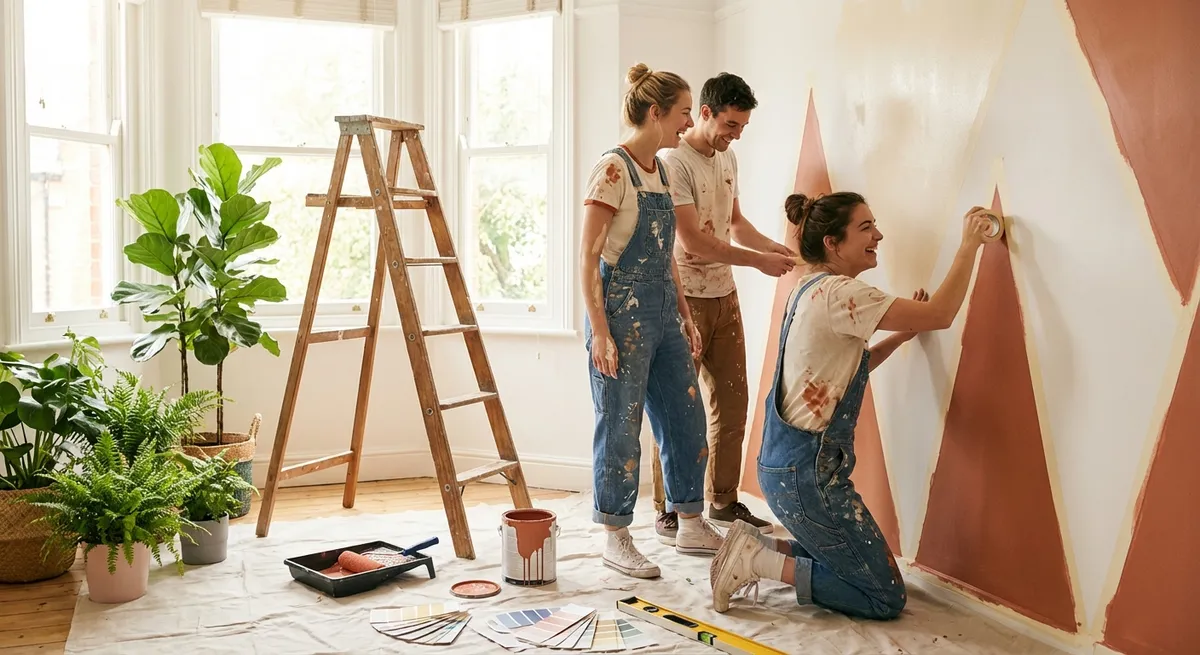
Project 1: Painted Accent Wall With Clean, Professional Edges
A painted accent wall is the fastest, most budget‑friendly upgrade—and where most DIYers start.
Step 1 – Choose the right paint and sheen
Pick a color that complements, not clashes with, the rest of the room. If your walls are warm (creams, beiges), stay in the warm family; if they’re cool (grays, blues), stick with cool tones. For living areas and bedrooms, an eggshell or matte finish hides imperfections better than high‑gloss. In high‑traffic rooms (hallways, kids’ rooms), consider satin for easier cleaning.
Step 2 – Prep the wall and surrounding area
Move furniture away from the wall and cover the floor with a drop cloth. Wipe the wall with a damp cloth to remove dust and let it dry. If there are nail holes or dings, fill them with lightweight spackle, let dry, and sand smooth with fine‑grit sandpaper. Remove outlet and switch covers; label any screws in a small container so you don’t lose them.
Step 3 – Tape for sharp lines
Use quality painter’s tape along the ceiling, baseboards, adjacent walls, and around windows/doors. Press the edge of the tape firmly with a putty knife or your fingernail to prevent bleeding. If your existing walls are a different color, you can “seal” the tape edge by brushing a thin line of the existing wall color along the tape and letting it dry before the new color. This helps get razor‑sharp edges.
Step 4 – Prime if needed, then paint in the right order
If you’re going from dark to light or using a bold, saturated color, apply a primer first; it will reduce the number of paint coats needed and improve coverage. Start by “cutting in” with a brush along the taped edges, corners, and around outlets. Then use a roller for the main area, working in vertical sections from top to bottom with overlapping passes. Avoid pressing too hard on the roller—let the paint do the work.
Step 5 – Remove tape at the right time
Apply a second coat once the first coat is dry to the touch, following manufacturer instructions. While the final coat is still slightly tacky—not fully cured—gently remove the tape at a 45‑degree angle. Waiting until it’s fully dry can cause peeling. Reinstall outlet covers once everything is dry, and pull your furniture back into place.
Project 2: Peel‑and‑Stick Wallpaper for a Patterned Feature (Renter‑Friendly)
Peel‑and‑stick wallpaper gives you big visual impact with less commitment than traditional wallpaper or permanent paint.
Step 1 – Choose the right product and pattern
Look for peel‑and‑stick wallpaper specifically labeled removable and safe for painted drywall. Large‑scale patterns are more forgiving than tiny detailed ones because slight alignment issues are less noticeable. If your wall is textured, read the manufacturer’s guidelines; some products don’t adhere well to heavy texture.
Step 2 – Prep the wall and create a straight reference line
Clean the wall with a mild detergent and water, then let it dry completely. Turn off power to outlets/switches on that wall at the breaker for safety. Use a level and a pencil to draw a perfectly straight vertical line where your first panel will go, usually starting near the center of the wall or at a key visual point. Walls and ceilings are often not perfectly straight, so don’t rely on them alone.
Step 3 – Apply the first panel carefully
Cut your first strip a few inches longer than the wall height. Peel back about 6–8 inches of the backing and align the top of the wallpaper with the ceiling, matching your level line on one side. Press from the center outward as you go down, smoothing air bubbles with a plastic smoothing tool or clean cloth. Peel more backing as you move downward, keeping the panel aligned with your guide line.
Step 4 – Match seams and trim edges
For the next strip, line up the pattern carefully with the previous piece before pressing it down. Slightly overlap or butt the seams according to the manufacturer’s instructions. Use a sharp utility knife and a straightedge to trim excess wallpaper along the ceiling and baseboards; replace the blade often for clean cuts.
Step 5 – Finish around outlets and switches
Once the wallpaper is in place, gently press it over outlets/switches, then cut a small “X” shape over the opening with your utility knife. Trim the excess so the cover plate will sit flat. Reinstall covers and turn the power back on. Step back and inspect seams; smooth any small bubbles by lifting and reapplying where needed (don’t force large bubbles—peel and reset instead).
Project 3: Board‑and‑Batten Accent Wall for Depth and Texture
Board‑and‑batten adds architectural interest using simple wood strips, paint, and basic tools.
Step 1 – Plan your layout and materials
Measure wall width and height, then sketch a simple layout with vertical battens spaced evenly (commonly 12–20 inches apart). Use a calculator or graph paper to figure spacing so edge battens align consistently with corners or trim. Decide on batten width (1x2 or 1x3 common) and whether you’ll add a horizontal top rail. Buy pre‑primed MDF or pine boards, construction adhesive, wood filler, caulk, and paint.
Step 2 – Mark the wall and cut battens
Use a stud finder to locate studs and mark them lightly with pencil. Transfer your layout to the wall, marking where each batten will go. Cut battens to length with a miter saw or handsaw and miter box. Dry‑fit a few pieces to confirm spacing looks right visually; adjust before you commit.
Step 3 – Attach top and side trim first
If you’re adding a horizontal top piece, install it first using construction adhesive and brad nails (ideally into studs). Do the same with any vertical edge trim that frames the wall. Use a level as you go to ensure everything is straight; correcting now is easier than fixing crooked battens later.
Step 4 – Install vertical battens
Working one batten at a time, apply a thin bead of construction adhesive on the back and press it into place following your layout marks. Secure with brad nails—hit studs where possible, but shorter nails into drywall plus adhesive is often sufficient for decorative trim. Check each batten with a level before nailing all the way down.
Step 5 – Fill, caulk, and paint for a seamless look
Fill nail holes and any wood seams with wood filler; let dry and sand smooth. Caulk along the edges where battens meet the wall and at joints between boards to hide gaps. Once dry, prime any bare wood or filler, then paint the entire wall—battens and background—in one color for a built‑in look. A semi‑matte or eggshell finish works well for most rooms.
Project 4: DIY Wood Slat Wall for a Modern, Warm Look
A vertical or horizontal wood slat wall adds warmth and a modern feel, and doubles as a backdrop for a TV or artwork.
Step 1 – Choose wood type and design direction
Common choices are pine, poplar, or oak in 1x2 or 1x3 sizes, or ripped plywood strips for a budget option. Decide if your slats will run vertically or horizontally—vertical makes ceilings feel higher, horizontal can make narrow rooms feel wider. Plan your spacing (e.g., ½–¾ inch between slats) and whether you want the wall behind the slats painted dark for contrast.
Step 2 – Prep and pre‑finish the slats
Sand your boards to remove splinters and soften edges. If you’re staining, do it before installation; it’s much easier and cleaner than staining on the wall. Apply stain and a clear protective finish (like polyurethane) according to the product instructions. Let everything dry fully.
Step 3 – Paint or prep the wall behind
If you want contrast, paint the wall behind the slats a dark color (e.g., black, charcoal, dark navy). Small gaps between slats will show the wall color, so painting now creates a more intentional look. Let the paint dry completely.
Step 4 – Snap a reference line and start installing
Find and mark studs. For vertical slats, use a level to draw a plumb line from ceiling to floor for your first slat. Attach that first slat using brad nails or trim screws into studs. Use consistent spacers (scrap wood or tile spacers) between slats to maintain even gaps. Check for level every few slats; small corrections early prevent visible drifting later.
Step 5 – Address outlets, edges, and finishing touches
Where a slat hits an outlet or switch, measure and cut carefully around the box, or plan your layout so slats avoid them. At the ends of the wall, you can either cut slats flush or wrap them slightly onto the adjacent wall for a “wrapped” look. Once everything is installed, fill nail holes with color‑matched wood filler if desired, lightly sand spots, and touch up with stain or finish as needed.
Project 5: Simple Floating Shelf Accent Wall for Storage and Style
Floating shelves turn a plain wall into functional display space—perfect for living rooms, offices, and bedrooms.
Step 1 – Decide layout and shelf size
Measure your wall and sketch where you want shelves to go: staggered, symmetrical rows, or stacked above a desk or console. Think about how you’ll use them (books are heavy; décor is lighter) to determine depth and length. Typical shelf depth is 8–12 inches. Choose ready‑made floating shelves rated for the load you need, or build your own if you’re comfortable.
Step 2 – Find studs and map mounting points
Use a stud finder to locate studs and mark their centers with painter’s tape. Most floating shelves need at least one, ideally two, studs for strong support. Hold the shelf bracket against the wall where you want it and mark the screw hole locations on the tape. Use a level to ensure the bracket is perfectly straight before marking.
Step 3 – Drill pilot holes and install brackets
Drill pilot holes at your marked locations—into studs where possible. For holes not hitting studs, use appropriate wall anchors rated for the expected weight (toggle bolts or heavy‑duty anchors). Secure the brackets to the wall, tightening screws firmly but not so hard that they strip.
Step 4 – Attach shelves and test strength
Slide or screw the shelves onto the installed brackets according to the manufacturer’s instructions. Test each shelf by applying gradual pressure with your hand, then placing a few lighter items before loading heavy objects like books. If there’s noticeable sag or wobble, remove the shelf, recheck your anchors and studs, and adjust before proceeding.
Step 5 – Style the wall without overloading it
Spread weight evenly across the wall instead of clustering heavy items in one spot. Mix books with lighter décor: plants, frames, and small objects. Leave some negative space so the wall doesn’t feel crowded. If this wall is also an accent color or has texture (like board‑and‑batten), let some areas remain visible to keep the design balanced.
Conclusion
An accent wall is a high‑impact DIY project that doesn’t require a full renovation or pro‑level skills. With some planning and a weekend’s effort, you can change the feel of a room using paint, pattern, texture, or added storage. Start with the approach that matches your skill level—simple paint or peel‑and‑stick wallpaper—and work up to trim work, slat walls, or floating shelves as your confidence grows. Focus on careful prep, accurate measuring, and patience with each step, and your wall will look like it belongs in a professionally designed space.
Sources
- [Sherwin-Williams: How to Paint a Room](https://www.sherwin-williams.com/en-us/homeowners/how-to/painting-a-room) – Covers paint selection, prep, and application techniques useful for accent walls
- [Benjamin Moore: Accent Walls – Tips and Color Ideas](https://www.benjaminmoore.com/en-us/interior-exterior-paints-stains/how-to-advice/color-basics/accent-walls) – Guidance on choosing colors and placement for accent walls
- [This Old House: How to Install a Board-and-Batten Wall](https://www.thisoldhouse.com/walls/21015215/how-to-install-a-board-and-batten-wall) – Detailed walkthrough of planning and installing board‑and‑batten trim
- [The Spruce: How to Hang Floating Shelves](https://www.thespruce.com/how-to-hang-floating-shelves-4589312) – Practical instructions on selecting hardware, finding studs, and safe installation
- [U.S. Consumer Product Safety Commission – Tip-Over and Anchor It!](https://www.cpsc.gov/AnchorIt) – Safety guidance for securing furniture and shelving to prevent tip‑over accidents
Key Takeaway
The most important thing to remember from this article is that this information can change how you think about DIY Projects.


