Small, focused projects can make your home look better, work better, and feel better—without needing a full renovation. The key is choosing upgrades you can realistically finish in a weekend and doing them the right way. This guide walks you through five practical DIY projects, each with clear, step-by-step instructions and pro-level tips so you can get results you’re proud of.
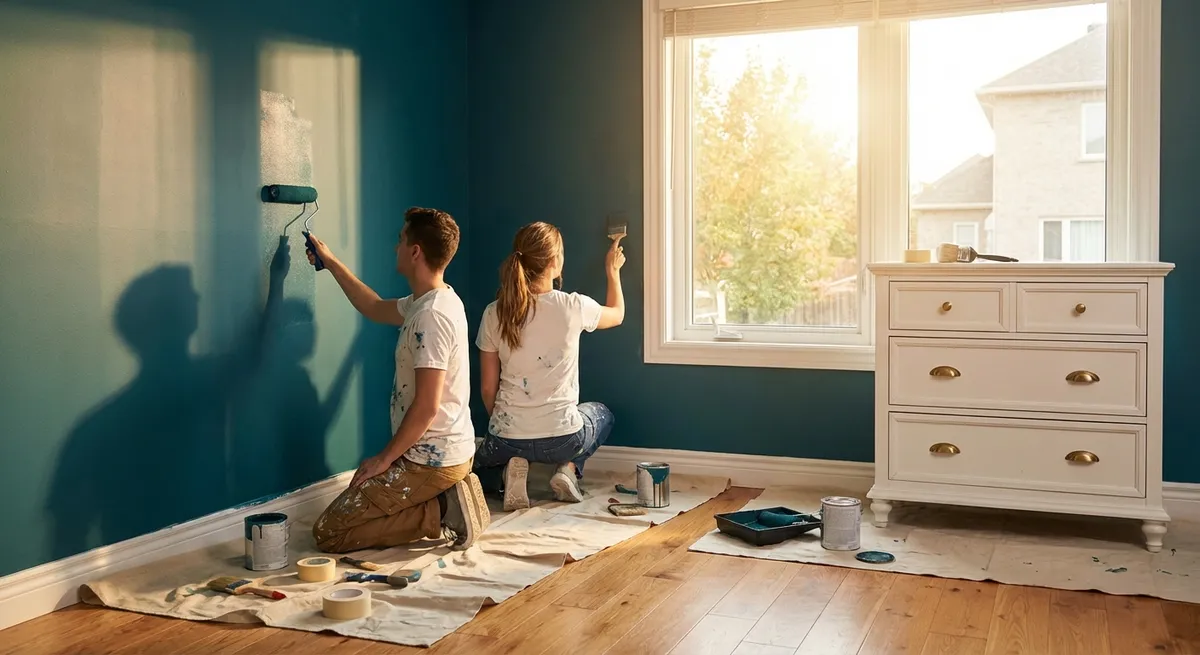
Project 1: Refresh a Room With a Clean Paint Job
A well-painted room is one of the fastest ways to make your home feel new. The difference between “obviously DIY” and “did you hire someone?” is all in the prep and sequence.
Step-by-step
Plan your color and finish
Choose a quality interior paint. Use eggshell or satin for living areas, satin or semi-gloss for kitchens and baths. Buy a sample first and paint a 2x2 ft area to see it in different lighting before committing.
Prep the room and surfaces
Move furniture away from walls, remove outlet and switch covers, and lay down drop cloths. Clean walls with a mild detergent solution, especially in kitchens and high-traffic areas. Fill nail holes and small dents with spackle, let dry, and sand smooth.
Protect edges and cut in
Tape baseboards, windows, and trim with painter’s tape if you’re not confident with a brush. Use an angled brush to “cut in” a 2–3 inch border around the ceiling, corners, door frames, and trim. Cutting in first lets your roller blend into those lines.
Roll the walls the right way
Pour paint into a tray, load the roller evenly, and roll in a “W” pattern on the wall. Fill in without pressing too hard—let the roller do the work. Work in sections and maintain a wet edge so you don’t get lap marks. Two thin coats are better than one thick one.
Finish and clean up
Remove tape before the paint fully cures (when it’s dry to the touch but not rock-hard) to reduce peeling. Reinstall outlet covers and move furniture back carefully. Label leftover paint with the room name and date for future touch-ups.
Helpful tip: Spend more on brushes and rollers than on fancy tools. A quality 2–2.5" angled brush and a low-lint roller sleeve make everything easier.
Project 2: Install a Backsplash Without Specialized Tools
A simple backsplash upgrade instantly modernizes a kitchen or bathroom and protects your walls. Peel-and-stick or adhesive-mat tiles are beginner-friendly and don’t require a tile saw for basic layouts.
Step-by-step
Measure and choose your material
Measure the length and height of your backsplash area (usually between countertop and upper cabinets). Add 10–15% extra for cuts and mistakes. Choose peel-and-stick tiles or tile panels that are rated for kitchens/baths and heat-resistant near stoves.
Prepare the wall surface
Clean the wall with degreaser and let dry completely; any grease or dust will prevent adhesion. If the wall is glossy, lightly sand and wipe clean so the tiles stick better. Remove outlet covers and switch plates.
Plan your layout before sticking
Dry-fit a row of tiles along the countertop to see where cuts will fall. Ideally, keep full tiles at eye level and place cut tiles in less noticeable areas (like under cabinets or near the ends). Mark a level horizontal line as your guide.
Apply tiles carefully and consistently
Start at the most visible corner or focal point. Peel and stick the first tile along your level line, pressing firmly from the center outward to remove air bubbles. Continue row by row, checking level often. Use a utility knife or tile snips (if recommended by manufacturer) to cut pieces for outlets and edges.
Finish edges and reinstall fixtures
Use matching edge trim or caulk to clean up exposed edges if needed. Around the countertop and sink, run a thin bead of paintable or clear kitchen/bath caulk to seal the gap. Reinstall outlet covers, and double-check that none of the tiles block switches or outlets.
Helpful tip: If you’re nervous about alignment, lightly mark your tile grid in pencil on the wall before you start. It’s easier to erase lines than to pull off misaligned tiles.
Project 3: Swap Out a Basic Light Fixture for an Upgraded One
Upgrading a dated light fixture can change the whole feel of a room. If you can safely turn off a breaker and follow directions, this is a project most DIYers can handle.
Step-by-step
Turn off power and confirm it’s off
Flip the breaker that controls the light circuit, not just the wall switch. Use a non-contact voltage tester at the fixture wires to confirm power is truly off before touching anything.
Remove the old fixture
Take off the glass shade or cover and remove bulbs. Unscrew the mounting screws holding the fixture base to the ceiling box. Carefully pull the fixture down to expose the wires. Note which wires are connected (take a photo), then loosen wire nuts and detach the fixture.
Check the electrical box and prep the new fixture
Confirm the ceiling box is secure and rated to support your new fixture’s weight, especially for heavier or ceiling fan fixtures. Assemble the new fixture according to the manufacturer’s instructions, leaving the final glass or shades off until after mounting.
Make the wire connections
Typically, connect black to black (hot), white to white (neutral), and green or bare copper to the ground screw or ground wire in the box. Use wire nuts that properly fit the number and size of wires and gently tug to make sure connections are secure. Carefully tuck wires back into the box.
Mount, test, and finalize
Attach the new fixture to the mounting bracket and tighten screws until the base is snug and level. Install bulbs of the correct type and wattage. Turn the breaker back on and test the light. Once working, install any glass shades or trim and clean off fingerprints.
Helpful tip: If the wiring colors don’t match typical black/white/ground, or the box feels loose, pause and consult a licensed electrician. Safety comes first.
Project 4: Add Simple Storage With a Strong, Straight Floating Shelf
Floating shelves add storage and display space without taking up floor area. Doing them right means finding studs, using the correct anchors, and getting everything level.
Step-by-step
Choose location and shelf type
Decide what you’ll store: books, decor, pantry items, or bathroom supplies. This determines how strong the shelf needs to be. Buy shelves with a solid mounting bracket and clear weight rating, or use solid wood and heavy-duty brackets.
Find studs and mark layout
Use a stud finder to locate studs in the wall and mark their positions lightly with pencil. Plan your shelf so at least two screws can go into studs. Use a level to draw a straight line where the top or bottom of the shelf will sit.
Mark and pre-drill for mounting hardware
Hold the bracket or shelf against your level line and mark screw hole locations. For holes going into studs, pre-drill pilot holes slightly smaller than the screw diameter. For holes between studs, use weight-rated wall anchors appropriate for your wall type (drywall, plaster, masonry).
Install bracket and shelf
Install wall anchors first (if needed), then secure the main bracket with screws into studs or anchors. Check level again after tightening. Slide the shelf onto the bracket or attach it to the installed brackets according to the manufacturer’s instructions.
Load the shelf smartly
Start by placing heavier items near the studs or bracket supports and lighter decor pieces toward the ends. Don’t exceed the stated weight limit—if the shelf flexes or hardware creaks, remove items and reinforce.
Helpful tip: If you can’t reliably find studs, opt for visible, L-shaped metal brackets with multiple screws into quality anchors. They’re more forgiving and often stronger in real-world use.
Project 5: Seal Drafty Windows and Doors for Better Comfort
Air leaks around windows and doors waste energy and make rooms feel uncomfortable. Sealing them is inexpensive and can pay off quickly in comfort and lower bills.
Step-by-step
Identify problem areas
On a windy day, feel around window and door edges for drafts or use a lit incense stick and watch for smoke movement. Pay attention to bottom door gaps, window frames, and areas where different materials meet (trim-to-wall, frame-to-siding).
Choose the right sealing materials
Use adhesive-backed weatherstripping for door jambs and window sashes. Install a door sweep or draft stopper at the bottom of exterior doors. Use paintable latex caulk for gaps around interior trim and exterior-grade caulk for outside seams.
Prep surfaces for adhesion
Clean the area with mild soap and water or an appropriate cleaner, then let dry. Remove old, cracked caulk with a scraper or utility knife. For exterior work, make sure surfaces are dry and temperatures are within the product’s recommended range.
Install weatherstripping and sweeps
Cut weatherstripping to length with scissors, then stick it along the sides and top of door frames or window sashes where they close. Install a door sweep at the bottom of the door so it lightly contacts the threshold without dragging. Open and close doors/windows a few times to confirm a good seal.
Caulk gaps and smooth the bead
Load the caulk gun, cut the tip at a 45° angle, and apply a steady bead into gaps around trim and frames. Smooth the bead with a damp finger or caulk tool before it skins over. Wipe excess with a damp cloth. Let it cure fully before painting, if needed.
Helpful tip: Focus first on the biggest leaks—often under exterior doors and at older single-pane windows. These spots usually give the best comfort improvement for the least effort.
Conclusion
You don’t need a full renovation—or a pro crew—to make your home look and feel better. By picking realistic projects and following a clear step-by-step process, you can upgrade rooms, add function, and improve comfort in just a weekend at a time. Start with one project, learn from it, and build your skills as you go. Each successful upgrade makes the next one easier—and your home more “fix ready” for whatever you want to tackle next.
Sources
- [U.S. Department of Energy – Air Sealing Your Home](https://www.energy.gov/energysaver/air-sealing-your-home) - Guidance on finding and sealing drafts for better efficiency and comfort
- [Energy Star – Windows, Doors and Skylights](https://www.energystar.gov/products/building_products/res_windows_doors_skylights) - Official recommendations on efficient windows and proper installation considerations
- [Benjamin Moore – How to Paint a Room](https://www.benjaminmoore.com/en-us/interior-exterior-paints-stains/how-to-advice-and-inspiration/interior-how-to-paint-a-room) - Professional painting tips, surface prep, and finish selection
- [Family Handyman – How to Install a Light Fixture](https://www.familyhandyman.com/project/how-to-install-a-light-fixture/) - Step-by-step light fixture replacement with safety notes and photos
- [This Old House – How to Install a Tile Backsplash](https://www.thisoldhouse.com/kitchens/21017662/how-to-install-a-tile-backsplash) - Detailed backsplash installation techniques and layout planning
Key Takeaway
The most important thing to remember from this article is that this information can change how you think about DIY Projects.


