If you’ve got a growing pile of tools but still feel disorganized, under-equipped, or slow on projects, the problem usually isn’t effort—it’s systems. A functional DIY setup isn’t about having every fancy gadget; it’s about having the right tools, stored in the right way, and ready when you need them. This guide walks through five practical, step-by-step processes to turn a random collection of tools into a reliable home workshop that makes projects smoother, safer, and faster.
Step 1: Map Your Projects Before You Buy Another Tool
Before rearranging shelves or buying new equipment, you need clarity on what you actually do (and want to do).
- List the last 5–10 projects you did (or tried to do): hanging shelves, fixing a leaky faucet, building a planter, patching drywall, etc.
- Write the next 5 projects you realistically want to do in the next 6–12 months: e.g., install a new faucet, build a workbench, paint a room, replace a light fixture.
- Under each project, list the tools you used or needed. Be honest about what you borrowed, improvised, or wished you had (e.g., stud finder, right-angle drill attachment, better level).
- Highlight overlap: if the same tool appears on multiple projects (cordless drill, utility knife, tape measure, orbital sander), that’s a core tool you should prioritize in budget and storage.
Separate tools into three groups:
- Core tools: used for most projects - Specialty tools: used rarely, for specific jobs - Wish list: tools that would have made recent jobs easier or safer
Decide what to buy, rent, or borrow:
- Buy: frequently used and safety-critical (e.g., drill, safety glasses, stud finder). - Rent: big, expensive, occasional (e.g., tile saw, demolition hammer). - Borrow: truly rare needs (e.g., pipe threading tool, drywall lift). 7. Set a realistic budget and timeline: instead of impulse-buying tools, plan purchases around upcoming projects. This way every new tool pays for itself quickly. 8. Document everything in a simple note or spreadsheet so future decisions aren’t guesswork—your tool setup becomes project-driven, not purchase-driven.
By mapping around real projects, you avoid owning five different gadgets you never touch while still lacking the one driver bit you need every weekend.
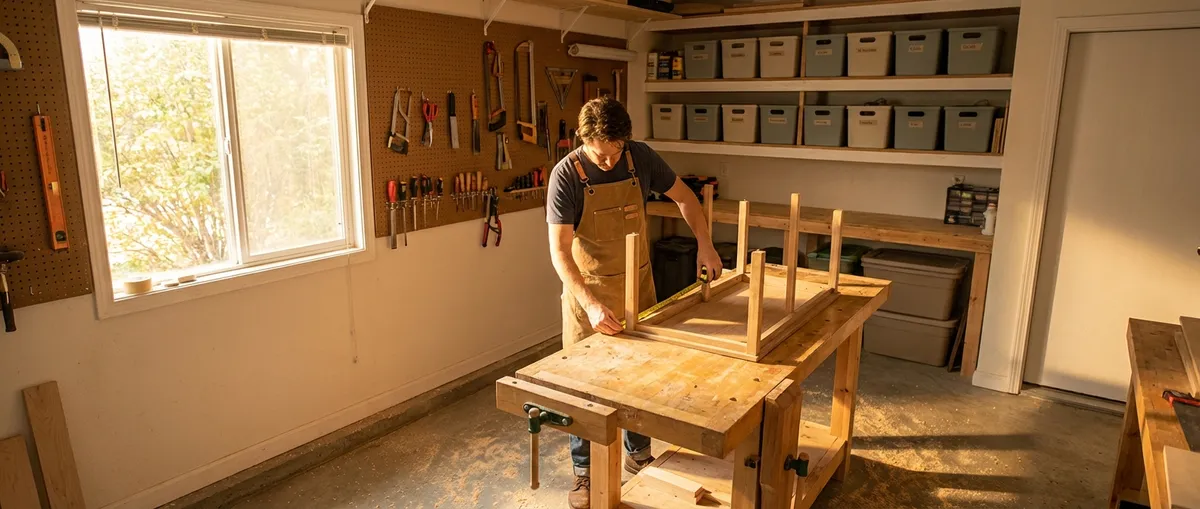
Step 2: Build a Logical Tool Layout Around How You Actually Work
A lot of home “workshops” are just random piles of tools. A functional setup puts tools where your hands and eyes expect them to be.
- Pick one main work zone: a garage wall, basement corner, or even a section of a spare room. This is your primary tool hub, not scattered drawers all over the house.
Define three functional areas:
- Prep & measurement: tape measures, pencils, levels, square, stud finder. - Cutting & shaping: saws, chisels, files, sanders, blades, bits. - Fastening & assembly: drills, drivers, wrenches, clamps, screws, nails.
Use vertical space first:
- Install a pegboard or slat wall if possible. - Hang the tools you grab most often at eye to chest height (tape measure, hammer, drill, screwdrivers, level). - Outline tools on the board or label hooks so every tool has a “home.”
Create a “grab-and-go” zone near the exit or door:
- Store your tool bag, cordless drill, small fastener kit, and basic hand tools in one place you can quickly grab for whole-house tasks.
Use drawers and bins intentionally:
- Top drawer: high-frequency small tools (utility knives, bits, pliers, pencils, small screwdrivers). - Middle: specialized tools (electrical tester, pipe wrench, stud finder attachments, sanding blocks). - Bottom: heavy or bulky tools (circular saw, router, impact driver). - Label each drawer and bin clearly: “Drill Bits,” “Painting Supplies,” “Plumbing,” etc.
Separate dirty from clean work:
- Dusty tools (saws, sanders, grinders) away from paint, finish, and adhesives. - If possible, position sanding and cutting areas near a door or window for ventilation.
Address power and lighting:
- Add a power strip with surge protection near your main bench. - Use bright, shadow-free LED lighting above the bench so you’re not working in your own shadow or mis-measuring.
Test your layout with one full project:
- Notice what you reached for that felt “too far” or what you kept misplacing. - Adjust until you can complete a typical small project with minimal walking and searching.
Your goal: you should be able to close your eyes, reach out, and know exactly where your main tools are. That’s when the layout is working.
Step 3: Create a Simple, Durable Tool Maintenance Routine
Tools don’t fail out of nowhere; they slowly degrade from neglect. A basic, repeatable routine keeps them safe, accurate, and ready.
- Designate one “maintenance day” each month (e.g., first Saturday morning). Put it on your calendar like any other appointment.
Start with cleaning, not fixing:
- Wipe down hand tools with a dry or slightly damp cloth to remove dust and grime. - For stubborn gunk, use a bit of mild detergent and water—dry thoroughly afterward. - For power tools, use a soft brush or compressed air (carefully) to remove dust from vents and moving parts.
Check cutting edges:
- Inspect utility blades, saw blades, drill bits, and chisels. - Replace disposable blades often—dull blades are more dangerous than sharp ones. - Sharpen or replace chisels and frequently used bits as needed.
Protect metal surfaces:
- Lightly oil exposed metal (wrenches, pliers, plane soles, chisel blades) with a non-detergent oil or tool oil to prevent rust. - Wipe off any excess so surfaces aren’t greasy.
Inspect cords, batteries, and chargers:
- Look for cracks, nicks, or fraying in cords; stop using damaged cords until repaired or replaced. - Check battery contacts for corrosion and wipe with a dry cloth if needed. - Rotate batteries—don’t leave one battery always in use and the others idle.
Test moving parts:
- Squeeze pliers, clamps, and triggers; open and close wrenches. - If movement is stiff, apply a small amount of lubricant (like a silicone spray or light machine oil) to joints and wipe off the excess.
Re-calibrate your measuring tools (as needed):
- Check your level against a known level surface, then flip it 180 degrees; the bubble should read the same both ways. - Inspect tape measures for kinks or a bent hook; replace if they don’t retract smoothly or measure correctly.
Finish with storage check:
- Put every tool back in its “home.” - Remove any tools that don’t belong in your main setup (duplicate, broken, never used). Decide to repair, donate, or recycle them.
A 30–45 minute monthly routine can easily add years to your tools and prevent mid-project breakdowns.
Step 4: Build a Safe, Practical Power Tool Setup
Power tools can make your work faster and cleaner—or create hazards if they’re poorly chosen or misused. A bit of upfront organization goes a long way.
Start with a small, essential power tool set:
- Cordless drill/driver - Orbital sander - Circular saw (or jigsaw if you’re tight on space and mostly cut smaller pieces) - Shop vacuum (for dust control and cleanup)
Standardize batteries if possible:
- Choose one major brand platform (DeWalt, Makita, Milwaukee, Ryobi, etc.) and try to keep most cordless tools on the same battery system. - This reduces chargers, simplifies storage, and keeps you working if one battery dies mid-project.
Create a dedicated charging station:
- Mount or place chargers on a wall shelf or bench area near an outlet. - Label charger locations so each one has a permanent spot. - Use a small bin or rack labeled “Charged” and “Needs Charging” for batteries.
Set safety as non-negotiable:
- Store safety gear (glasses, hearing protection, dust mask or respirator, work gloves) next to your power tools, not in another room. - Make it physically easier to grab safety gear than to start a tool without it.
Plan for dust and debris:
- Connect tools to your shop vac when possible (many sanders and saws have dust ports). - Sweep or vacuum after each work session—dust buildup isn’t just messy; it can affect tool cooling and create slip hazards.
Follow a consistent pre-use checklist for each power tool:
- Is the bit/blade sharp and secure? - Are all guards in place and working? - Is the workpiece clamped or held securely? - Are loose clothing and jewelry out of the way, and long hair tied back?
Store power tools in a way that protects cords, batteries, and alignment:
- Don’t hang tools by their cords. - Avoid stacking heavy tools directly on top of each other. - Keep them in cases or on shelves where they’re supported and accessible.
Review the manual for each new tool—even briefly:
- Confirm correct blade or bit types. - Check recommended safety gear. - Note any maintenance steps (brush replacement, lubrication points, etc.).
A focused, safe power tool setup doesn’t require a huge collection—it requires a clear system and consistent habits.
Step 5: Pack a Mobile DIY Kit So You’re Never “Half-Prepared”
Not every task happens near your main workbench. A well-thought-out mobile kit saves countless trips back and forth and helps you tackle quick fixes immediately.
Choose the right container:
- For small homes or apartments: a sturdy tool bag or medium toolbox with a handle. - For larger homes/garages: a rolling toolbox or stackable organizer that can be wheeled where needed.
Define what the kit is for:
- Aim for “whole-house fixes and small installs,” not full builds. - The kit should handle tasks like hanging shelves, tightening hinges, minor electrical swaps (if you’re comfortable and qualified), painting touch-ups, and quick patch jobs.
Stock core hand tools:
- Tape measure - 16–20 oz hammer - Combination screwdrivers (or a multi-bit driver) - Adjustable wrench - Utility knife with spare blades - Pliers (needle-nose + slip-joint or linesman) - Small level
Add fasteners and anchors in a compact organizer:
- Assorted wood screws (various lengths) - Wall anchors for drywall and masonry (with matching screws) - A few common nails - Picture-hanging hardware
Include basic marking and measuring gear:
- Pencils or a fine-tip marker - Small speed square - Painter’s tape (for marking and temporary holds)
Add simple specialty items that solve common headaches:
- Stud finder - Small tube of all-purpose construction adhesive - Tube(s) of common caulk (paintable latex and/or kitchen/bath silicone) - Electrical outlet tester (to confirm power is off and wiring is correct—if you do simple electrical work and understand safety basics)
Include minimal safety gear:
- Foldable or compact safety glasses - Lightweight work gloves - A small dust mask or disposable respirators
Create a “reset ritual” after each use:
- Before putting the kit away, return every tool to its spot. - Replace any used consumables (blades, screws, anchors, batteries). - Wipe down any dirty tools so the kit is always ready immediately.
When your mobile kit is dialed in, you can fix small problems on the spot instead of letting them pile up into weekend-sized headaches.
Conclusion
A useful DIY setup isn’t about building a magazine-worthy shop or owning every tool you see online. It’s about building systems: project-driven tool choices, a logical layout, simple maintenance, safe power tool use, and a mobile kit that keeps you ready anywhere in the house.
If you treat your tools and equipment like a working system instead of a random collection, projects get faster, safer, and far less frustrating. Start with one step—mapping your projects or setting up a basic layout—and refine from there. Every small improvement in how you manage your tools pays off the next time you pick them up.
Sources
- [OSHA – Hand and Power Tools](https://www.osha.gov/hand-power-tools) - Official safety guidelines and best practices for using and maintaining hand and power tools.
- [Family Handyman – Essential Tools for the Homeowner](https://www.familyhandyman.com/list/essential-tools-for-homeowners/) - Practical breakdown of core tools most homeowners will use regularly.
- [This Old House – How to Set Up a Home Workshop](https://www.thisoldhouse.com/garages/21015084/how-to-set-up-a-home-workshop) - Covers workshop layout ideas, storage, and basic equipment planning.
- [Popular Mechanics – How to Maintain Your Power Tools](https://www.popularmechanics.com/home/tools/how-to/g656/how-to-maintain-your-power-tools/) - Detailed tips on cleaning, lubricating, and caring for power tools.
- [University of California ANR – Safe Use of Hand and Power Tools](https://safety.ucanr.edu/files/1334.pdf) - Educational PDF outlining safe operation, inspection, and maintenance procedures for common tools.
Key Takeaway
The most important thing to remember from this article is that this information can change how you think about Tools & Equipment.


