Most people wait until something breaks to deal with it. By then, the repair is stressful, more expensive, and usually messier than it needed to be. A better approach: knock out a few quiet, low-pressure fixes while everything still mostly works. These “calm-weather” repairs don’t require a full workshop or contractor skills—just basic tools, a little planning, and the willingness to follow clear steps.
This guide walks you through five practical, step-by-step repairs that prevent bigger problems later. Each one is realistic for DIYers, saves money over calling a pro, and builds skills you’ll use again and again.
Step 1: Fix a Slowly Dripping Faucet Before It Wastes Real Money
A slow drip feels harmless, but it can waste hundreds of gallons of water a year and add up on your bill. Most common drips come from worn-out internal parts, not a failing faucet.
What you’ll need
- Adjustable wrench
- Phillips and flathead screwdrivers
- Replacement cartridge or washers/O-rings (match to your faucet brand/model)
- Plumber’s grease (optional but helpful)
- Towel or small bucket
How to do it
- Shut off the water and plug the drain.
Look under the sink for the shutoff valves (hot and cold). Turn them clockwise until they stop. Turn the faucet on to release pressure, then close it. Put a sink plug or rag in the drain so you don’t lose small parts.
- Remove the handle and trim.
Look for a small cap on the handle hiding a screw (often under a red/blue indicator). Pop it off with a small flathead screwdriver. Unscrew the handle screw, then pull the handle off. Remove any decorative rings or sleeves underneath.
- Access and remove the cartridge or stem.
Under the trim, you’ll see either a cartridge (for single-handle faucets) or a stem (for two-handle faucets). There may be a retaining nut or clip. Use your adjustable wrench or pliers to carefully loosen and remove it. Pull the cartridge/stem straight out—wiggle gently if it’s stuck.
- Inspect and replace the worn parts.
Look for cracks, flattened rubber seals, or mineral buildup. For cartridge faucets, replace the cartridge with the same model (take the old one to the hardware store if needed). For older compression-style faucets, replace the rubber washer and O-ring on the stem. Lightly coat new rubber parts with plumber’s grease.
- Reassemble, then test for leaks.
Slide the new or repaired part back into place, making sure it’s oriented the same way it came out. Reinstall the retaining nut/clip, trim pieces, and handle. Turn the water valves back on slowly and test the faucet in all positions. If you see a small drip, snug the retaining nut a bit more—but don’t overtighten.
Step 2: Patch a Wall Crack So It Doesn’t Turn Into a Major Eyesore
Hairline cracks and small dings in drywall are easy to ignore until they spread or make a room look tired. Fixing them while they’re small is quick and keeps your walls solid and clean.
What you’ll need
- Utility knife
- Putty knife (2–4 inch)
- Pre-mixed joint compound or lightweight spackle
- Sanding sponge or fine-grit sandpaper (120–220 grit)
- Damp rag or sponge
- Matching paint and a small roller or brush
How to do it
- Prepare and widen the crack slightly.
Use a utility knife to cut along the crack, creating a small V-shaped groove. This feels backwards, but it gives the compound something to grab onto. Brush or vacuum away dust. Wipe the area with a damp rag to remove residue.
- Apply the first layer of compound.
Load a small amount of compound onto your putty knife and press it firmly into the crack, forcing it in. Then smooth it so it’s just slightly raised above the wall surface. Feather the edges outward so there’s no sharp ridge. Let it dry fully (follow the container’s dry time).
- Sand lightly and apply a second coat.
Once dry, gently sand the area until it’s smooth but not perfectly flat—you want to leave most of the compound in place. Wipe away dust. Apply a second, wider coat, feathering the edges 2–3 inches beyond the first patch so it blends with the wall. Let it dry again.
- Final sand and surface check.
Sand once more, using lighter pressure near the edges so you don’t create a shallow crater. Run your hand over the area with your eyes closed; you’ll feel uneven spots more easily than you’ll see them. Spot-sand as needed until it feels continuous with the surrounding wall.
- Prime if needed and paint to match.
For larger patches or if your compound label recommends it, apply primer so the paint doesn’t flash (look different in sheen). Once dry, paint over the patch, feathering the paint into the surrounding wall. Two thin coats usually blend better than one heavy coat.
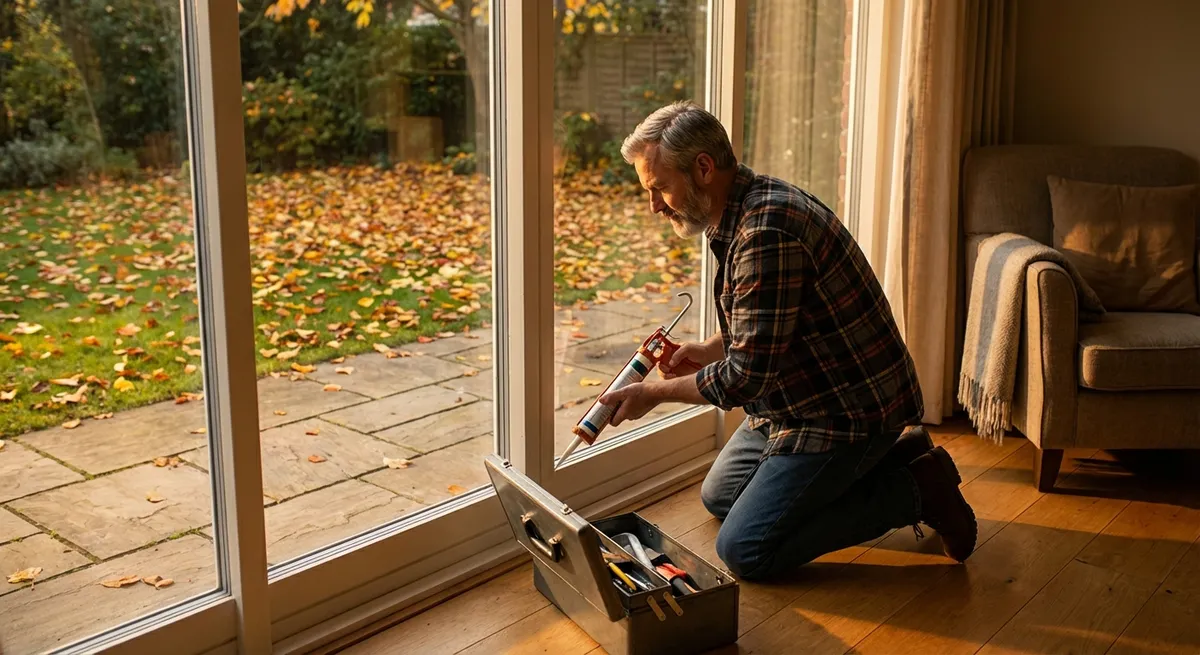
Step 3: Reseal a Drafty Exterior Door to Cut Energy Loss
A door that lets in drafts isn’t just uncomfortable—it quietly raises your heating and cooling costs. Replacing worn weatherstripping is a simple job that pays off every season.
What you’ll need
- Tape measure
- Utility knife or scissors
- Screwdriver or drill (if your weatherstripping screws in)
- New weatherstripping (match type: adhesive, V-strip, or compression)
- Door sweep for the bottom (if you see light under the door)
How to do it
- Check where the draft is coming from.
On a windy day, close the door and run your hand slowly along the sides, top, and bottom. Better yet, hold a lit incense stick or thin tissue near the frame and watch for movement. Note where air is moving the most.
- Remove old weatherstripping and clean the surface.
Peel off adhesive strips or unscrew mechanical weatherstripping. Scrape away old glue with a putty knife if needed. Clean the surface with mild cleaner and let it dry. A clean, dry surface is critical for new adhesive to stick properly.
- Measure and cut your new weatherstripping.
Measure each side of the door frame individually—don’t assume they’re identical. Cut the new strips to length with a utility knife or scissors. Follow the manufacturer’s instructions on which side faces the door and how tightly it should compress.
- Install the side and top seals.
Start at the top of the frame, then do the sides. If it’s adhesive-backed, peel and press it firmly into the corner where the door meets the frame, working slowly to avoid gaps or bubbles. For screw-on types, predrill small pilot holes if necessary and fasten the strip so it lightly presses against the closed door.
- Add or adjust the door sweep at the bottom.
If you see light or feel air under the door, install a door sweep. Hold it against the closed door so the rubber or bristles just touch the threshold, not drag hard. Mark and cut to length, then screw it into place. Open and close the door to ensure it moves freely while still sealing.
Step 4: Secure a Wobbly Interior Door That Won’t Latch Cleanly
A door that rattles, sticks, or won’t catch properly usually doesn’t need replacing—it just needs its alignment corrected. This often comes down to loose hinges or a misaligned strike plate.
What you’ll need
- Phillips screwdriver or drill/driver
- Longer wood screws (2.5–3 inches)
- Wood glue and wooden toothpicks or matchsticks (optional fix for stripped holes)
- Chisel (if you need to adjust the strike plate)
- Pencil
How to do it
- Tighten all hinge screws and test.
Open the door and tighten every hinge screw on the door and the frame. If any just keep spinning, the screw hole is stripped. Sometimes simply tightening everything will pull the door back into alignment so it latches better—test before moving on.
- Repair stripped screw holes if needed.
Remove the loose screw. Dip a wooden toothpick or matchstick in wood glue, shove it into the hole, and break it off flush. Repeat until the hole is snugly filled. Let it dry, then drive the original screw back in. This gives the screw something solid to bite into.
- Use longer screws to pull the door back into place.
On the top hinge (frame side), replace one or two existing screws with longer wood screws that reach into the stud behind the frame. This can “pull” the top of the door slightly toward the hinge side and improve latch alignment. Don’t overtighten—small changes make a big difference.
- Check latch alignment with the strike plate.
Close the door slowly and watch how the latch meets the strike plate. If it hits too high, low, or not deep enough, mark the contact point lightly with a pencil. That mark tells you whether you need to move or enlarge the opening in the plate.
- Adjust the strike plate opening if the latch still misses.
If the latch is just slightly off, you can file or chisel the plate opening a bit larger in the needed direction, then reinstall the plate. For bigger misalignments, you may need to move the strike plate slightly: unscrew it, chisel a new shallow recess where it needs to sit, fill the old screw holes with glued toothpicks, and screw it back in at the new position.
Step 5: Quiet a Noisy Bathroom Fan So You’ll Actually Use It
Bathroom fans are critical for removing moisture and preventing mold—but when they’re loud, people avoid using them. Often, cleaning and a simple upgrade are all that’s needed to make them quieter and more effective.
What you’ll need
- Screwdriver
- Vacuum with brush attachment
- Soft brush (old toothbrush works)
- Mild cleaner and rag
- Replacement fan motor and/or grille (optional, model-specific)
How to do it
- Turn off power at the breaker.
Don’t rely on the wall switch alone. Find the correct breaker for the bathroom and switch it off. Confirm by trying to turn the fan on—it should not run.
- Remove the cover and clean it thoroughly.
Most covers pull down and then have spring wires you can pinch to release. Vacuum the cover and fan area, then wash the cover with warm soapy water. Built-up dust makes the fan work harder and much louder.
- Vacuum and brush the fan housing and blades.
Use the vacuum’s brush attachment to clean around the motor and in the housing. Carefully brush dust off the blades and motor vents. Excess dust can throw the fan off balance, causing vibration and noise.
- Check for loose parts and vibration points.
Gently wiggle the motor bracket—if it moves, tighten its screws. Look for ducting that’s not firmly attached or metal that vibrates against the housing. You can reduce minor vibration by tightening screws or adding thin foam tape where metal parts contact.
- Consider a motor or insert upgrade if it’s still too loud.
Many older fans can accept a modern, quieter motor assembly without replacing the entire housing. Check the brand and model number (usually inside the housing) and look up compatible upgrade kits. These can often be swapped in place of the old motor and blade assembly with just a few screws, turning a rattling fan into a quiet, effective one you’ll actually use.
Conclusion
Home repair doesn’t have to mean full-scale renovations or weekend-long chaos. Tackling small, calm-weather fixes—like stopping a drip, patching a crack, sealing a draft, aligning a door, or quieting a fan—keeps your home comfortable and prevents bigger, more expensive problems later.
Each of these projects is doable with basic tools and patience. As you work through them, you’re not just improving your house—you’re building practical skills and confidence that make every future repair feel less intimidating.
Sources
- [U.S. Environmental Protection Agency – Fix a Leak](https://www.epa.gov/watersense/fix-leak-week) – Explains how small leaks waste water and offers practical guidance on finding and repairing them.
- [Energy.gov – Air Sealing Your Home](https://www.energy.gov/energysaver/weatherize/air-sealing-your-home) – Details how sealing doors, windows, and other gaps improves efficiency and comfort.
- [Family Handyman – How to Repair Drywall](https://www.familyhandyman.com/project/how-to-patch-drywall/) – Step-by-step drywall patching techniques and material recommendations.
- [International Association of Certified Home Inspectors – Bathroom Ventilation](https://www.nachi.org/bathrooms-kitchens-ventilation.htm) – Covers why proper bathroom ventilation matters and common issues inspectors see.
- [This Old House – How to Fix a Door That Sticks](https://www.thisoldhouse.com/doors/21016463/how-to-fix-a-sticking-door) – Practical advice on diagnosing and adjusting interior doors for better operation.
Key Takeaway
The most important thing to remember from this article is that this information can change how you think about Home Repair.


