You don’t need a truck full of tools or contractor experience to keep your home in good shape. What you do need is a clear plan, the right basic tools, and step‑by‑step instructions you can actually follow. This guide walks through five practical repairs that solve real problems most homeowners run into—and shows you how to do them safely and correctly so they last.
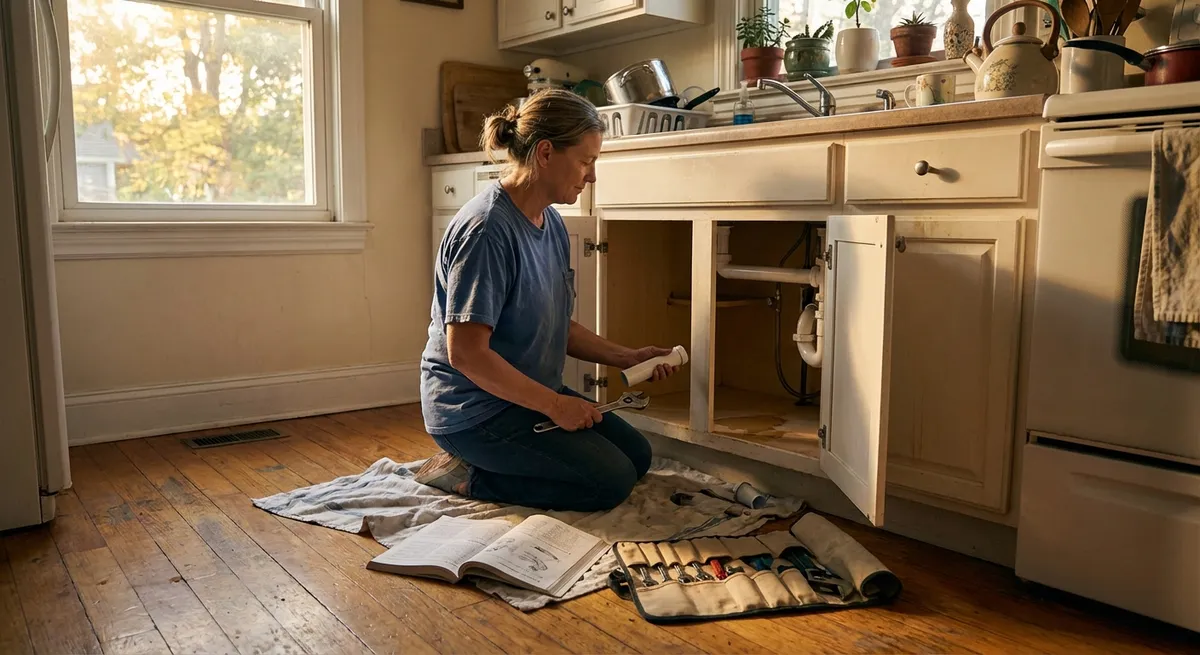
Step 1: Fix a Dripping Faucet (Without Replacing the Whole Thing)
A dripping faucet wastes water, raises your bill, and can stain your sink. Most of the time, the fix is replacing a worn-out cartridge, washer, or O‑ring.
What you’ll need
- Adjustable wrench or basin wrench
- Phillips and flathead screwdrivers
- Replacement cartridge/washer/O‑ring (match your faucet model)
- Plumber’s grease
- Towel and small container for parts
Step-by-step
Shut off the water supply
Turn off the valves under the sink (clockwise). Turn the faucet on to relieve pressure and confirm the water is off.
Remove the handle
Look for a small cap or decorative cover hiding the screw. Pry gently with a flathead screwdriver, then remove the screw and pull the handle off. If it’s stuck, wiggle gently rather than forcing it.
Access the cartridge or stem
Remove any decorative trim and retaining nuts with an adjustable wrench. Lay parts out in order so you can reinstall them correctly.
Inspect and replace worn parts
For cartridge faucets, pull the cartridge straight up and out. For compression faucets, unscrew the stem and inspect the rubber washer and O‑rings. Replace damaged or flattened parts with identical new ones. Lightly coat the new O‑rings/washer with plumber’s grease.
Reassemble and test
Put everything back in reverse order. Turn the water back on slowly and test for leaks at the spout and under the sink. If it still drips, double‑check that the replacement part matches your faucet model and is fully seated.
Practical tip: Take the old cartridge/washer to the store so you can match it exactly. A close match is usually not good enough—faucets are picky.
Step 2: Patch a Hole in Drywall So It Actually Disappears
From doorknob dents to old anchor holes, damaged drywall makes a room look neglected. The good news: you can repair it cleanly with basic supplies.
What you’ll need
- Utility knife
- Putty knife (2"–6")
- Sanding sponge or fine‑grit sandpaper (120–220)
- Joint compound or lightweight spackle
- Self‑adhesive mesh patch (for holes bigger than a dime)
- Primer and matching paint
Step-by-step
Prep the damaged area
For small nail or screw holes, scrape loose paint or drywall paper. For larger holes, use a utility knife to create a clean, slightly beveled edge. Remove any crumbling material.
Apply a patch if needed
For holes larger than a dime (but smaller than about 4"), stick a self‑adhesive mesh patch over the hole, centered and pressed flat. This reinforces the repair so it doesn’t crack later.
Apply joint compound in thin layers
Use your putty knife to spread compound over the hole or patch, feathering the edges wider than the damaged area. Think “thin and wide,” not “thick and lumpy.” Let it dry fully per the product instructions.
Sand smooth and repeat if needed
Lightly sand until smooth and level with surrounding wall. If you see low spots or patch lines, add a second thin layer of compound and repeat. Two to three thin coats usually look better than one thick one.
Prime and paint
Prime the repaired area so the finish paint doesn’t flash (look different from the rest of the wall). Once dry, paint, feathering the edges into the surrounding area. Use the same sheen (flat, eggshell, etc.) as the existing wall.
Practical tip: For tiny nail holes, you can often get away with a dab of lightweight spackle applied with your fingertip, then wiped flat with a damp cloth—no sanding needed.
Step 3: Quiet a Squeaky Interior Door
Squeaky doors are annoying but usually easy to fix. The noise is almost always friction at the hinges.
What you’ll need
- Hammer and nail/awl or small flathead screwdriver (to lift hinge pin)
- Rag or paper towels
- Lubricant: silicone spray, white lithium grease, or petroleum jelly
Step-by-step
Identify the noisy hinge
Slowly open and close the door and listen. Often only one hinge is causing the squeak.
Remove the hinge pin carefully
Place a nail or small screwdriver at the bottom of the hinge pin and tap gently upward with a hammer until the pin comes loose. Support the door if you’re removing more than one pin at a time (or work one hinge at a time).
Clean the hinge pin and barrel
Wipe old grime, paint flakes, and dust off the pin and the hinge barrel using a rag. Built‑up debris is often the squeak culprit.
Apply lubricant
Coat the hinge pin lightly with your chosen lubricant. Avoid overdoing it—too much can drip and stain the door or trim.
Reinstall and test
Tap the pin back into place and open and close the door several times to work in the lubricant. If needed, repeat for other hinges until the squeak is gone.
Practical tip: Avoid vegetable oils or cooking spray—they can gum up over time and attract dust.
Step 4: Reseal a Drafty Window to Cut Energy Loss
Drafty windows make your home uncomfortable and waste energy. Often, the problem is failing caulk around the frame or gaps where air sneaks in.
What you’ll need
- Utility knife or scraper
- Caulk remover (optional but helpful)
- Exterior‑grade paintable latex caulk (for outside)
- Interior paintable caulk (for inside)
- Caulk gun
- Damp rag and small bucket of water
Step-by-step
Find the drafts
On a windy day, hold your hand around the window frame to feel for cold air. You can also use a lit incense stick or light tissue—watch where the smoke or tissue moves.
Remove old cracked caulk
Use a utility knife or scraper to cut and peel away loose, cracked, or separated caulk. The new bead needs a clean surface to adhere to. Don’t gouge the frame or siding.
Clean the surface
Brush or wipe away dust and debris. Let the area dry completely; caulk won’t stick well to damp surfaces.
Apply a smooth, continuous bead of caulk
Cut the caulk tube tip at a 45‑degree angle for the bead size you need. Run a steady bead along the seam where the window frame meets the wall (inside or outside, depending where the gap is). Work in manageable sections.
Tool the caulk and clean up
Use a damp finger or caulk finishing tool to smooth the bead, pressing it into the gap and making a neat finish. Wipe excess with a damp rag. Let cure as directed before painting or exposing to heavy moisture.
Practical tip: For movable sashes on older windows, weatherstripping (like adhesive foam or V‑strip) may be a better fix than caulk. Caulk is for gaps that should not move.
Step 5: Replace a Standard Light Switch Safely
Swapping a worn or outdated light switch is a straightforward electrical project—as long as you follow safety steps and local codes. If anything looks confusing or unsafe, stop and call a licensed electrician.
What you’ll need
- New switch (match type: single‑pole, 3‑way, etc.)
- Non‑contact voltage tester
- Screwdrivers
- Wire stripper (if needed)
- Electrical tape (optional)
Step-by-step
Turn off power at the breaker
Find the correct circuit breaker and switch it off. Do not rely on the wall switch alone. Put a piece of tape over the breaker so no one turns it back on while you’re working.
Verify the power is off
Remove the switch cover plate. Use a non‑contact voltage tester near the switch terminals and wires. If it shows any live power, stop and recheck the breaker.
Remove the old switch
Unscrew the switch from the electrical box and gently pull it out so you can see the wiring. Take a clear photo before disconnecting anything—that photo is your diagram.
Transfer wires to the new switch
For a standard single‑pole switch, you’ll usually see two hot (black or sometimes red) wires on the brass screws and a ground (bare copper or green) on the green screw. Move each wire from the old switch to the same position on the new one. Tighten screws firmly but don’t overtighten and damage the wire. Wrap wires clockwise so tightening the screw pulls them in.
Reinstall and test
Carefully fold the wires back into the box, avoiding sharp bends. Screw the switch into the box, reinstall the cover plate, and turn the breaker back on. Test the switch. If it doesn’t work or anything sparks, buzzes, or smells burnt, turn the breaker off immediately and call an electrician.
Safety tip: If your home has aluminum wiring, or you see damaged insulation, back‑stabbed wires you’re unsure about, or a crowded box, have a pro handle it. Aluminum and older wiring can require special connectors and techniques.
Conclusion
Keeping your home in good shape doesn’t require a complete workshop or a contractor on speed dial. By learning a few core repairs—like stopping a drip, patching walls cleanly, quieting doors, sealing drafts, and safely swapping a switch—you can solve everyday problems before they turn into bigger, more expensive issues.
Start with one project, follow each step carefully, and take photos as you go so you can put everything back correctly. Over time, you’ll build skills, confidence, and a more comfortable, better‑maintained home.
Sources
- [U.S. Environmental Protection Agency – WaterSense: Fix a Leak](https://www.epa.gov/watersense/fix-leak-week) - Covers the impact of household leaks and basic approaches to fixing common plumbing leaks
- [Family Handyman – How to Fix Drywall](https://www.familyhandyman.com/project/how-to-fix-holes-in-drywall/) - Practical instructions and visuals for drywall patching techniques
- [U.S. Department of Energy – Air Sealing Your Home](https://www.energy.gov/energysaver/air-sealing-your-home) - Explains where air leaks occur and how to seal windows and other gaps for better efficiency
- [Occupational Safety and Health Administration (OSHA) – Working with Electricity](https://www.osha.gov/sites/default/files/publications/electrical_safety.html) - Essential electrical safety practices for non-professionals
- [Leviton – Residential Switches: Installation Instructions](https://www.leviton.com/en/docs/Instruction_Sheet_-_Single_Pole_Switches.pdf) - Manufacturer installation guidance for standard light switches
Key Takeaway
The most important thing to remember from this article is that this information can change how you think about Home Repair.


