When something breaks at home, most people either panic, ignore it, or call a pro immediately. But a lot of everyday issues—leaks, flickering lights, jammed doors—have simple first-response fixes you can safely handle yourself. This guide walks you through five practical, step-by-step repairs that DIY enthusiasts can use to stabilize problems, prevent damage, and often solve the issue completely. Even when you still need a professional, these steps can buy you time and protect your home.
Before You Start: Safety and Setup
Most home repairs go wrong not because they’re complicated, but because someone rushed or skipped safety basics. Taking a few minutes up front makes every fix safer and smoother.
- Know your shutoffs.
Find and label your main water shutoff, individual fixture valves (under sinks, behind toilets), and your electrical panel’s main breaker. If you live in an apartment, ask management where building shutoffs are.
- Use basic PPE every time.
Keep safety glasses, work gloves, and ear protection in one easy-to-grab spot. If you’re dealing with dust, old paint, or insulation, add a good dust mask or respirator.
- Power and water first, tools second.
Before touching anything electrical or plumbing-related, turn off power or water to that area. Confirm power is off with a non-contact voltage tester; check water by opening a faucet.
- Work in good light.
Use a bright work light or headlamp so you can see fittings, screws, and cracks clearly. Many “mystery problems” in homes are just poorly lit problems.
- Take photos before you disassemble.
Snap clear pictures of wiring, pipe connections, and hardware. These become your “map” when putting everything back together.
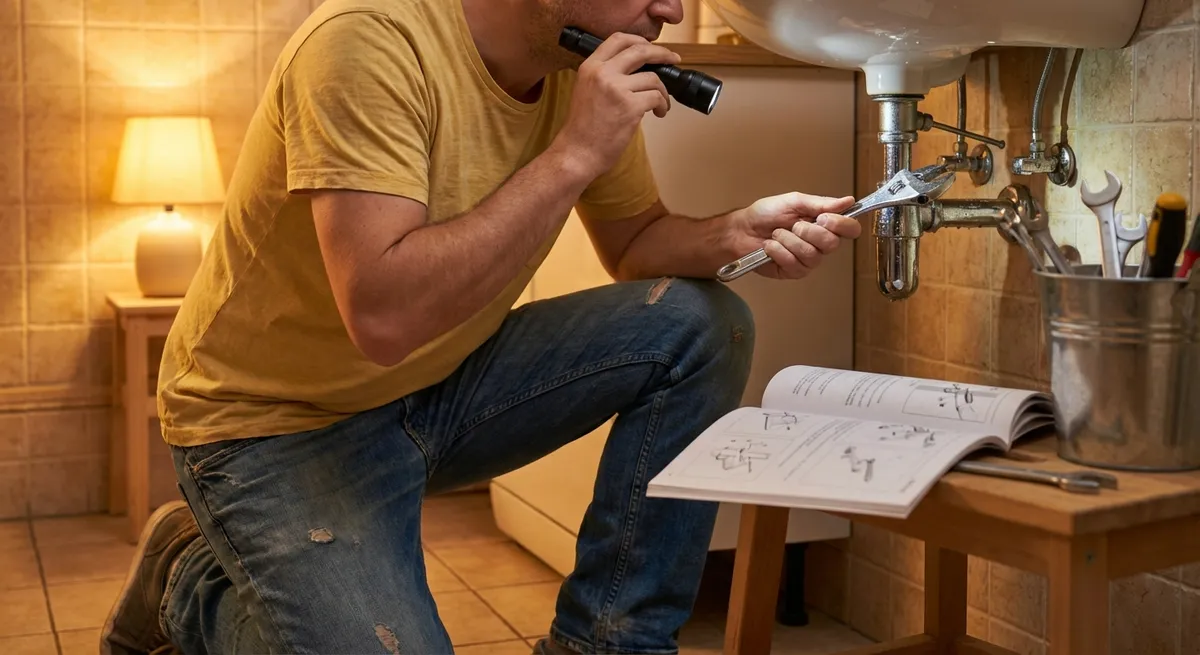
Step 1: Stop a Small Leak Under a Sink Before It Wrecks the Cabinet
Under-sink leaks often start small—then quietly destroy cabinets, flooring, and even ceilings below. Catching and stabilizing them fast can save you from a major repair later.
What you’ll need
Adjustable wrench, flashlight, paper towels, small bucket or tray, plumber’s tape (PTFE), slip-joint pliers.
How to do it
- Clear and inspect the area.
Empty the cabinet, wipe up any standing water, and dry the pipes with a paper towel so you can see fresh moisture clearly.
- Find the actual leak point.
Place a dry paper towel around one section at a time (P-trap, slip joints, shutoff valves, supply lines). Turn the faucet on, then off. See where the towel gets wet—this tells you which connection is failing.
- Tighten loose slip joints gently.
For plastic trap assemblies, hand-tighten the large plastic nuts, then give a slight extra turn with slip-joint pliers. Don’t over-tighten; you can crack the fittings. For metal nuts, use an adjustable wrench and go a quarter-turn at a time.
- Reseat and re-tape threaded connections.
If a threaded connection (like a supply line into a shutoff valve) is leaking:
- Turn off the shutoff valve feeding that line.
- Open the faucet to relieve pressure.
- Unscrew the leaky connection.
- Wrap the male threads with plumber’s tape, 3–4 wraps clockwise.
- Reconnect and tighten firmly, but not aggressively.
- Test and monitor.
Turn the water back on slowly while watching the repaired areas. Check again after 15–30 minutes and again later in the day. Place a tray or shallow container under the pipes for a day or two to catch any slow drips you might have missed.
When to call a pro: If the shutoff valve itself is leaking from the stem or body, or if the cabinet floor is soft or swollen, you may be looking at a larger repair.
Step 2: Fix a Door That Won’t Latch or Keeps Swinging Open
A stubborn interior door that won’t latch, drags, or swings on its own is usually a small alignment problem, not a “new door” problem. You can fix most of these with a screwdriver and a bit of patience.
What you’ll need
Screwdriver, wood toothpicks or matches, wood glue (optional), utility knife, chisel (optional), pencil.
How to do it
- Figure out what’s actually wrong.
Close the door slowly:
- Does the latch hit the strike plate instead of going in?
- Is there a bigger gap at the top on one side?
- Does the door rub against the frame or floor?
- Tighten hinge screws first.
- Open the door and tighten all hinge screws on the door and frame.
- If screws just spin, the holes are stripped and need to be filled.
- Repair stripped screw holes.
- Remove the loose screw.
- Push wood toothpicks (with or without a dab of wood glue) into the hole until snug.
- Break them off flush with the surface.
- Reinsert the screw; it should grab firmly now.
- Adjust the strike plate if the latch doesn’t catch.
- Close the door and mark where the latch hits the strike plate with a pencil.
- If it’s slightly high or low, loosen the strike plate screws and shift it up or down. Retighten and test.
- If it needs more movement, remove the plate and use a chisel to enlarge the mortise slightly, then reinstall.
- Tame a door that swings on its own.
- Remove the hinge pin from the middle hinge.
- Lay it on a hard surface and tap it slightly with a hammer in the middle to introduce a gentle curve.
- Reinstall the pin; the added friction usually stops the swing. Repeat with another hinge if needed.
Loose hinges cause most alignment issues.
When to call a pro: If the entire frame is out of square due to foundation movement or wall damage, you may need a carpenter.
Step 3: Restore a Dead or Flickering Outlet Safely
A dead outlet can be caused by a tripped GFCI, a tripped breaker, or a loose or failed connection. You can safely troubleshoot the basics and often restore power without touching live wiring.
What you’ll need
Non-contact voltage tester, small screwdriver, flashlight.
How to do it
- Check for GFCIs that may control the outlet.
- Look for outlets with “TEST” and “RESET” buttons in kitchens, bathrooms, garages, basements, and exterior walls.
- Press “RESET” firmly on each one you find. Some GFCIs control multiple downstream outlets.
- Check your breaker panel.
- Open the panel door and look for breakers in the middle position or slightly off from “ON.”
- Firmly switch the suspect breaker all the way to “OFF,” then back to “ON” to reset.
- Label the circuit if it isn’t already.
- Test the outlet with a plug-in device.
- Plug in a lamp or phone charger you know works.
- If it’s still dead, test a nearby outlet on the same wall to see if the issue is isolated or affecting a group.
- Use a non-contact voltage tester.
- With the breaker ON, remove the outlet cover plate. Do not touch any wires.
- Bring the tester close to the outlet’s side terminals. If it beeps or lights up on only one side in a strange pattern, you may have a loose connection or backstabbed wire.
- Decide if this is your stopping point.
At this stage, you’ve:
If you’re not comfortable turning off the breaker and pulling the outlet out to inspect connections, this is the right time to call an electrician and describe what you’ve already tried.
When to call a pro immediately: If you smell burning, see scorch marks, or the breaker keeps tripping after reset, stop using that circuit and contact an electrician.
Step 4: Quiet a Squeaky Floor Without Tearing Up the Room
Squeaky floors are usually wood rubbing against fasteners or other wood, not a sign your floor is collapsing. You can often reduce or eliminate the noise from above with targeted screws.
What you’ll need
Stud finder (with joist mode if possible), drill/driver, trim-head or flooring screws, painter’s tape or pencil, putty (for finished floors, optional).
How to do it
- Find the squeak and the joist direction.
- Walk the area slowly and mark noisy spots with small pieces of painter’s tape.
- Use a stud finder on the ceiling below (if accessible) to find joist direction, or on the floor near walls to get a sense of where joists run.
- Locate joists beneath the squeak.
- Typical joist spacing is 16" on center.
- Once you find one joist, measure out at 16" intervals to find others and lightly mark their lines on the floor with tape or pencil.
- Add screws through the subfloor into the joists.
- For carpeted floors:
- Feel through the carpet for the joist line.
- Drive a screw through carpet, pad, and subfloor into the joist until the head is just below the subfloor surface (it will hide in the carpet).
- For hardwood or laminate:
- Use thin trim-head screws.
- Pre-drill small pilot holes if needed to avoid splitting.
- Drive screws just below the surface and fill with matching wood putty if appearance matters.
- Test as you go.
- After each screw or pair of screws, walk the area again.
- You’re trying to pull the subfloor tight to the joist exactly where the squeak occurs.
- Know when it’s “good enough.”
Total silence isn’t always realistic in older homes. If you’ve significantly reduced the squeaking and the floor feels solid underfoot, you’ve accomplished the most practical fix without opening the floor.
When to call a pro: If the floor feels spongy, uneven, or visibly bowed, structural issues may be involved and need professional assessment.
Step 5: Patch a Small Drywall Hole So It Actually Disappears
From doorknob dents to misplaced anchors, small drywall damage is a fact of life. A clean patch comes down to layering thin, even coats and blending them well, not just slapping on more mud.
What you’ll need
Drywall joint compound, putty knife (2–4"), sanding sponge or fine-grit sandpaper, self-adhesive drywall patch (for larger holes), primer, matching paint.
How to do it
- Prep the damaged area.
- For nail holes or tiny dings: Lightly scrape loose material away with the putty knife.
- For holes up to about 2": Use a self-adhesive patch or mesh tape over the hole for strength.
- Apply the first coat of compound.
- For small holes: Press compound directly into the hole, then smooth it level with the surrounding wall.
- For patched holes: Spread compound over and slightly beyond the patch in a thin, even layer.
- Feather the edges wide.
- On the second coat (after the first dries), extend the compound 2–4" beyond the patch in all directions.
- Use wider strokes and apply less pressure at the outer edges so the compound tapers gradually into the wall.
- Sand lightly and inspect.
- Once fully dry, lightly sand until smooth. Avoid over-sanding the center; you don’t want to expose the patch or mesh.
- Run your hand over the area with your eyes closed—you’ll feel high or low spots better than you can see them.
- Prime, then paint.
- Apply a small amount of primer over the patched area; this prevents flashing (a shiny or dull patch compared to the rest of the wall).
- Once dry, paint the repair and, if possible, the entire wall section or up to a natural break (corner, door frame) for best blend.
When to call a pro: If you have widespread damage, suspected mold, or cracks that keep returning in the same spot, consult a contractor.
Conclusion
Being “fix ready” doesn’t mean you can—or should—do every repair yourself. It means you know how to safely stabilize common problems, solve the straightforward ones, and recognize when it’s time to bring in a pro. By learning these first-response fixes for leaks, doors, outlets, floors, and walls, you protect your home from small issues turning into big ones, and you gain confidence every time you pick up a tool.
Use this playbook as a starting point, not a finish line. Each successful repair makes the next one easier, and over time, your home becomes a lot less stressful—and a lot more under control.
Sources
- [U.S. Consumer Product Safety Commission – Home Electrical Safety Checklist](https://www.cpsc.gov/s3fs-public/513.pdf) - Guidance on safely inspecting and working around home electrical systems
- [The Family Handyman – How to Fix a Leaky Sink Drain](https://www.familyhandyman.com/project/how-to-fix-a-leaky-sink-drain/) - Practical walkthroughs for diagnosing and tightening sink drain connections
- [This Old House – How to Fix a Squeaky Floor](https://www.thisoldhouse.com/flooring/21015109/how-to-fix-squeaky-floors) - Detailed methods for silencing squeaky floors from above and below
- [Lowe’s – How to Patch and Repair Drywall](https://www.lowes.com/n/how-to/patch-and-repair-drywall) - Step-by-step instructions and visuals for patching different sizes of drywall damage
- [NFPA – Electrical Safety in the Home](https://www.nfpa.org/Education-and-Research/Home-Fire-Safety/Electrical) - Safety recommendations for dealing with electrical issues and preventing home fires
Key Takeaway
The most important thing to remember from this article is that this information can change how you think about Home Repair.


