Small home problems rarely stay small. A dripping faucet, a loose outlet cover, or a sticky door can turn into bigger headaches if you ignore them. The good news: you don’t need to be a contractor to handle a lot of first-response fixes. With a few basic tools and a clear plan, you can take care of common issues safely and confidently.
This guide walks through five practical, step‑by‑step repairs you can reasonably do yourself, plus tips to stay safe and avoid making problems worse.
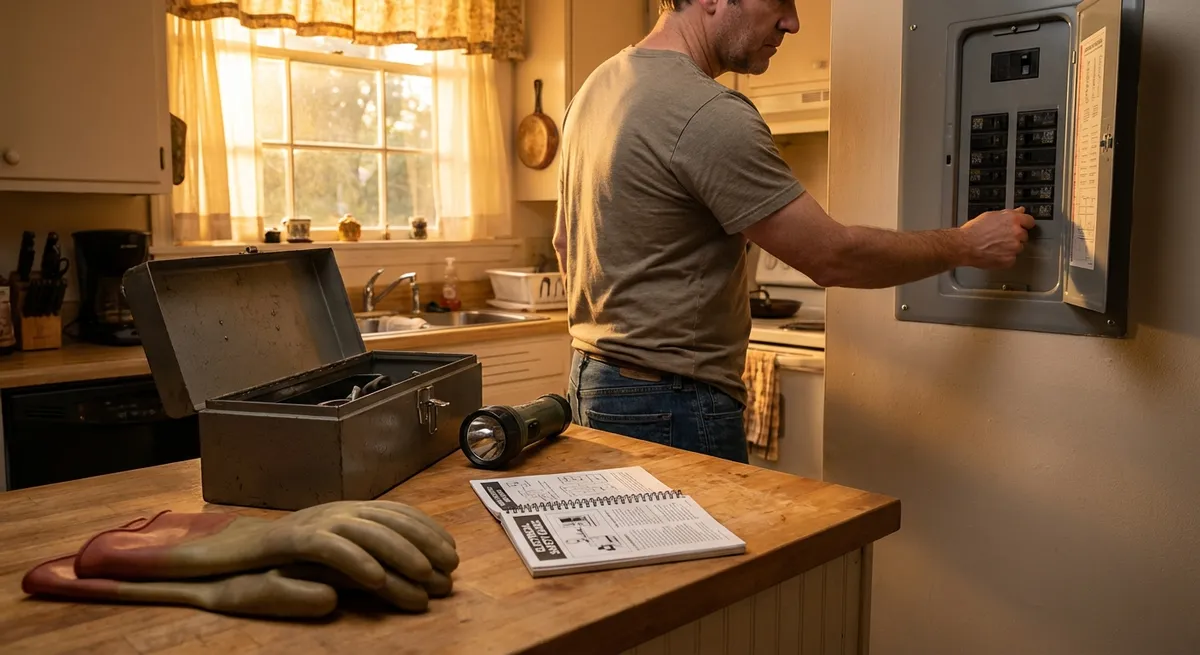
Before You Start: Safety and Prep Matter More Than Tools
Before diving into any repair, slow down and get ready. Most DIY mistakes happen because people rush, skip safety steps, or use the wrong materials.
- Know when to stop. If you see scorched wiring, structural cracks, active leaks from inside walls, or smell gas, stop and call a licensed pro or your utility emergency line.
- Turn things off. For electrical work, switch off the breaker and test the fixture to confirm it’s dead. For plumbing, close the shutoff valve.
- Protect yourself. Safety glasses, work gloves, and a dust mask (for sanding or drilling) should be standard.
- Use the right tools. For these projects, a basic kit with a screwdriver set, adjustable wrench, pliers, utility knife, level, drill/driver, and tape measure is usually enough.
- Document before you disassemble. Take photos with your phone of wiring, hardware placement, and how things fit together. They’re invaluable during reassembly.
Once you have that mindset, the repairs below become much easier and less stressful.
Step 1: Stop a Running Toilet Without Replacing the Whole Thing
A running toilet wastes water and money but is usually fixable without removing the toilet or calling a plumber. You’ll mainly deal with parts inside the tank.
What you’ll need: Adjustable wrench (maybe), replacement flapper if needed, towel.
Step-by-step:
- Remove the tank lid and inspect.
Gently lift off the tank lid and set it somewhere safe. Look inside while the toilet is misbehaving. Most issues come from:
- A worn or warped rubber flapper
- The chain being too tight or too loose
- The float set too high so water keeps flowing into the overflow tube
- Test the flapper seal.
- Cracks, warping, or buildup on the flapper
- Mineral deposits around the valve seat
- Adjust or replace the flapper.
- Turn off the water supply (the valve behind or under the toilet) and flush to empty most of the tank.
- Unhook the chain and detach the flapper from the pegs on each side of the overflow tube.
- Install the new flapper according to the package, making sure it sits evenly.
- Reattach the chain so there’s a little slack when the handle is at rest (but not so much that it tangles).
- Set the water level correctly.
- For float-cup fill valves: adjust the screw on top of the rod to raise or lower the float.
- For older float-ball types: gently bend the metal arm downward so the ball shuts off the valve earlier.
- Test and fine-tune.
Push down on the flapper with your finger. If the running sound stops, the flapper isn’t sealing properly. Check for:
There’s usually a line inside the tank or a manufacturer marking.
Turn the water back on, let the tank fill, and flush several times. Listen for continuous running. If it stops a few seconds after filling and the water level matches the mark, you’re done. If not, tweak the float height or chain tension again.
Pro tip: If your toilet is very old and the internal parts are brittle or corroded, a complete “toilet tank rebuild kit” may be easier than chasing one bad part at a time.
Step 2: Fix a Drafty Exterior Door for Better Comfort and Lower Bills
Cold air sneaking around your door isn’t just annoying—it can raise your energy bill and make rooms uncomfortable. Weatherstripping and threshold adjustments are simple fixes with big impact.
What you’ll need: Screwdriver, utility knife, measuring tape, replacement weatherstripping, possibly a new door sweep.
Step-by-step:
- Find where the draft comes from.
On a windy day or with your HVAC running:
- Slowly move your hand around the edges of the closed door.
- Use a small strip of tissue or a candle (carefully) to see where air moves.
Typical leak points: bottom of the door, latch side, and top corners.
- Inspect existing weatherstripping.
Open the door and look at the material around the frame:
- Is it cracked, flattened, or missing?
- Does it fully contact the door when closed?
If it’s worn, it’s time to replace.
- Replace side and top weatherstripping.
- Carefully pull off the old strip. If it’s nailed or screwed, remove the fasteners.
- Measure the jamb and cut new weatherstripping to fit with a utility knife.
- Install according to the product (peel-and-stick or nail/screw-on), starting at the top.
Close the door against it to ensure it compresses lightly but doesn’t make the door hard to close.
- Install or upgrade the door sweep.
The gap at the bottom often causes the worst drafts.
- Remove the old sweep (usually a strip screwed into the bottom of the interior side of the door).
- Hold the new sweep in place, mark screw holes, and trim to width if needed.
- Install so the sweep just touches the threshold—not dragging hard across it.
- Check the threshold and latch.
- Some thresholds have adjustable screws. Turn them a little at a time to raise or lower the threshold so the door seals without rubbing.
- If the latch isn’t pulling the door tight, adjust the strike plate slightly (loosen screws, tap plate inward, retighten) so the door closes snugly.
Pro tip: Close the door on a sheet of paper at various points around the frame. If you can pull it out easily, that area likely needs better weatherstripping or latch adjustment.
Step 3: Secure a Wobbly Handrail or Stair Banister
A loose handrail is more than an annoyance—it’s a safety hazard. Most of the time, the fix is tightening or upgrading how it’s fastened to the wall or posts.
What you’ll need: Stud finder, drill/driver, wood screws or rail mounting hardware, wood filler (if needed), level.
Step-by-step:
- Assess where it’s loose.
Grasp the rail and gently pull in different directions.
- Does the whole rail move?
- Just one bracket?
- A post at the top or bottom of stairs?
Identify every movement point.
- Locate wall studs behind brackets.
- Use a stud finder to find studs near existing brackets.
- If a bracket is fastened only into drywall or weak material, it will never be secure.
Mark stud locations lightly with a pencil.
- Reposition or reinforce brackets.
- If possible, move brackets so they align with studs.
- Remove the bracket, fill old screw holes with wood filler (if in wood) or patch compound (if in drywall), and let dry.
- Pre-drill new pilot holes into the stud and secure the bracket with appropriate-length wood screws.
- Tighten or upgrade fasteners.
If the rail or post is bolted:
If fasteners are undersized or stripped:
- Check overall alignment and safety.
- Use a level to make sure the rail still has a consistent angle and isn’t twisted.
- Put your full weight on the rail (within reason) in several spots to confirm it no longer wobbles.
If movement remains at a structural joint (like a rotted post), you may need a pro to evaluate and repair the underlying framing.
Pro tip: For drywall-only areas where you can’t hit a stud, consider using heavy-duty, manufacturer-rated toggle anchors—but for handrails, securing to studs is strongly preferred whenever possible.
Step 4: Repair a Cracked Wall Seam So It Stays Fixed Longer
Hairline cracks where walls meet or at drywall seams are common. The key to a lasting repair is using the right compound and reinforcing the joint, not just smearing over the crack.
What you’ll need: Utility knife, sanding sponge, joint compound (or patching compound), drywall tape (paper or fiberglass), putty knife, primer, paint.
Step-by-step:
- Widen and clean the crack.
- Use a utility knife to gently open the crack a bit so compound has something to grip.
- Remove loose material and dust with a brush or vacuum.
Don’t overcut—just enough to create a small V-shaped groove.
- Apply drywall tape.
- For straight seams, paper tape works well; for irregular cracks, fiberglass mesh is easier.
- Press the tape over the crack, centered along its length.
- For mesh tape, its adhesive backside usually holds it in place; for paper tape, you’ll embed it in compound.
- Embed the tape in joint compound.
- Spread a thin layer of compound over the tape with a putty knife, pressing firmly to remove air bubbles.
- Feather the edges out beyond the tape so it blends into the surrounding wall.
- Let it dry fully according to the product instructions.
- Build up smooth layers.
- Lightly sand high spots with a sanding sponge once the first coat is dry.
- Apply a second, wider coat, extending a few inches beyond the first edges.
- If needed, repeat with a third coat, each time sanding lightly between coats.
The goal is a smooth transition you can’t feel with your fingers.
- Prime and paint.
- Always prime repaired areas, especially over joint compound, to avoid flashing (a visibly different sheen).
- Once dry, paint to match the surrounding wall. Feather your roller or brush into the existing paint rather than stopping on a hard edge.
Pro tip: If the crack keeps returning in the same spot, check for underlying issues like seasonal movement, moisture problems, or structural shifts. Cosmetic fixes won’t solve deeper problems.
Step 5: Replace a Light Fixture Safely and Confidently
Swapping out an outdated light for a new one can change a room’s look in an hour. The critical part is working safely with electricity and mounting the fixture correctly.
What you’ll need: Voltage tester, screwdriver, wire strippers (if needed), new fixture, wire connectors (wire nuts).
Step-by-step:
- Turn off power at the breaker and verify.
- Find the correct circuit breaker and switch it off.
- At the fixture, flip the wall switch on to confirm the light does not work.
- Use a non-contact voltage tester to confirm there’s no power at the fixture wires.
Never trust the switch alone—always test.
- Remove the old fixture.
- Take off the glass shades or bulbs, then unscrew the canopy or base that sits against the ceiling or wall.
- Carefully lower the fixture while supporting its weight.
- Note how the wires are connected (a photo helps): typically black (hot) to black, white (neutral) to white, and green or bare (ground) to the metal box or ground wire.
- Disconnect and inspect the box.
- Unscrew the wire connectors and separate the wires.
- Inspect the electrical box: it should be firmly attached and rated for the fixture’s weight (especially for ceiling fans or heavy lights).
- If the box is loose, repair or replace it with an appropriate, properly mounted box before proceeding.
- Connect the new fixture.
- Follow the manufacturer’s wiring diagram.
- Connect ground to ground (green or bare), neutrals together (white to white), and hot wires together (black to black) with wire connectors.
- Tug gently on each connection to ensure it’s secure.
- Carefully tuck the wires into the box and mount the fixture bracket and canopy as directed, making sure it’s snug and level.
- Test and finalize.
- Install bulbs of the correct type and wattage (never exceed the fixture’s rating).
- Turn the breaker back on and test the light and any switches or dimmers.
- If it flickers, doesn’t work, or the breaker trips, turn everything off immediately and recheck your connections. If issues persist, call a licensed electrician.
Pro tip: If the fixture will be used on a dimmer, make sure both the switch and bulbs are compatible (for example, LED-compatible dimmer with dimmable LED bulbs).
Conclusion
You don’t have to renovate your entire home to make it safer, more comfortable, and cheaper to run. Small, focused repairs—stopping a running toilet, sealing a drafty door, tightening a shaky handrail, fixing cracked wall seams, or updating a light fixture—add up quickly.
The pattern is the same across most DIY home repairs:
- Protect yourself first.
- Diagnose carefully before you start taking things apart.
- Use the right materials, not just the quickest fix.
- Don’t be afraid to stop and call a pro if something looks wrong.
With a measured approach and a few repeatable skills, you can handle many first-response fixes yourself and keep your home in better shape, one project at a time.
Sources
- [U.S. Environmental Protection Agency – WaterSense: Fixing Leaks](https://www.epa.gov/watersense/fix-leak-week) - Guidance on common household leaks, including toilets, and how to address them
- [U.S. Department of Energy – Weatherstripping Your Home](https://www.energy.gov/energysaver/weatherstripping) - Official tips on choosing and installing weatherstripping to reduce drafts and energy loss
- [U.S. Consumer Product Safety Commission – Electrical Safety in the Home](https://www.cpsc.gov/Safety-Education/Safety-Education-Centers/Electrical-Safety-in-the-Home) - Safety best practices for working around household electrical systems
- [The Family Handyman – How to Fix Drywall Cracks](https://www.familyhandyman.com/project/how-to-repair-drywall-seams/) - Practical step-by-step reference for repairing drywall seams and cracks
- [National Association of Home Builders – Handrail & Guard Requirements](https://www.nahb.org/advocacy/top-priorities/building-codes/code-requirements-for-guardrails-and-handrails) - Code-related information on safe handrail and guard installation and requirements
Key Takeaway
The most important thing to remember from this article is that following these steps can lead to great results.


