Little dents, popped nails, or that one bad doorknob hit—damaged drywall makes a room look tired fast. The good news: most small to medium drywall repairs are completely DIY-friendly if you follow a simple, repeatable process.
This guide walks you through how to patch drywall so the repair disappears once painted. You’ll learn what tools to use, how to prep the area, and the technique pros rely on for smooth, blendable results.
Know Your Damage Before You Start
Not every wall blemish needs the same repair. Spending two minutes deciding what you’re dealing with saves you from overcomplicating the job—or under-fixing it so the problem comes back.
Common drywall damage types:
- Hairline cracks – Often from minor settling. Usually repaired with joint compound and tape.
- Nail or screw pops – Fasteners backing out, leaving a bump or small hole.
- Small holes (pinholes to thumb-sized) – From picture hooks, anchors, or screws.
- Medium holes (up to about 6 inches) – From doorknobs, accidents, or removed fixtures.
- Edge damage and corners – Where drywall meets trim or metal corner bead.
Basic rules of thumb:
- Cosmetic only? (scratches, tiny dents) – Often fixed with a quick skim of lightweight spackle and sanding.
- Structural or recurring issues? (large cracks, sagging drywall, soft or damp spots) – Stop and find the cause. You might have water leaks, framing movement, or other issues that need addressing before you patch.
If the drywall feels soft, crumbly, or shows stains or mold, track down the moisture source before any cosmetic repair. Patching over an active leak is wasting time and materials.
Step 1: Gather the Right Tools and Materials
Having everything ready makes the process smoother and your results better. You don’t need pro-grade gear, but you do need the basics that let you work cleanly and accurately.
Essential tools:
- 4–6 inch putty knife (for applying compound)
- 10–12 inch drywall knife (for final feathering on larger patches)
- Utility knife with sharp blades
- Sanding sponge or 120–220 grit sandpaper
- Dust mask and safety glasses
- Small bucket or pan for joint compound
Materials to have on hand:
- Pre-mixed joint compound (all-purpose or lightweight)
- Quick-dry spackle (for very small holes if you want faster turnarounds)
- Self-adhesive fiberglass mesh tape (for cracks and small holes)
- Drywall repair patch or scrap drywall (for larger holes)
- Backer support (a scrap of wood like a paint stir stick or 1x2 for larger holes)
- Primer (a stain-blocking or drywall-specific primer)
- Touch-up paint or wall paint that matches your existing color
Practical tips:
- If you’re only doing tiny holes and nail pops, a small tub of lightweight spackle and a 4-inch knife may be all you need.
- For multiple repairs or bigger areas, buy a larger bucket of joint compound; it’s easier to work with and sands more predictably.
- Use mesh tape for ease on smaller cracks and holes. For long or critical cracks, paper tape is stronger but takes more practice.
Step 2: Prep the Damaged Area the Right Way
Most bad-looking drywall patches came from skipped prep. This step doesn’t take long, but it’s key to getting compound to stick and blend.
1. Clean and inspect the area
- Wipe off dust, loose paint, or cobwebs with a dry or slightly damp cloth.
- Look for signs of moisture (staining, soft spots, bubbling paint). Fix any underlying issue before proceeding.
2. Open and firm up the damage
- For cracks, don’t just smear over them. Use a utility knife to slightly widen the crack into a shallow “V” shape. This gives your compound and tape something to grip.
- For nail or screw pops, don’t just fill the bump. Drive the existing screw slightly below the surface or remove it and install a new drywall screw about 1 inch above or below the original hole. Sink the new screw just below the surface without tearing the paper.
- For small holes, trim away any loose paper or crumbly gypsum with your knife so the edges are firm.
- For medium holes, cut a clean square or rectangle around the damage so you’re working with straight, solid edges.
3. Lightly scuff glossy paint
If your wall has a semi-gloss or gloss finish, lightly sand the area around the repair so the compound can bond well. Wipe off dust after sanding.
This quick prep makes a big difference in how well your patch holds up over time.
Step 3: Secure the Base and Apply Tape or Patch
Now you’ll create a stable base so your joint compound doesn’t crack or sag later.
For cracks and small holes
1. Apply mesh tape
- Center self-adhesive mesh tape over the crack or hole.
- Press it firmly so it bonds to the wall and lays flat—no wrinkles or bubbles.
- For small holes, one piece crossed over the center is usually enough.
2. Reinforce nail/screw pops
- After setting your new screw, you’ll cover the screw head with compound—no tape needed for a single fastener.
- If you have a line of fasteners or a larger crack nearby, use tape over the whole area.
For medium holes (up to about 6 inches)
You need a backing so the patch has something solid to sit against.
1. Install backing support
- Cut a thin strip of wood (like a paint stick or a 1x2) a few inches longer than the hole.
- Insert it into the hole and hold it tight against the inside of the existing drywall.
- From the front, drive 1–2 drywall screws through the existing drywall and into each end of the backing strip. Now you have a solid piece of wood behind the opening.
2. Create and secure the patch
- Cut a piece of drywall slightly smaller than the hole so it fits snugly.
- Place the patch against the backing board and secure it with 2–4 drywall screws, driving them just below the surface.
- Cover all seams between the patch and existing wall with mesh tape.
Take a moment to feel the area with your hand. The surface doesn’t need to be perfectly flat yet, but it should feel secure with no flexing when you press on it.
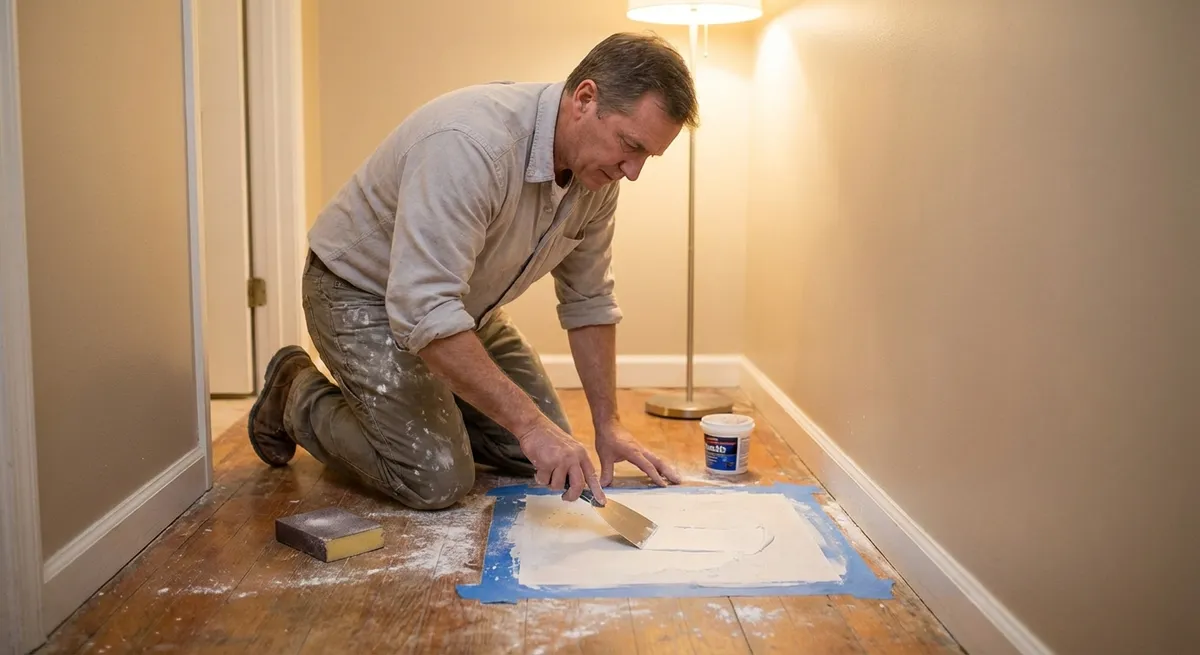
Step 4: Apply, Shape, and Sand the Joint Compound
This is where the repair starts to disappear. Plan on at least two coats, usually three for a truly invisible patch. Work thin; thick coats crack and are harder to sand.
First coat: Bed the tape and fill
- Load your knife with a modest amount of joint compound.
- Press firmly over the tape or patch, forcing compound through the mesh and into the crack or gaps.
- Scrape off excess, leaving just enough to cover the tape and fill low spots. Don’t try to make it perfect in one pass.
- Let it dry fully. Dry time varies by product and humidity—usually a few hours to overnight.
Second coat: Build and feather
- Switch to a wider knife (6–10 inch) for better blending.
- Apply a slightly wider coat over the first, extending an inch or two further on each side.
- Feather the edges: hold one side of the knife tighter against the wall and the opposite side slightly lifted. This creates a gradual slope instead of a noticeable ridge.
- Smooth out tool marks as best you can; it saves sanding time later.
- Let it dry completely.
Light sanding between coats
- Use a sanding sponge or fine sandpaper (120–150 grit).
- Sand lightly just to knock down ridges or bumps—don’t over-sand and expose the tape.
- Wipe away dust with a dry cloth or vacuum with a brush attachment.
Third coat: Final skim (if needed)
- Apply a thin, wide coat that extends beyond your previous coats.
- Focus on smoothing transitions, not building up thick material.
- After it’s fully dry, do a final sand with 180–220 grit for a smooth finish.
Pro tip: Shine a work light at a low angle across the wall. This raking light highlights imperfections that aren’t obvious straight on.
Step 5: Prime, Paint, and Blend the Repair
Skipping primer is one of the biggest reasons patches “flash” (show through) after painting. Joint compound is more porous than painted drywall, and it soaks up paint differently.
Prime the repair
- Use a stain-blocking or dedicated drywall primer.
- Cover the entire repaired area and slightly beyond.
- Let the primer dry per the manufacturer’s instructions.
Primer evens out absorption so your topcoat looks consistent and hides the repair.
Paint and blend
- If you have the original wall paint, use that. If not, take a chip (from an outlet cover area or a hidden spot) to a paint store for color matching.
- For small patches, you can often touch up just the repaired area and lightly feather the edges with a brush or small roller.
- For larger patches, paint from corner to corner or at least the full section of wall between natural breaks (like trim, doors, or corners) to avoid visible “patch outlines.”
- Match your existing sheen: flat, eggshell, satin, etc. A mismatch in gloss can make even a perfect patch stand out.
Let the paint dry fully, then check the repair in natural daylight and at night with lights on. That’s when you’ll see if any edges or ridges need a quick final touch.
Conclusion
Drywall repair looks intimidating until you break it down into a simple process: inspect, prep, support, build thin coats, then prime and paint. Once you’ve done a few patches, you’ll be able to fix nail pops, cracks, and everyday wall damage in an evening or a weekend with tools you keep on hand.
The real “secret” to pro-looking results isn’t special products—it’s patience with thin layers, proper drying time, and careful feathering. Take your time on those steps, and your walls won’t tell on past damage.
Sources
- [USG – Installing and Finishing Gypsum Panels](https://www.usg.com/content/usgcom/en/products-solutions/products/wallboard/drywall-panels/ultralight-panels/ultralight-mold-tough-panels.html) - Manufacturer guidance on working with drywall panels and compounds
- [Family Handyman – How to Patch and Repair Drywall](https://www.familyhandyman.com/project/how-to-patch-and-repair-drywall/) - Practical step-by-step examples and repair variations
- [Home Depot – Drywall Repair Projects and Tips](https://www.homedepot.com/c/ab/drywall-repair-projects-and-tips/9ba683603be9fa5395fab9013eb0a4a) - Product-specific instructions and visual guides for DIYers
- [Lowe’s – How to Patch and Repair Drywall](https://www.lowes.com/n/how-to/patch-and-repair-drywall) - Illustrated walkthroughs for small and medium drywall repairs
- [Benjamin Moore – How to Touch Up Wall Paint](https://www.benjaminmoore.com/en-us/painting-ideas-inspiration/interior-painting-ideas/how-to-touch-up-paint) - Tips for priming and blending paint so repairs are less visible
Key Takeaway
The most important thing to remember from this article is that this information can change how you think about Home Repair.


