A slow bathroom sink is annoying, but it’s also one of the easiest home repairs you can tackle yourself. Hair, soap scum, and toothpaste build up over time, turning a once-speedy drain into a standing-water problem. Instead of jumping straight to harsh chemicals or a service call, you can usually clear the clog with simple tools and a bit of patience.
This guide walks you through a practical, step-by-step approach: from quick checks to a full P-trap cleaning. You’ll learn how to work safely, avoid damaging your plumbing, and know when it’s time to stop and call a pro.
Know What You’re Dealing With (and What to Avoid)
Before you start pulling pipes apart, it helps to understand what typically clogs a bathroom sink—and the common mistakes DIYers make.
Most bathroom sink clogs are caused by:
- Hair catching on the pop-up stopper or rod underneath it
- Soap scum and toothpaste mixing with hair and sticking to the pipe walls
- Small debris (floss, cotton swabs, etc.) that never should’ve gone down the drain
Things to avoid right away:
- Pouring chemical drain cleaners into the sink “just to try” – they can damage pipes, especially older metal ones, and make future manual cleaning risky because of chemical residue.
- Using excessive force with tools – overtightening or wrenching plastic fittings can crack them.
- Ignoring leaks after reassembly – even a slow drip can lead to cabinet damage and mold over time.
Have a small bucket, some rags, and a pair of disposable gloves ready. If you have a second bathroom, plan to use that sink while you work in case this takes longer than expected.
Step 1: Clear the Stopper and Surface Gunk
Often the slow drain problem is right at the top, just under the drain opening.
- Remove items from under the sink so you have room to work later if needed. Lay down an old towel to protect the cabinet.
Check the drain stopper:
- If your sink has a simple lift-out stopper, pull it straight up. - If it won’t come out, it’s likely attached to a pivot rod under the sink; you’ll handle that in Step 3. 3. With the stopper lifted out, wipe off visible hair and buildup using a paper towel or old rag. Don’t rinse this junk back down the drain—throw it in the trash. 4. Use a flashlight to look into the drain opening. If you see more hair within an inch or two of the surface: - Insert a small plastic drain cleaning tool (sometimes called a hair clog remover or drain snake strip). - Push it gently down several inches, then pull it back up slowly to catch hair. 5. Repeat a few times until you’re no longer pulling out material. Run the water for 10–15 seconds to test flow.
If the sink is still draining slowly or the stopper won’t come out, move on to the next step.
Step 2: Try a Safe Hot Water and Baking Soda Flush
If you’ve removed obvious gunk from the top but the drain is still sluggish, a simple hot-water flush can help break up soap scum deeper in the line.
- Boil a kettle or large pot of water. If you have PVC (plastic) pipes, let the water cool for a minute off the boil so it’s very hot but not violently boiling, to reduce stress on the plastic.
- While the water heats, wipe out any standing water from the sink with a cup and sponge so the hot flush can reach the clog more effectively.
- Slowly pour the hot water directly down the drain in two or three stages, giving it 20–30 seconds between pours.
If you want a bit more cleaning power, use this sequence:
- Pour about ½ cup of baking soda into the drain. - Follow with ½–1 cup of plain white vinegar. It will fizz—this helps loosen some grime. - After 10–15 minutes, flush with your hot water. 5. Check flow by running the faucet on full for 30–60 seconds. If the water is still pooling, the clog is likely deeper or wrapped around the stopper assembly.
At this point, don’t repeat chemical-free flushes endlessly—if it hasn’t worked after one or two tries, move on to mechanical removal.
Step 3: Remove the Pop-Up Stopper from Below
Many bathroom sinks use a pop-up drain system connected to a rod and lever under the sink. Hair often collects right where the stopper meets the rod.
- Place a bucket or shallow container under the sink below the drain area to catch any drips.
- Look at the back of the drainpipe under the sink. You should see a horizontal pivot rod going into the drain tailpiece (the vertical pipe coming down from the sink).
- Where that rod enters the pipe, you’ll find a pivot nut (usually plastic, sometimes metal).
- Loosen the pivot nut by hand first. If it’s stuck, use pliers but don’t crank hard; plastic parts crack easily.
- Once the nut is loosened, slide the pivot rod straight out of the drainpipe. You may hear a little water drip—this is normal.
- From the top of the sink, pull the stopper straight up. It should come out easily now.
Clean the stopper thoroughly:
- Remove hair wrapped around the bottom “hook” where the rod used to hold it. - Wipe off any thick soap scum. 8. With the stopper out, use your plastic drain tool again to clear anything further down the vertical pipe. Go slowly and pull debris out, don’t force it down.
Before testing the drain, you can either leave the stopper out temporarily or reinstall it loosely after you’ve cleaned deeper components in the next step.
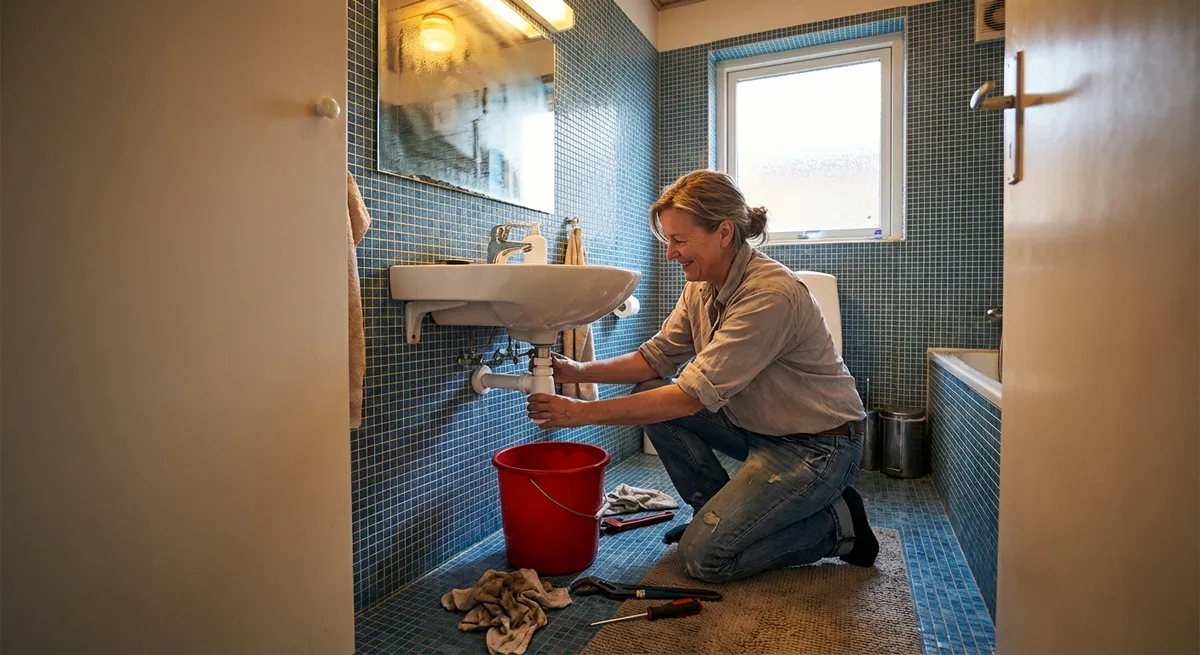
Step 4: Take Off and Clean the P-Trap
If you’ve cleared the stopper area and it’s still slow (or not draining at all), the clog may be in the P-trap—the curved section of pipe under the sink where debris often settles.
- Place a bucket directly under the P-trap to catch any water and gunk.
- Identify the P-trap: it’s the U-shaped pipe under the sink connected between the vertical drain from the sink and the horizontal pipe going into the wall.
- Most traps have slip-joint nuts (large plastic or metal rings) at both ends.
- Try loosening them by hand.
- If they’re stuck, gently use adjustable pliers, but don’t overtighten or crush plastic fittings.
- Once both nuts are loosened, carefully lower the P-trap into your bucket. It will likely be full of dirty water, hair, and soap scum.
- Take the trap to a utility sink or outdoors. Clean it thoroughly:
- Use a bottle brush or old toothbrush to scrub the inside.
- Rinse until water flows clearly through the curve.
Look into the pipes connected to the wall and the sink side:
- Use a flashlight. - If you see buildup within reach, gently loosen it with your drain tool or a small, flexible brush.
Reassemble the P-trap:
- Make sure the rubber or plastic washers are seated correctly on the slip joints. - Hand-tighten the nuts firmly; avoid using tools unless you have a minor leak, then give a small extra turn.
Do not overtighten plastic fittings—hand tight plus a quarter-turn is usually plenty.
Step 5: Test for Leaks and Restore Normal Operation
Now that you’ve cleared the major clog points, you need to make sure everything works and doesn’t leak.
Start with the stoppers and pivot rod:
- Reinsert the clean stopper from the top of the sink. - Under the sink, slide the pivot rod back into the hole on the drain tailpiece. You may need to wiggle the stopper a bit so the rod catches its slot. - Reinstall and hand-tighten the pivot nut. 2. Connect the pivot rod to the lift rod mechanism (the vertical rod behind the faucet) using the small metal clip and holes on the adjustment strap. Choose the hole that lets the stopper fully open and close. 3. With the bucket still under the drain, run the water at full flow for at least 1–2 minutes.
While the water runs:
- Inspect every connection you touched: the trap nuts, the pivot nut, and any other fittings. - Look for drips, then wipe the pipe with a dry paper towel to confirm any moisture source.
If you find a small leak:
- Try gently tightening the nearby slip nut by hand another quarter-turn. - If it still leaks, turn off the water, disassemble that joint, check that the washer is correctly seated and not cracked, then reassemble.
Once it’s watertight, test your stopper:
- Fill the sink halfway, then release the stopper. - Watch how quickly the water drains. - Check under the sink one more time for leaks as it drains.
If the drain is clear, you’re done. Put your stored items back under the sink, keeping an eye out over the next day or two for any new signs of dampness.
When to Stop and Call a Professional
DIY fixes are great, but there’s a point where more force or more “experiments” can do more harm than good. Stop and call a licensed plumber if:
- Multiple fixtures in the same bathroom (sink, tub, toilet) are draining slowly or backing up—this suggests a bigger line or main drain issue.
- You see signs of corrosion on metal pipes, crumbling fittings, or the trap won’t reseal without leaking.
- You smell strong sewage odors from the drain even after cleaning.
- Chemical drain cleaners were already used and didn’t work—let a pro handle lines that may now contain caustic residues.
Taking the time to clear a slow sink drain properly usually means you won’t be dealing with it again for a while. Cleaning the stopper and trap once or twice a year as routine maintenance can prevent most clogs from ever forming.
Sources
- [U.S. Environmental Protection Agency (EPA) – Safer Choice: Drain Maintenance](https://www.epa.gov/saferchoice) – Guidance on choosing safer cleaning options and why to limit harsh chemical drain cleaners
- [Family Handyman – How to Fix a Slow Draining Bathroom Sink](https://www.familyhandyman.com/project/how-to-fix-a-slow-draining-bathroom-sink/) – Step-by-step photo guide to removing stoppers and cleaning traps
- [The Spruce – How to Remove and Clean a Sink P-Trap](https://www.thespruce.com/how-to-remove-and-clean-a-p-trap-2718756) – Detailed instructions and diagrams of trap components
- [International Association of Certified Home Inspectors (InterNACHI) – Plumbing Traps and Vents](https://www.nachi.org/plumbing-traps-vents.htm) – Background on how traps work and why they matter for drainage and odor control
Key Takeaway
The most important thing to remember from this article is that this information can change how you think about Home Repair.


