Small wall damage is one of the most common home repair headaches—and one of the easiest to fix yourself. Whether it’s from a doorknob, a misplaced chair, or an old wall anchor, you don’t need to live with dents and holes in your drywall. With a few basic tools and some patience, you can get a smooth, paint-ready surface that looks like new.
This guide walks through a practical, DIY-friendly process to repair holes up to about 4 inches across in interior drywall.
Know Your Wall and Damage Before You Start
Not all holes are the same, and how you fix them depends on their size and your wall type.
Most modern homes use drywall (also called gypsum board or plasterboard). Older homes may have plaster walls, which are harder and may require different materials and techniques. If you’re not sure, lightly tap the wall: drywall usually sounds hollow with a softer feel; plaster tends to feel harder and less flexible.
For this guide, we’ll focus on drywall repairs for:
- Nail and screw holes (small punctures)
- Picture-hanger damage and former wall anchors
- Dings and dents from furniture or door handles
- Small to medium holes (up to about 4 inches across)
If you see signs of water damage (stains, soft or crumbly drywall, musty smell), fix the leak or moisture source first. Covering over wet or moldy drywall will only create a bigger problem later.
Step 1: Prep the Area So the Patch Actually Sticks
A clean, stable surface is what makes the repair last.
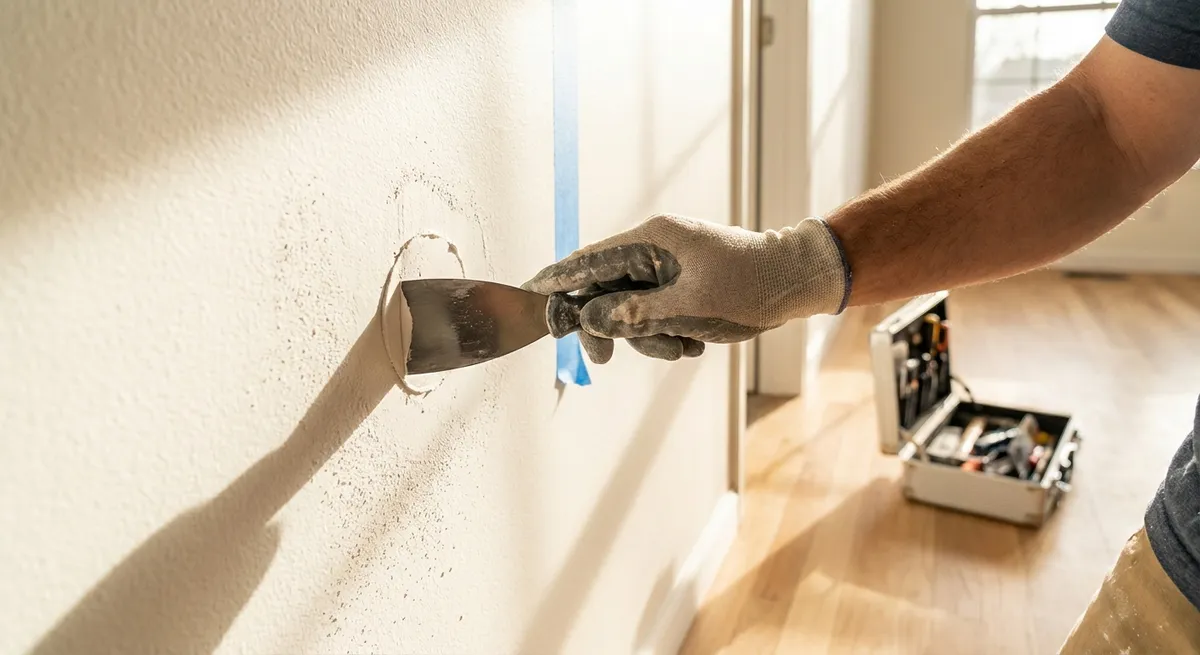
- Remove loose material. Use a utility knife or putty knife to scrape away any flaking paint, crumbling drywall, or rough edges. For larger holes, cut away ragged edges to create a more regular shape (circle, square, or rectangle).
- Check for hidden hazards. Before cutting or enlarging a hole, be careful about wires and plumbing. Avoid using deep saw cuts near outlets, switches, or plumbing lines. If you’re unsure, stop and consult a professional.
- Lightly sand around the hole. Use medium-grit sandpaper (120–150 grit) to scuff the paint and create a surface that joint compound or patch material can grip. Sand about 2–3 inches around the damaged area.
- Wipe away dust. Use a dry or slightly damp cloth to remove sanding dust and debris. Let it dry completely. Dust left on the wall can cause the repair to peel or bubble.
- Protect nearby surfaces. Lay down a drop cloth or old sheet, and if you’re working near trim or outlets, use painter’s tape to protect edges and covers from compound and paint.
Step 2: Choose the Right Patch Method for the Hole Size
Using the right approach for the damage saves time and gives a cleaner finish.
For tiny holes (nails, picture hooks, pinholes):
- Spackling compound (lightweight or all-purpose)
- 2"–3" putty knife
These can usually be done in a single quick coat.
For small to medium holes (up to about 1/2 inch):
- Spackling or joint compound
- Possibly a second coat and light sanding
You typically don’t need mesh tape or a patch.
For larger holes (about 1/2 inch to 4 inches):
- Self-adhesive mesh patch _or_
- A small piece of drywall plus joint tape
- All-purpose joint compound
- 4"–6" taping knife, maybe also an 8"–10" knife for feathering
Tip: If you’re new to this, self-adhesive mesh patches are often the easiest option for holes roughly the size of a golf ball to a baseball. For larger than that, a cut-in drywall patch is usually stronger and blends better.
Step 3: Install the Patch or Build Up the Repair
Now you’ll fill or cover the damage so it’s structurally sound and ready for finishing.
For very small holes and dings
- Load your knife. Scoop a small amount of spackle onto your putty knife.
- Press and fill. Push the compound firmly into the hole, then scrape the surface flat. Hold the knife at a slight angle and pull across the repair in several directions.
- Thin it out. Remove any obvious ridges or excess material; a thinner, neat coat dries faster and sands easier.
Often a single coat is enough for nail holes; deeper dings may need a second light application after the first coat dries.
For medium holes with a mesh patch
- Apply the patch. Center the self-adhesive mesh patch over the hole and press it firmly so it sticks flat to the wall.
- First coat of compound. Using a 4"–6" knife, spread joint compound over the patch, pressing it into the mesh. Cover the patch completely but don’t worry about perfection yet.
- Feather the edges. Thin the compound out as you move away from the center of the patch. This reduces the “hump” effect when it’s dry.
- Let it dry. Follow the compound’s instructions; drying can range from 20 minutes (for fast-setting) to 24 hours.
For cut-in drywall patches (more advanced but very solid)
- Square up the hole. Use a drywall saw or utility knife to cut the damaged area into a neat rectangle or square.
- Cut a patch piece. From scrap drywall, cut a piece the same thickness as your wall and slightly smaller than the opening.
- Add backing support. Screw a short piece of wood (like a 1"x2") behind the opening, spanning the hole so you can screw the drywall patch into it from the front.
- Screw in the patch. Fasten the new piece of drywall to the backing. It should sit flush with the surrounding wall.
- Tape the seams. Place self-adhesive mesh tape or paper tape over all seams to prevent future cracking.
Once the physical patch is in place, you’re ready to compound just like with a mesh patch.
Step 4: Build Up Smooth Layers and Sand for a Seamless Look
This is where the repair goes from “obvious patch” to “almost invisible.”
- Apply a second coat. Once the first coat is fully dry, add a wider, thinner coat of joint compound that extends farther beyond the patch edges (6"–10" wide area for larger patches). Use a wider knife for smoother results.
- Focus on blending. The goal is a shallow, wide “feather” into the existing wall, not a thick mound in the middle. Keep the center slightly proud if needed, but the outer edges should gradually blend into the original surface.
- Sand lightly. When dry, use fine-grit sandpaper (180–220 grit) or a sanding sponge. Use light pressure and short, overlapping strokes. You’re knocking down ridges, not carving into the wall.
- Check with a light. Shine a flashlight or lamp at an angle across the patch to highlight bumps or dips. Mark problem areas lightly with a pencil.
- Touch up as needed. If you still see low spots or obvious edges, apply a very thin skim coat of compound over those areas, let dry, and sand again.
Wear a dust mask or respirator while sanding—drywall dust is fine and gets everywhere. Vacuum or wipe down the area afterward.
Step 5: Prime, Paint, and Blend with the Rest of the Wall
A solid patch can still stand out if the paint and sheen don’t match.
- Prime the repair. Use a drywall or stain-blocking primer over the patched area. Primer seals the compound and helps prevent “flashing” (a spot that looks different under lighting).
- Feather the primer. Don’t stop primer with a hard edge; extend slightly beyond the patch so the paint blend will be smoother.
- Match the paint type. Use the same finish as the rest of the wall: flat, eggshell, satin, etc. Sheen mismatch is one of the biggest reasons patches are visible.
- Blend the edges. When painting, keep a “wet edge” and lightly roll or brush beyond the patch so you don’t leave a visible outline. For small spots, a foam roller can help mimic the existing texture.
- Consider repainting a section. On older or faded walls, the best blend may come from repainting from corner to corner or along a full wall section rather than just the patch.
Let the paint fully dry before judging the final look—colors and sheen can change slightly as they cure.
Conclusion
Fixing a small hole in drywall is one of the most useful home repair skills you can learn. With some basic tools, a little practice spreading compound, and a careful approach to sanding and painting, you can turn damaged walls into clean, smooth surfaces that don’t give away where the problem used to be.
Once you’re comfortable with this process on small holes, you’ll be better prepared to tackle larger patches, repair old anchor damage, and keep your walls looking ready for whatever project you take on next.
Sources
- [USG – Joint Treatment Tips and Best Practices](https://www.usg.com/content/usgcom/en/products-solutions/products/wallboard/joint-treatment/joint-compounds/how-to-apply-joint-compound.html) - Manufacturer guidance on applying joint compound and building up smooth surfaces
- [Home Depot – How to Patch and Repair Drywall](https://www.homedepot.com/c/ah/how-to-patch-and-repair-drywall/9ba683603be9fa5395fab901c79fd19) - Step-by-step visuals and material options for different hole sizes
- [Lowe’s – How to Patch and Repair Drywall](https://www.lowes.com/n/how-to/patch-repair-drywall) - Additional instructions and tips on using mesh patches and sanding techniques
- [Family Handyman – How to Patch Drywall](https://www.familyhandyman.com/project/how-to-patch-drywall/) - Practical, DIY-focused advice on cutting in patches and preventing future cracks
Key Takeaway
The most important thing to remember from this article is that this information can change how you think about Home Repair.


