Small wall damage is one of the most common eyesores at home—nail holes, a doorknob bump, or that time a chair scraped the drywall a little too hard. The good news: you don’t need to call a contractor to fix it. With a few basic supplies and a bit of patience, you can repair small wall holes so smoothly that paint is the only thing you’ll notice.
This guide walks you through a straightforward, five-step process any confident DIYer can handle, plus practical tips to avoid the most common mistakes that make repairs show through paint.
Step 1: Identify the Damage and Choose the Right Repair Method
Before grabbing the spackle, figure out exactly what you’re dealing with. Different damage needs different fixes.
For small wall repairs, think in four basic categories:
- Pinholes and nail holes: From picture hooks or cables. Usually smaller than a pencil eraser.
- Screw holes and minor dents: A bit larger, often from shelving brackets or bumped furniture.
- Doorknob-sized holes (up to about 4 inches): Often from impact, like a door without a stop.
- Hairline cracks: Especially around windows, doors, or where two materials meet.
Match damage to method:
- Pinholes and tiny nail holes: Lightweight spackling or paintable caulk is usually enough.
- Screw holes and minor dents: Use a premixed joint compound or slightly heavier spackle.
- Larger holes up to 4 inches: Use a wall repair patch or a piece of drywall with joint compound.
- Hairline cracks: Flexible, paintable caulk can be better than rigid compound, especially near trim or doors where movement is common.
Quick checks before you start:
- Press gently around the damaged area. If the wall feels spongy or crumbles easily, you may have a bigger problem like moisture damage that needs further investigation.
- Look for discoloration, repeated cracking, or soft spots. Fix any underlying leaks or movement before patching.
- Confirm the wall type: most modern interiors are drywall, but older homes might have plaster, which can require slightly different tools and a gentler touch when sanding.
Step 2: Prep the Area for a Strong, Clean Repair
Good prep is the difference between a patch that disappears and one that sticks out under every light in the room.
Follow this sequence:
- Clean the surface.
- Wipe the area with a damp cloth or sponge to remove dust, grease, or residue.
- For older walls or areas near kitchens, use a mild detergent solution and let dry completely.
- Remove loose material.
- Use a utility knife or 5-in-1 tool to scrape off any loose paint, flaking drywall paper, or crumbling edges.
- For larger holes, slightly bevel the edges inward—this helps the compound feather out and blend.
- Lightly roughen glossy surfaces.
- If the wall is very smooth or shiny (e.g., semi-gloss paint), lightly scuff the area with 220-grit sandpaper.
- Wipe away dust with a clean, damp cloth and let it dry.
- For larger holes, install a backing or patch.
- For holes about 1–4 inches, use a self-adhesive wall repair patch (fiberglass mesh with a backing).
- Center the patch over the hole and press firmly, smoothing out bubbles.
- For slightly bigger or irregular holes, you might cut a small piece of drywall and screw it to a backing board—but for most DIYers, a store-bought patch is easier and fast.
- Prime exposed paper or raw drywall (if needed).
- If scraping exposed the brown paper layer of drywall or raw gypsum, brush on a quick-dry primer or sealer before applying compound.
- This prevents bubbling and uneven absorption that can ruin the finish.
Taking a few extra minutes here prevents many of the issues people blame on “bad mud” or “cheap paint” later.
Step 3: Apply Compound or Spackle in Thin, Even Layers
Now you’re ready to fill the damage. The key rule: thin layers beat one thick blob every time.
For pinholes and nail holes
- Use a flexible putty knife (1.5–3 inches wide).
- Scoop a small amount of lightweight spackle onto the knife.
- Press the spackle directly into the hole, then scrape the excess off at a slight angle.
- Leave just enough to fill the hole flush with the wall—no mounds.
For screw holes and small dents
- Use joint compound or a heavier premixed spackle.
- Apply with a 4–6 inch putty knife.
- Press the compound firmly into the damaged area, then stroke across it in two directions (horizontal and vertical) to fill and smooth.
- Feather the edges by holding the knife at a shallow angle and wiping outward so the compound thins into the surrounding wall.
For larger holes with a patch
- Place compound on your 6-inch knife and spread it over the patch in all directions, fully covering the mesh or patch surface.
- Keep the center slightly thicker to hide the patch, but focus on feathering the edges several inches beyond the patch so there’s no obvious ridge.
- Let this first layer dry according to the package instructions (often 2–24 hours depending on the product and thickness).
Practical tips:
- Don’t overwork the compound—once it starts stiffening, leave it alone and fix imperfections in the next coat.
- If you see pinholes or small air bubbles, they often appear as it dries; you’ll address them in the next pass.
- Use a dust mask if working in enclosed spaces, especially when you know you’ll be sanding later.
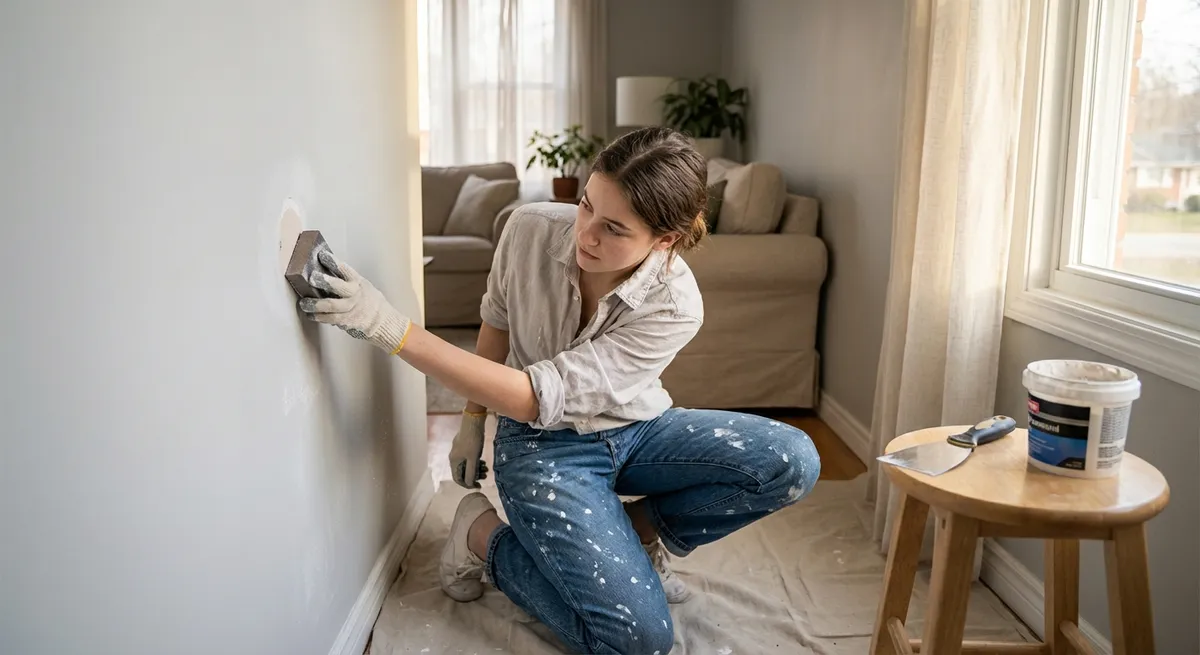
Step 4: Sand Smooth and Add a Second (and Third, if Needed) Coat
This is where your repair goes from “patched” to “invisible.” Rushing the sanding and second coat is the most common DIY mistake.
- Let the first coat dry completely.
- It should be hard to the touch and not cool or tacky.
- If it gums up your sandpaper, it’s not ready.
- Sand lightly.
- Use 220-grit sandpaper or a sanding sponge.
- Sand in light, circular motions over the patch, blending into the surrounding wall.
- Focus on knocking down high spots and edges, not removing all the compound you just added.
- Check with your hand and the light.
- Run your fingertips lightly over the area—you’ll feel ridges more easily than you see them.
- Shine a light at a shallow angle across the wall; this reveals lumps, dips, and scratch marks.
- Apply a second coat.
- Use a wider knife (6–8 inches) and spread a thinner coat that extends beyond the first.
- Your goal now is to feather and blend, not to build height.
- Fill any pinholes or tiny depressions you see from the first coat.
- Repeat drying and sanding.
- After the second coat dries, sand again—very lightly this time.
- For larger patches, a third ultra-thin coat may be needed for a perfect blend.
Dust control tips:
- Lay down a drop cloth or old sheet to catch the dust.
- Use a vacuum with a brush attachment on the wall after sanding, or wipe with a barely damp cloth to remove fine dust before priming.
- If you’re doing several patches, a sanding sponge with dust-collection holes (used with a compatible hand sander or vacuum) can help keep the air cleaner.
Step 5: Prime, Paint, and Blend the Repair with the Rest of the Wall
Even a perfect patch can stand out if you skip primer or mismatch the paint. This last step makes everything look intentional and uniform.
- Prime the patched area.
- Use a stain-blocking or drywall primer, even on small repairs.
- Primer evens out how the wall absorbs paint so the patch doesn’t “flash” (look duller, shinier, or a different texture).
- For small nail holes, a small artist brush or mini foam roller works well.
- Match your paint type and sheen.
- Confirm whether your wall is flat, eggshell, satin, semi-gloss, or gloss. Sheen mismatch is very noticeable.
- If you don’t know the brand or color, take a paint chip (from a less visible area, like behind a switch plate) to a paint store for matching.
- Use the right tool for blending.
- For small spots, a foam brush or small high-quality brush can minimize brush marks.
- For larger areas or multiple patches on one wall, it’s often better to repaint the entire wall section with a roller for consistent texture.
- Feather the paint.
- Don’t glob all your paint in the center of the patch.
- Start your brush or roller in the middle of the repair, then gently spread outwards, using lighter pressure as you move away to blend into the old paint.
- Let it dry and reassess in different light.
- Once dry, check during the day and at night with indoor lighting.
- If you still see a faint outline, a second, thin coat of paint across a wider area usually takes care of it.
If the wall has a textured finish (orange peel, knockdown, stipple), you may need a spray texture product or a specialty roller to match the existing look before priming and painting. Many home centers sell small cans of aerosol texture labeled by type; always test on scrap cardboard first and apply lightly.
Conclusion
Repairing small wall holes isn’t just about making your home look better—it also keeps damage from getting worse and makes future painting much easier. By taking your time with prep, building up thin layers of compound, sanding carefully, and finishing with primer and properly matched paint, you can turn distracting damage into a clean, smooth surface that blends into the rest of the wall.
Once you’ve done a few of these repairs, you’ll stop ignoring those dings and nail holes and start knocking them out in an evening. It’s one of the simplest, highest-impact home fixes you can master—and a big step toward keeping your home looking “Fix Ready” year-round.
Sources
- [U.S. General Services Administration – Gypsum Board (Drywall) Overview](https://www.gsa.gov/technical-procedures/masonry/gypsum-board-drywall/gypsum-board-general) - Explains basic drywall construction, layers, and properties that affect repair methods
- [Home Depot – How to Patch and Repair Drywall](https://www.homedepot.com/c/ah/how-to-patch-and-repair-drywall/9ba683603be9fa5395fab904d6ee334) - Step-by-step reference with visuals for spackling, patching, and sanding
- [Lowe’s – How to Patch a Hole in Drywall](https://www.lowes.com/n/how-to/patch-hole-in-drywall) - Practical guidance on choosing patch types and compounds for different hole sizes
- [Benjamin Moore – How to Touch Up Interior Wall Paint](https://www.benjaminmoore.com/en-us/consumer-and-professional-tips/interior-painting-advice/how-to-touch-up-interior-wall-paint) - Covers blending, sheen matching, and avoiding visible touch-up marks
- [Sherwin-Williams – Paint Sheen Guide](https://www.sherwin-williams.com/en-us/homeowners/solutions/paint-sheen-guide) - Explains how different paint sheens affect the look of repaired areas and touch-ups
Key Takeaway
The most important thing to remember from this article is that this information can change how you think about Home Repair.


