A door that sticks, swings open by itself, or rubs the frame is annoying—and it usually gets worse over time. The good news: most interior door problems come down to a few simple issues you can fix with basic tools. This guide walks you through practical, step-by-step repairs so your door closes cleanly, latches securely, and stops scraping the floor or frame.
Step 1: Diagnose Why the Door Isn’t Closing Right
Before grabbing tools, figure out what’s actually wrong. Different problems call for different fixes, and guessing often leads to more damage.
Stand back and slowly open and close the door while watching:
- Does it swing open or shut on its own?
That usually means the door is slightly out of plumb because the hinges have shifted or the frame is not square.
- Does it rub against the top, side, or bottom?
Look for fresh scrape marks on the door edge, top, or along the floor. This tells you where it’s binding.
- Is the gap (reveal) around the door uneven?
Ideally, you should see a small, even gap (around 1/8"–3/16") around the top and sides. A tight or zero gap on one side points to hinge or frame movement.
- Does the latch not catch or only catch if you push the door hard?
This is usually a misaligned strike plate or a door that has sagged slightly.
- Are any hinge screws loose or stripped?
Lightly wiggle the door while watching the hinges. If you see movement between hinge and jamb, you’ve found a big part of the problem.
Once you know whether you’re dealing with sagging, sticking, rubbing, or latch issues, you can choose the right repair instead of fighting all of them at once.
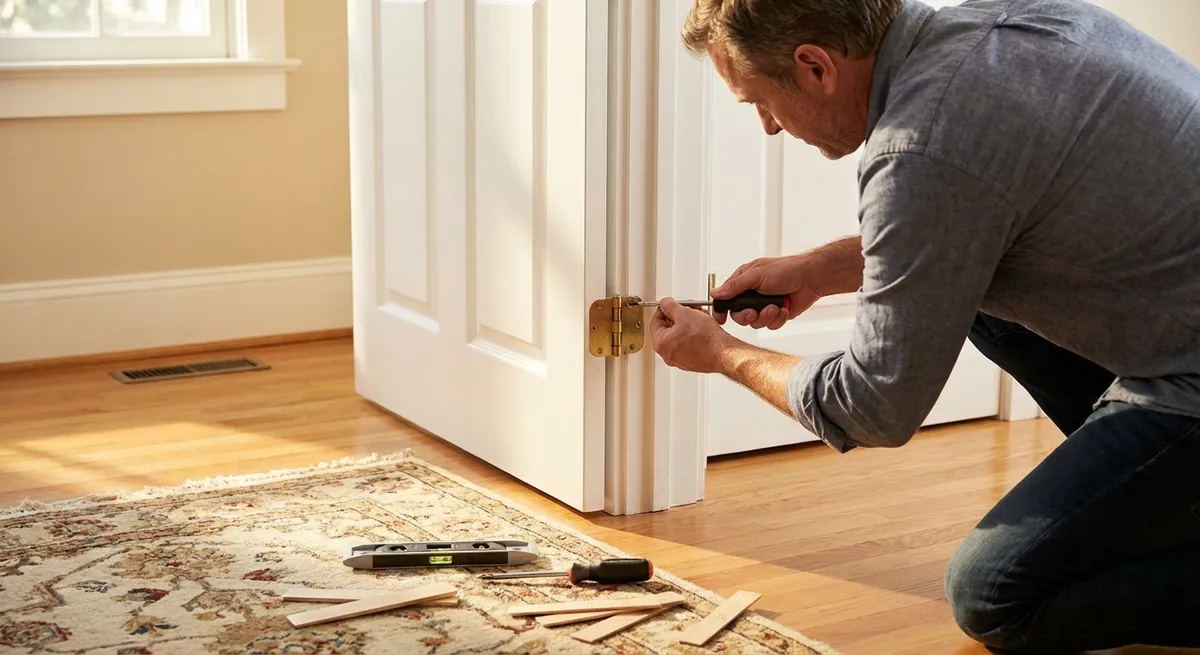
Step 2: Tighten and Reinforce Hinges to Fix Door Sag
Most interior doors develop problems because the hinges loosen over time. Tightening and reinforcing them often solves the issue without cutting or sanding anything.
You’ll need: a screwdriver (preferably hand-driven), longer wood screws (like #8 or #9, 2.5"–3"), and wooden toothpicks or matchsticks if screw holes are stripped.
- Check all hinge screws by hand.
Use a screwdriver to gently tighten each screw on both the door side and frame side of every hinge. Don’t use a drill here—you can easily overtighten and strip the wood.
- Focus on the top hinge first.
The top hinge carries most of the door’s weight. If your door is sagging (gap wider at the top on the latch side), tightening or reinforcing the top hinge often lifts the door slightly and evens things out.
- Replace short frame screws with longer ones.
If the screws in the jamb (frame) are only an inch or so long, swap one or two of them (especially on the top hinge) for 2.5"–3" screws. Drive them in straight so they bite into the wall framing behind the jamb, pulling the door up and back toward the hinge side.
- Repair stripped screw holes if needed.
If a screw just spins and never tightens:
- Remove it and fill the hole with wood glue and a few broken wooden toothpicks or matchsticks.
- Let it sit a few minutes, then trim flush.
- Reinsert the screw and tighten. It should bite firmly again.
- Test the door after tightening.
Open and close the door several times. If the sagging is fixed, the latch should line up better, gaps should be more even, and any rubbing at the latch-side top corner may disappear.
If the door still rubs or the latch misses, move on to small alignment tweaks.
Step 3: Adjust the Door Position Without Major Carpentry
If your door still sticks or the gap looks off, you can tweak how the door hangs by slightly moving the hinges or their leaves. This lets you shift the door a bit without replacing it or trimming too much material.
You’ll need: screwdriver, thin cardboard or business cards (for shims), and optionally a hammer and wood chisel.
- Use hinge shims for minor adjustments.
To move the door away from the hinge side (for example, if it rubs on the latch side at the top):
- Loosen the screws on the top hinge (door side or frame side, depending where you need movement).
- Insert a thin shim (like a cut piece of business card) behind the hinge leaf.
- Retighten the screws, trapping the shim behind the hinge.
- This slightly pivots the door, usually opening up space where it was rubbing.
- Adjust the bottom hinge if the door rubs at the bottom latch corner.
Add a thin shim behind the bottom hinge in a similar way. Small changes at the hinges can translate into noticeable clearance at the door corners.
- Set the hinge deeper if the door is too far from the jamb.
If the hinge leaf sits proud of the jamb and causes a large gap:
- Remove the hinge leaf from the jamb.
- Lightly pare away a small amount of wood in the mortise with a sharp chisel so the hinge can sit slightly deeper.
- Reinstall the hinge and test. Only remove a very small amount at a time—you can’t put wood back.
- Check alignment after each small change.
Don’t do multiple big adjustments at once. Make a small change, tighten everything, then open and close the door. Watch the reveal around the edge and see if rubbing has improved.
- Confirm that hinges are all in line.
Misaligned hinges can twist the door slightly. With the door open, sight down the hinge barrels—they should line up in a straight vertical line. If one looks out of line, its screws may not be seated flat or the hinge leaf could be warped and need replacing.
Once the door swings freely but still isn’t latching right, you’re ready to fine-tune the latch and strike plate.
Step 4: Realign the Latch and Strike Plate So the Door Catches Cleanly
If you have to yank the door to make it latch, or the latch doesn’t catch at all unless you lift or push the door, the strike plate is likely out of alignment with the latch bolt.
You’ll need: screwdriver, pencil or painter’s tape, small file or metal rasp, wood chisel (optional), and possibly wood filler or longer screws.
- Find where the latch actually hits the strike plate.
- Close the door slowly and watch where the latch contacts the strike.
- You can put a bit of lipstick, chalk, or marker on the latch, then close the door lightly, to transfer a mark onto the strike plate showing where they meet.
- Check vertical alignment first.
If the latch hits above or below the strike plate opening:
- Adjust the strike plate position for larger mismatches.
If the latch is clearly too high or low for the plate:
- Fix latch depth issues.
If the door closes but feels springy or doesn’t fully “click”:
- Check handle and latch operation.
Make sure the latch moves smoothly when you turn the knob or lever and springs back fully when released. If it sticks, a light spray of silicone lubricant on the latch (wipe off excess) can improve operation.
At this point, many door problems are resolved. If your door was also dragging the floor or rubbing the frame edge, you may still need a bit of trimming.
Step 5: Trim a Sticking Door Safely and Cleanly
If despite hinge and latch adjustments the door still scrapes the floor or frame, carefully removing a small amount of material from the problem area is the final step. Done right, you’ll barely notice the change—but you’ll definitely notice the smoother operation.
You’ll need: masking or painter’s tape, pencil, hand plane or sanding block (for small adjustments), circular saw or power planer (for larger corrections), and paint or finish for touch-ups.
- Mark exactly where the door is rubbing.
- Close the door until it just catches.
- Slide a piece of paper along the edge where you think it rubs; where the paper stops, that’s the tight spot.
- Mark these spots with a pencil or a strip of painter’s tape on the edge of the door.
- Take the door off the hinges if doing more than light sanding.
- Support the door, then remove the hinge pins with a screwdriver and hammer (tap gently from bottom if needed).
- Lay the door flat on a pair of sawhorses or a protected surface.
- Start with the least aggressive tool.
For minor rubbing:
- Use a circular saw with a guide for larger adjustments.
If you need to remove more material from the bottom:
- Smooth and seal the trimmed edge.
- After trimming, sand the cut edge smooth.
- Prime and paint or seal the bare wood to protect it from moisture. Unsealed edges can swell later and recreate the rubbing problem.
Rehang the door, reinstall the hinge pins, and test it several times. It should now swing freely, clear the floor and frame, and latch securely without force.
Conclusion
Most “problem” doors don’t need replacing—they need a careful look at hinges, alignment, latch position, and sometimes a small amount of trimming. By diagnosing the specific issue and working through tightening, shimming, strike plate adjustments, and controlled trimming, you can restore a smooth, solid-closing interior door with basic tools and a bit of patience. These same steps work across most interior doors in your home, making this a repair skill that pays off again and again.
Sources
- [This Old House – How to Fix a Sticking Door](https://www.thisoldhouse.com/doors/21015187/how-to-fix-a-sticking-door) - Step-by-step methods for diagnosing and correcting common door problems
- [Family Handyman – How to Align a Door](https://www.familyhandyman.com/project/how-to-align-a-door/) - Visual guide to hinge adjustments, shimming, and strike plate fixes
- [Home Depot – Interior Door Repair Project Guide](https://www.homedepot.com/c/ab/interior-door-repair/9ba683603be9fa5395fab9014f1f9fd) - Overview of interior door repair techniques and required tools
- [Fine Homebuilding – Fix a Door That Won’t Close](https://www.finehomebuilding.com/2018/09/05/fix-a-door-that-wont-close) - Professional insights on dealing with sagging doors and misaligned latches
Key Takeaway
The most important thing to remember from this article is that this information can change how you think about Home Repair.


