Small problems at home rarely stay small for long. A sticky door, a slow drain, or a flickering light might seem like minor annoyances, but they’re often early warning signs of bigger, more expensive issues. The good news: you can handle many of these yourself with basic tools, a bit of patience, and a clear plan.
This guide walks you through five practical, step-by-step home repairs that DIY enthusiasts can tackle safely and confidently.
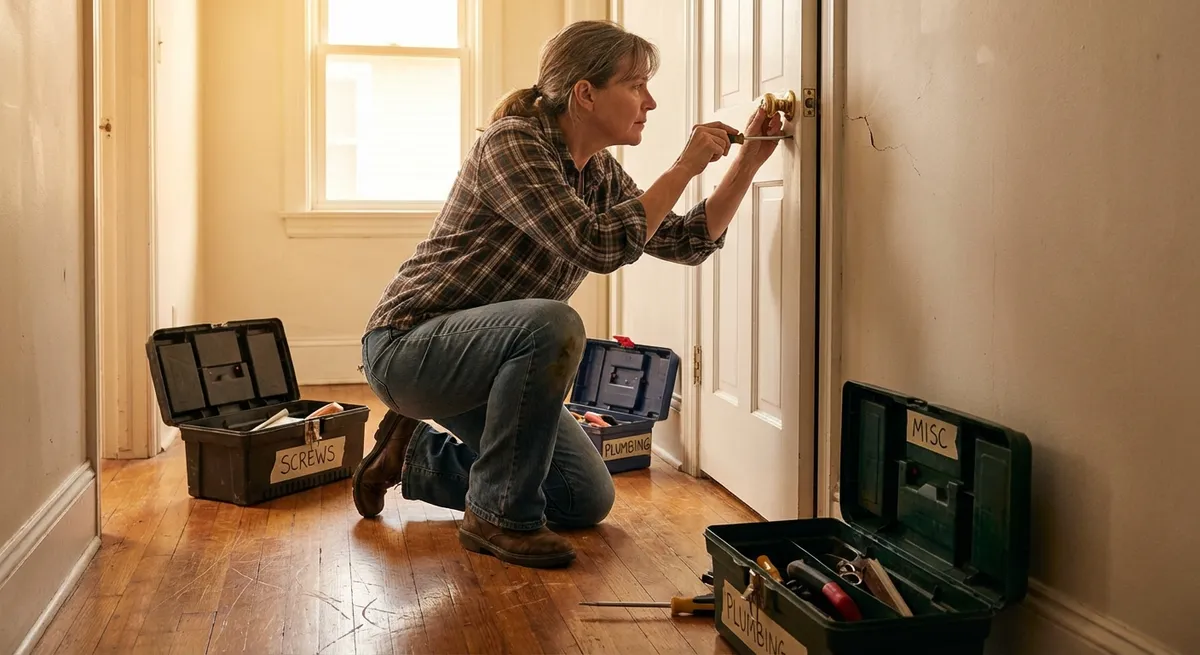
Step 1: Silence and Tighten a Wobbly, Squeaky Door
A loud, wobbly door is more than annoying—it can damage hinges and frames over time.
What you’ll need: Screwdriver, wood toothpicks or matchsticks, wood glue, hammer, light machine oil or silicone spray, rag.
Inspect the hinges and screws
Open and close the door slowly. Watch the hinge area. If the door sags or shifts, the screws are likely loose. Check all hinges from top to bottom.
Tighten existing screws first
Use the correct screwdriver (usually Phillips) and snug each screw firmly. Don’t overtighten; if a screw spins without grabbing, the hole is stripped and needs repair.
Fix stripped screw holes
Remove the loose screw. Fill the hole with a few wood toothpicks or matchsticks coated in wood glue. Tap them in gently with a hammer, wipe away excess glue, then break them off flush with the surface. Let dry per glue instructions, then reinstall the screw into the newly “filled” hole.
Lubricate the hinges to stop squeaks
Place a rag beneath the hinges to catch drips. Apply a drop or two of light machine oil or silicone spray to the hinge pin and moving parts. Open and close the door several times to work in the lubricant. Wipe off any extra.
Check door alignment and latch
Close the door slowly and see if it latches cleanly. If it rubs or doesn’t close properly, adjust the screws slightly on the offending hinge to move the door up, down, or sideways in small increments until it lines up with the frame.
Step 2: Clear a Slow Sink Drain Without Harsh Chemicals
A slow drain can lead to backups, bad smells, and stress each time you use the sink.
What you’ll need: Rubber gloves, bucket, old toothbrush or small brush, adjustable wrench (for some traps), plunger (optional), baking soda and vinegar (optional).
Clean the stopper or drain cover
For bathroom sinks, remove the stopper by loosening the retaining nut under the sink or twisting the stopper out (varies by model). Hair and soap scum often collect here. Clean thoroughly with an old brush under running water.
Plunge the drain (if still slow)
Fill the sink with enough water to cover the plunger cup. Block any overflow holes with a damp rag. Place the plunger over the drain and plunge up and down firmly for 20–30 seconds. Test drainage. Repeat if needed.
Remove and clean the P-trap
Place a bucket under the P-trap (the U-shaped pipe). Loosen the slip nuts by hand or with an adjustable wrench. Carefully remove the trap and dump contents into the bucket. Use the brush to clean inside the trap and adjoining pipes within reach.
Reassemble and test
Reattach the P-trap, hand-tighten the nuts, then snug them slightly more with the wrench. Run water and check for leaks. If you see drips, tighten a bit more—but don’t overtighten plastic fittings.
Use a gentle flush if needed
If the drain is still slow but improved, pour about a half cup of baking soda into the drain, followed by a half cup of white vinegar. Let it foam for 10–15 minutes, then flush with hot (not boiling) water. This helps clear residual buildup without harsh chemicals.
Step 3: Stop a Running Toilet and Save on Water Bills
A constantly running toilet wastes a surprising amount of water and money. Most fixes are simple once you know what to check.
What you’ll need: Adjustable wrench (maybe), replacement flapper or fill valve if needed, towel.
Remove the tank lid and observe
Carefully lift off the tank lid and set it safely aside. Flush the toilet while watching the inside components. Note whether the water keeps flowing into the bowl or the tank overfills and spills into the overflow tube.
Check the flapper for proper seal
When the tank is full, the rubber flapper at the bottom should seal tightly. If you see water trickling past it or hear a faint hiss, the flapper may be worn, warped, or dirty. Turn off the water supply valve behind the toilet, flush to empty the tank, then inspect the flapper. Clean or replace as needed.
Adjust or replace the fill valve
If water rises too high and spills into the overflow tube, your fill level is set too high. For float-cup style valves, turn the adjustment screw or move the clip on the metal rod to lower the float. For older ball-float types, gently bend the float arm downward to lower the water level. Aim to keep the water about an inch below the top of the overflow tube.
Inspect the chain and handle
Ensure the chain from the handle to the flapper has a bit of slack but doesn’t get caught under the flapper. If it’s too short, the flapper can’t close fully; too long, it can tangle. Adjust by moving the clip to a different link. Check that the handle moves freely and returns to its resting position.
Turn the water back on and test
Turn the supply valve back on slowly. Let the tank fill, then flush and listen. The tank should refill, stop, and remain silent. If you still hear running water, re-check the flapper and fill level, and replace worn parts entirely if minor adjustments don’t solve it.
Step 4: Patch a Small Drywall Hole So It Blends In
Dings, nail pops, and small holes are part of normal living, but left alone they make your walls look tired and can chip further.
What you’ll need: Spackle or joint compound, putty knife, sanding sponge or fine sandpaper, primer, paint, small paintbrush or roller, damp cloth.
Prepare and clean the damaged area
Use the putty knife to gently scrape away any loose paint or crumbling drywall. Wipe the area with a damp cloth to remove dust. Let it dry completely; compound adheres poorly to dusty or damp surfaces.
Apply spackle or joint compound
For nail holes and small dings (smaller than a dime), scoop a bit of spackle onto the putty knife and press it firmly into the hole. Smooth it so it’s slightly raised above the wall surface; it will shrink as it dries. For slightly larger holes, you may need two thin layers.
Allow to dry and sand smooth
Follow the drying time on the product label (often 1–24 hours depending on depth). Once dry, lightly sand with a sanding sponge or fine sandpaper until smooth and flush with the wall. Feather the edges into the surrounding paint so you don’t feel a ridge.
Prime the patched area
Apply a small amount of primer over the patched spot. This step prevents the repair from flashing through the paint (looking dull or different in sheen). Let the primer dry fully.
Paint and blend
Use matching wall paint. For tiny areas, a small brush works; for larger patches, use a mini roller to mimic the existing texture. Feather the paint slightly past the repair into the surrounding area to blend. If needed, apply a second thin coat after the first dries.
Step 5: Replace a Light Fixture Safely and Confidently
Updating an outdated or faulty light fixture is one of the most visible upgrades you can make. Done wrong, though, it’s a safety hazard—so follow each step carefully.
Important: If you’re not comfortable working with electrical wiring, hire a licensed electrician. When in doubt, don’t guess.
What you’ll need: New light fixture, non-contact voltage tester, screwdriver, wire strippers (if needed), wire connectors (wire nuts), step stool or ladder.
Shut off power at the breaker
Don’t rely only on the wall switch. Locate the correct circuit breaker in your panel and switch it off. Place a piece of tape or a note on the panel to let others know you’re working on that circuit.
Verify the power is off
Remove the old fixture’s cover or shade so you can access the wires. Use a non-contact voltage tester near the wires. If it lights or beeps, the power is still on. Double-check that you flipped the right breaker and test again until there is no indication of voltage.
Remove the old fixture
Support the fixture with one hand while unscrewing the mounting screws. Gently pull it down to expose the wiring. You’ll typically see black (hot), white (neutral), and possibly bare or green (ground) wires. Note how they’re connected, then loosen and remove the wire connectors to detach the fixture.
Prepare and connect the new fixture wires
If needed, strip about 1/2 inch of insulation from the fixture’s wire ends. Connect black to black, white to white, and green/bare to the ground wire or grounding screw in the electrical box. Twist wires together and secure with wire connectors. Tug gently on each connection to ensure it’s tight. Carefully tuck the wires into the box.
Mount the new fixture and test
Attach the fixture’s mounting bracket if required, then secure the fixture to the box with the provided screws. Install bulbs that match the recommended wattage, attach shades or covers, and restore power at the breaker. Finally, test the switch to confirm everything works correctly. If the breaker trips or the light doesn’t work, turn the breaker off again and re-check wiring—or call an electrician.
Conclusion
Home repair doesn’t have to be mysterious or overwhelming. When you break tasks into clear steps and focus on safety, you can solve a lot of everyday problems yourself—before they grow into bigger, more expensive headaches.
Start with repairs like the ones in this guide: tightening a door, clearing a drain, stopping a running toilet, patching drywall, and updating a light fixture. Each success builds your confidence and your skill set, making your home safer, more comfortable, and easier to live in.
Sources
- [U.S. Department of Energy – Home Maintenance and Repair Tips](https://www.energy.gov/energysaver/home-maintenance-and-repair) – General guidance on maintaining home systems efficiently and safely
- [U.S. Environmental Protection Agency – WaterSense](https://www.epa.gov/watersense) – Information on water-saving fixtures and the impact of leaks and running toilets
- [The Family Handyman – How to Fix a Leaky or Running Toilet](https://www.familyhandyman.com/project/how-to-fix-a-leaky-or-running-toilet/) – Detailed walkthrough of toilet repair techniques
- [This Old House – How to Replace a Light Fixture](https://www.thisoldhouse.com/lighting/21015108/how-to-replace-a-light-fixture) – Step-by-step instructions and safety tips for light fixture replacement
- [Lowe’s – How to Patch and Repair Drywall](https://www.lowes.com/n/how-to/patch-and-repair-drywall) – Practical guidance for repairing holes and imperfections in drywall
Key Takeaway
The most important thing to remember from this article is that this information can change how you think about Home Repair.


