Heating bill creeping up, rooms feeling drafty, and the furnace running nonstop? Before you price out a new HVAC system, there’s a cheaper, faster win: air sealing. A couple of tubes of caulk, some weatherstripping, and a free afternoon can make your home feel warmer and more efficient without major renovation. This guide walks you through five step‑by‑step projects any motivated DIYer can handle with basic tools.
Start with a Simple Draft Hunt
Before you fix anything, you need to find where the air is sneaking in and out. A quick “draft audit” can reveal the biggest leaks in under an hour.
Walk the house on a windy day or when the temperature difference between inside and outside is noticeable. Slowly move your hand around window and door frames, electrical outlets on exterior walls, baseboards, attic hatches, and around plumbing or cable penetrations. Feel for cool or warm air movement. If you have a stick of incense or a small piece of toilet paper, hold it near suspected leak points; if the smoke or paper moves, you’ve found a draft. Mark each spot with painter’s tape or a small pencil note so you can easily find it later. Prioritize noticeable leaks in common areas and bedrooms, then move to less-used spaces like basements and garages. Take quick photos of problem spots with your phone so you can refer back when you’re buying supplies.
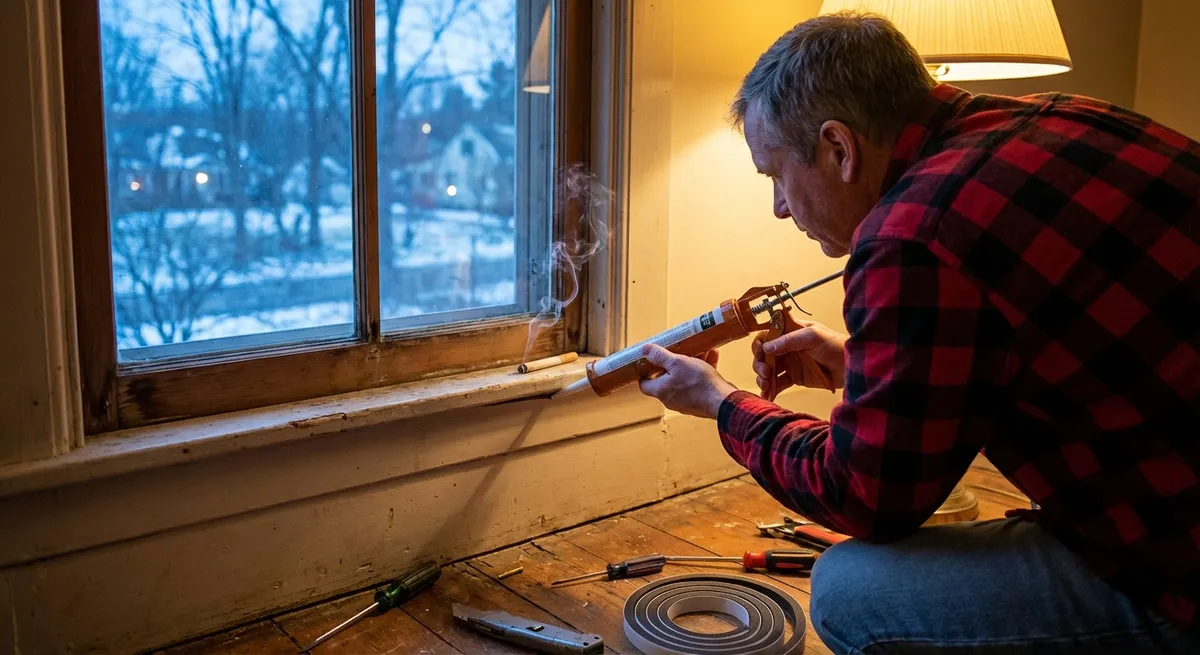
Step 1: Seal Window Frames with Interior Caulk
Windows are common leak points, especially in older homes. If the frame is structurally sound but drafty, sealing the interior trim with caulk is a fast, high‑impact fix.
First, clean the area where the window trim meets the wall and the window frame using a dry brush or vacuum with a brush attachment. Old, cracked caulk should be gently scraped away with a utility knife or a caulk removal tool so the new bead can adhere properly. Choose a paintable acrylic latex caulk labeled for interior use; if the area occasionally gets moist (like a bathroom), use a paintable caulk rated for kitchens and baths. Cut the nozzle at a 45° angle with a small opening, and puncture the inner seal. Apply a steady bead along the gap, working in manageable sections of 2–3 feet. Immediately smooth the caulk with a damp finger or caulk-smoothing tool, pressing it into the gap and wiping away excess with a damp cloth. Let it cure as recommended on the tube, then touch up with matching paint if needed for a clean, finished look.
Step 2: Add Weatherstripping to Drafty Doors
Exterior doors often leak air around the jamb and at the bottom. Proper weatherstripping lets the door close comfortably while creating a reliable seal.
Start by inspecting the door on a bright day with indoor lights off; if you can see daylight around the edges, you’re losing conditioned air. Close the door and slide a piece of paper between the door and frame—if it slips out easily without resistance, that area needs better sealing. Measure the top and sides of the door frame so you buy the right length of weatherstripping. For most homes, adhesive-backed foam or vinyl V-strip weatherstripping is quick and effective. Clean the door frame with mild soap and water, then dry thoroughly so the adhesive sticks. Cut the weatherstripping to length, peel the backing, and press it firmly into the frame along the latch side, hinge side, and top, making sure it’s snug but not so tight that the door becomes hard to close. For the bottom, consider a door sweep or a combination door shoe and threshold seal; screw it in according to manufacturer instructions and adjust until it lightly brushes the floor or threshold without dragging.
Step 3: Block Attic Air Leaks Around Light Fixtures and Hatches
Warm air rises, and your attic is a prime escape route. Even small gaps around recessed lights, attic hatches, and wiring penetrations can add up to noticeable heat loss.
Safety comes first: if you’re working near electrical fixtures, turn off power to that circuit at the breaker panel. In the attic, walk only on joists or secure platforms to avoid stepping through the ceiling. For non‑IC‑rated recessed lights (older cans that should not be in direct contact with insulation), use pre‑made airtight covers or build a lightweight fire-resistant box per manufacturer or code guidance; seal the base of the cover to the drywall using fire-rated caulk or foam where required. For IC‑rated fixtures that can be in contact with insulation, you can typically seal the trim ring from below with caulk if small gaps are visible. Around the attic hatch, apply adhesive-backed foam weatherstripping to the frame so the hatch compresses against it when closed. If the hatch itself is thin, glue rigid foam board to its back to improve insulation, then tape the seams with foil tape for a better seal. While you’re up there, seal small gaps around pipes, cables, or vent penetrations with fire-rated caulk or low-expansion foam, following any local code recommendations.
Step 4: Seal Gaps Around Baseboards and Trim
Those hairline cracks along baseboards and trim can subtly pull in dusty, unconditioned air from wall cavities and basements, especially on exterior walls.
Vacuum along the baseboards and wipe them down with a slightly damp cloth to remove dust and debris; caulk won’t adhere well to dirty surfaces. Identify gaps where the baseboard meets the wall, and where it meets the floor, focusing on exterior walls and rooms over unconditioned spaces (like over a garage). For most interior gaps above the baseboard, use paintable acrylic latex caulk; for larger gaps, you may need backer rod (a foam rope) pushed into the gap before caulking so you don’t waste caulk trying to fill deep voids. Cut the caulk tip small, run a consistent bead along the gap, and smooth it within a few minutes, wiping any excess off the floor with a damp cloth. Avoid caulking where the baseboard meets carpet—if carpet needs to be sealed, that’s usually done during installation with tack strips and proper underlay. When the caulk has cured, paint it to match the wall or trim, which not only improves appearance but also adds a thin extra layer of protection.
Step 5: Tighten Up Utility Penetrations Inside and Out
Anywhere a pipe, cable, or vent enters or leaves your home is a potential leak. These “utility penetrations” are often overlooked but simple to fix.
Start inside: look behind toilets, under sinks, at dryer vents, and where cable or internet lines come into the house. If you can see a gap between the pipe or line and the surrounding wall, seal it according to the surface type. Use paintable caulk for small gaps in drywall, and low-expansion spray foam for larger openings—just don’t overfill; foam expands and can crack finishes if applied excessively. Outside, walk the foundation and exterior walls. Check around hose bibs, AC lines, gas meters, and electrical service entries. For masonry or siding, use exterior-grade caulk labeled for that material (e.g., masonry sealant for brick, high-quality polyurethane or silicone sealant for siding). Clean loose debris, apply the sealant generously but neatly, and tool it with a gloved finger or caulk tool to shed water away from the opening. For larger or irregular holes, use a combination of backer rod, foam, or patch materials recommended for your cladding (like mortar repair for brick) before sealing the final surface.
Conclusion
Air sealing isn’t flashy, but it’s one of the most effective DIY repairs you can do to make your home more comfortable and efficient. By methodically tackling windows, doors, attic leaks, trim gaps, and utility penetrations, you’re reducing drafts, easing the load on your heating and cooling system, and improving indoor comfort with relatively low cost and effort. Start with the worst leaks you can feel, work through these steps at your own pace, and keep a running list of areas to revisit. A few tubes of caulk and some weatherstripping can often do more for your comfort than constantly nudging the thermostat.
Sources
- [U.S. Department of Energy – Air Sealing Your Home](https://www.energy.gov/energysaver/weatherize/air-sealing-your-home) - Overview of why air sealing matters, common leak locations, and basic methods
- [ENERGY STAR – Seal and Insulate with ENERGY STAR](https://www.energystar.gov/campaign/seal_insulate/methodology) - Guidance on prioritizing air sealing and insulation projects for energy savings
- [Family Handyman – How to Seal Windows and Doors for Winter](https://www.familyhandyman.com/project/how-to-seal-windows-and-doors-for-winter/) - Practical walkthroughs on caulking and weatherstripping techniques
- [Building America Solution Center – Air Sealing](https://basc.pnnl.gov/resource-guides/air-sealing) - Technical but useful details on sealing fixtures, penetrations, and assemblies
- [Energy Trust of Oregon – Finding and Fixing Air Leaks](https://www.energytrust.org/resources/finding-and-fixing-air-leaks/) - DIY‑friendly tips for locating drafts and choosing the right sealing products
Key Takeaway
The most important thing to remember from this article is that this information can change how you think about Home Repair.


