Minor problems in your home rarely stay minor. A faint drip, a slow drain, a sticky door, or a hairline crack in drywall can quietly grow into expensive repairs if you ignore them. The good news: many of these issues are easy to stop early with basic tools and a bit of know‑how.
This guide walks through five practical, step‑by‑step fixes DIY‑minded homeowners can tackle without overhauling their whole house. Each repair is focused, realistic, and aimed at preventing bigger headaches later.
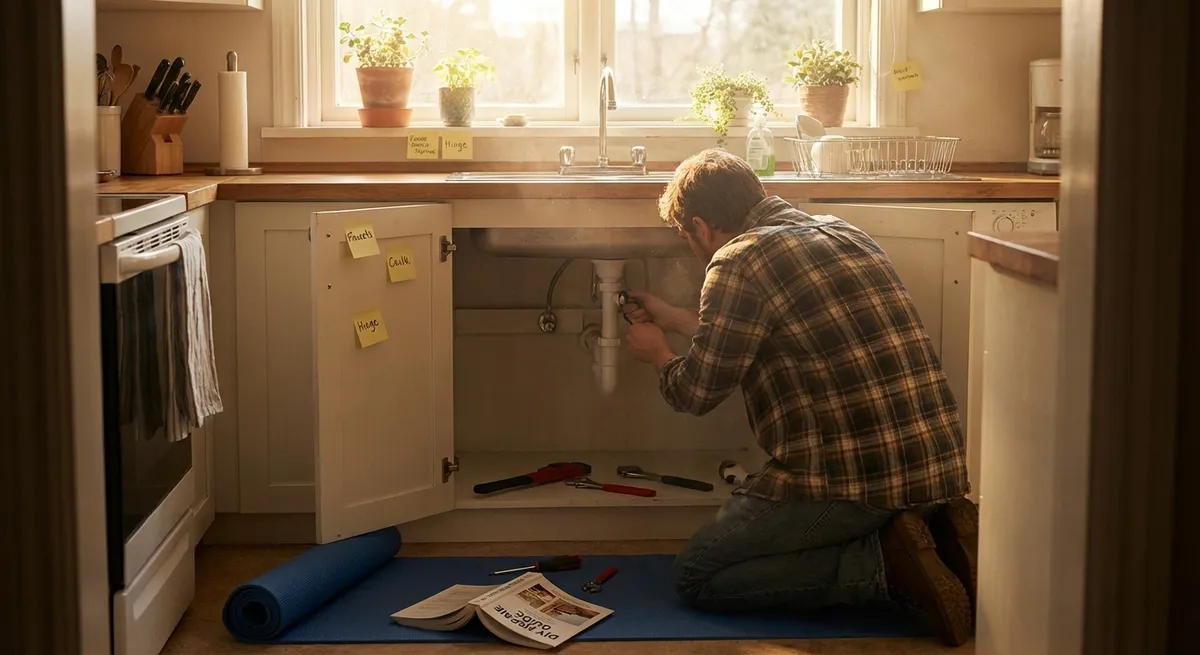
Step 1: Stop a Small Sink Leak Under the Cabinet
A slow drip under a kitchen or bathroom sink can warp cabinets, grow mold, and damage flooring. Catching and fixing it early is one of the highest‑value DIY repairs you can do.
What you’ll need: Adjustable wrench, plumber’s tape (thread seal tape), dry rag or paper towels, flashlight, small bucket or bowl.
How to do it:
- Find the leak source.
Empty the cabinet, place a bowl under the pipes, and run water. Use a flashlight and your hand (carefully) to feel for moisture around:
- Shutoff valves
- Supply line connections
- The P‑trap (curved drain pipe)
- Where the drain meets the sink
- Tighten loose connections first.
Turn off the shutoff valves (or main water supply if needed). Use an adjustable wrench to snug up any loose nuts a quarter‑turn at a time. Don’t overtighten—if you feel strong resistance, stop.
- Re‑seal threaded joints.
If the leak is at a threaded connection:
- Turn off water and open the faucet to relieve pressure.
- Unscrew the leaking fitting.
- Wipe the threads dry.
- Wrap plumber’s tape clockwise around the male threads 3–4 times.
- Reattach and tighten firmly but not excessively.
- Inspect and reseat the P‑trap.
- Place the bucket below to catch water.
- Loosen the slip nuts by hand or with pliers.
- Check that the washers are not cracked, deformed, or missing. Replace if needed.
- Reassemble, ensuring parts are aligned and washers are seated properly.
- Test for drips.
If the leak is at the P‑trap:
Turn the water back on, run both hot and cold for at least 30 seconds, and dry everything. Then run another test and check for moisture with your hand. Keep the cabinet clear for a day so you can confirm it stays dry.
Pro tip: Keep a shallow tray or plastic bin under sink plumbing. Even if a future leak starts, you’ll catch water quickly instead of soaking the cabinet floor.
Step 2: Quiet a Loose or Squeaky Interior Door
Squeaks, rubbing, and doors that don’t latch are usually minor alignment issues, not a sign you need a new door. A little adjustment can make doors close smoothly and quietly.
What you’ll need: Screwdriver, hammer, small nail or punch, petroleum jelly or light oil, wood toothpicks or wooden matchsticks, utility knife.
How to do it:
- Identify the symptom.
- Squeak when moving: likely hinge friction.
- Door won’t latch: strike plate or hinge alignment.
- Door rubs the frame: sagging hinges or swollen wood.
- Lubricate the hinges.
- Open the door.
- Tap the hinge pin up from the bottom with a nail or punch until it comes loose.
- Wipe the pin clean.
- Apply a light coat of petroleum jelly or a few drops of light oil.
- Reinsert the pin and wipe any excess off the hinge.
- Repeat for each hinge and test the door.
- Tighten hinge screws.
Check all hinge screws on both the door and frame. Tighten them snugly. Loose screws on the top hinge are a common cause of door sag.
- Fix stripped screw holes.
If a screw just spins and won’t tighten:
- Remove the screw.
- Push wooden toothpicks or wooden matchsticks (with the tips removed) into the hole with a dab of wood glue.
- Snap or cut them flush with the surface.
- Reinsert and tighten the screw into the now‑filled hole.
- Adjust the strike plate if the latch misses.
- Close the door slowly and see where the latch contacts the strike plate.
- If it hits high or low, slightly loosen the strike plate screws and nudge the plate up or down. Retighten and test.
- For very small adjustments, you can lightly file the opening of the strike plate to create a bit more clearance.
Pro tip: When humidity makes a door swell and rub slightly, mark the rub spot with a pencil, then sand gently rather than planning an aggressive trim. Remove a small amount, test, and repeat as needed.
Step 3: Clear a Slow Bathroom Drain Without Harsh Chemicals
Slow drains are usually caused by hair, soap scum, and buildup just inside the opening. Chemical drain cleaners can damage pipes over time and aren’t always necessary for light clogs.
What you’ll need: Drain snake or plastic drain hair remover, old toothbrush, cup or small container, rubber gloves, baking soda and white vinegar (optional), bucket.
How to do it:
- Remove the drain stopper or cover.
- For pop‑up stoppers: Look under the sink for the pivot rod (a horizontal rod attached to the drain). Unscrew the retaining nut, gently pull out the rod, then lift out the stopper from the sink.
- For simple covers: They may unscrew counterclockwise or lift off with a gentle pry.
- Manually clear debris.
- Put on gloves.
- Use a plastic drain hair remover or small drain snake to fish out hair and gunk.
- Pull debris straight out; avoid pushing it deeper. Have a trash bag ready.
- Clean the stopper and drain opening.
- Scrub the stopper with an old toothbrush and warm soapy water to remove buildup.
- Wipe the inside of the drain opening as far as you can reach.
- Flush with hot water (and optional baking soda/vinegar).
- Pour a kettle of hot (not boiling) water down the drain.
- For extra cleaning:
- Pour about 1/2 cup baking soda into the drain.
- Follow with 1/2–1 cup white vinegar.
- Let it fizz for 10–15 minutes.
- Rinse with more hot water.
- Reassemble and test.
- Reinstall the stopper: insert it from the top, slide the pivot rod back into the opening in the stopper stem, and tighten the retaining nut.
- Fill the sink halfway, then pull the stopper and watch how quickly it drains.
- If it’s still slow, repeat snaking or consider checking the P‑trap below.
Pro tip: Use a simple mesh drain screen in showers and bathroom sinks to catch hair before it enters the pipe. Empty it regularly—this alone prevents many clogs.
Step 4: Patch a Small Drywall Hole or Dent for a Clean Wall Finish
Nail pops, door handle dings, and small holes from anchors can make walls look tired. Repairing them properly makes painting easier and upgrades the overall look of a room.
What you’ll need: Spackle or lightweight joint compound, putty knife (2–4"), fine‑grit sandpaper (120–220 grit), damp sponge or cloth, primer and touch‑up paint.
How to do it:
- Prep the damaged area.
- For small holes or dents: Use the putty knife to scrape away loose paint or crumbling drywall.
- If the edges around the hole are raised, gently press them flat or lightly sand them.
- Apply the first layer of spackle.
- Scoop a small amount of spackle onto the putty knife.
- Press it firmly into the hole or dent, then draw the knife across the area at a slight angle.
- Scrape off excess so the patch is just slightly raised above the wall surface.
- Let it dry completely.
- Follow the product instructions for dry time; small patches often dry within 30–60 minutes.
- Don’t rush sanding—if it gums up, it’s not fully dry.
- Sand and, if needed, apply a second coat.
- Lightly sand the patch until it’s smooth and level with the wall.
- Wipe off dust with a damp cloth.
- For deeper holes, you may see a slight dip after sanding—apply a thin second coat, feathering it out a bit wider, let dry, then sand again.
- Prime and paint for a seamless finish.
- Spot‑prime the patched area so the paint adheres evenly and doesn’t “flash” (show a different sheen).
- Once primer is dry, apply touch‑up paint in thin, blended coats. For best results, paint from corner to corner or natural break lines, not just a small circle directly over the patch.
Pro tip: When patching near a corner, use the putty knife to follow the existing angle instead of trying to invent a new one. Matching existing lines keeps patches invisible.
Step 5: Reseal a Drafty Window to Boost Comfort and Cut Energy Loss
Drafts around windows make rooms uncomfortable and can quietly raise your energy bills. Resealing with fresh caulk and weatherstripping is a straightforward way to tighten things up.
What you’ll need: Exterior‑grade caulk (for outside), paintable interior caulk (for inside), caulk gun, utility knife, putty knife or scraper, weatherstripping (foam or rubber), soapy water and rag, paper towels.
How to do it:
- Find where the air is getting in.
On a windy day or with your HVAC running:
- Hold a damp hand or a lit incense stick near the window frame, trim, and sash edges.
- Watch for smoke movement or feel for cold air.
- Note the locations of drafts inside and, if possible, check the exterior as well.
- Remove old, failing caulk.
- Use a utility knife and scraper to cut and lift out cracked, loose, or peeling caulk around the window trim (inside and outside, as needed).
- Wipe the area clean with soapy water and let it dry. Caulk adheres best to clean, dry surfaces.
- Apply new caulk to gaps.
- Cut the caulk tube tip at a 45° angle, small opening first—you can always cut larger if needed.
- Run a steady bead along gaps between the window frame and wall/trim.
- Keep the bead continuous to avoid pinholes.
- Immediately smooth it with a wet finger or caulk tool for a neat, sealed joint.
- Add or replace weatherstripping on moving parts.
- Open the window and inspect existing weatherstripping along the sash where it meets the frame.
- If it’s compressed, missing, or brittle, peel it off.
- Measure the length you need and cut new weatherstripping to size.
- Stick or press it firmly into place per the product instructions, ensuring the window can still close and lock without excessive force.
- Test and adjust.
- Allow caulk to cure as directed (usually 24 hours before painting or heavy exposure).
- Retest with the damp hand or incense stick.
- If you still feel minor air flow around operable parts, add a thin strip of additional weatherstripping or adjust the window locks so the sash pulls tighter to the frame.
Pro tip: Focus first on the worst‑offending windows in the rooms you use most. You’ll feel an immediate difference in comfort, especially in bedrooms and living areas.
Conclusion
You don’t need a full renovation plan or a truckload of tools to meaningfully improve your home. Fixing small leaks, smoothing out doors, clearing slow drains, patching wall damage, and sealing drafts are all realistic projects that prevent bigger problems and make daily life more comfortable.
Work one repair at a time, keep your tools simple, and pay attention to early warning signs—drips, drafts, squeaks, and slow drains are all your home quietly asking for help. Addressing them now keeps you firmly in control of maintenance instead of reacting to costly surprises later.
Sources
- [U.S. Department of Energy – Air Sealing Your Home](https://www.energy.gov/energysaver/air-sealing-your-home) - Guidance on reducing drafts and improving home energy efficiency
- [Energy Star – Windows, Doors and Skylights](https://www.energystar.gov/products/building_products/residential_windows_doors_and_skylights) - Information on window performance and sealing for energy savings
- [Family Handyman – How to Fix a Leaky Sink](https://www.familyhandyman.com/project/how-to-fix-a-leaky-sink/) - Step‑by‑step examples of locating and repairing common sink leaks
- [This Old House – How to Patch a Hole in Drywall](https://www.thisoldhouse.com/walls/21017617/how-to-patch-a-hole-in-drywall) - Visual reference for drywall patching techniques and tools
- [Mayo Clinic – Mold exposure: Symptoms and causes](https://www.mayoclinic.org/diseases-conditions/mold-allergy/symptoms-causes/syc-20351550) - Background on why fixing moisture issues early helps protect health
Key Takeaway
The most important thing to remember from this article is that this information can change how you think about Home Repair.


