A lot of home repairs don’t start as disasters; they start as small issues no one notices until it’s too late. Instead of waiting for something to break, you can run a simple “checkpoint” routine a few times a year to keep your place solid, safe, and easier to live in. This guide walks you through five practical, step‑by‑step checks you can do with basic tools—and what to do if you spot trouble.
Step 1: Hunt Down Hidden Water Leaks
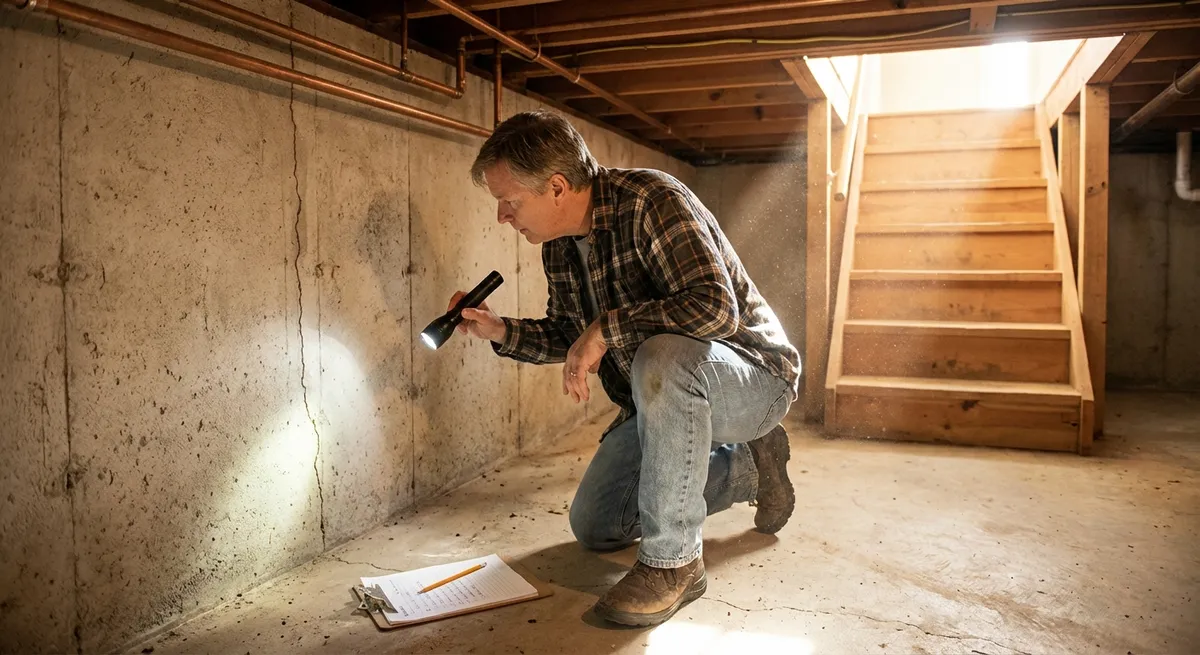
Water damage is one of the most expensive problems in a home, and it often starts quietly. Catching leaks early can save walls, floors, and a lot of money.
What you’ll need: flashlight, paper towels or dry cloth, small bucket, adjustable wrench, plumber’s tape (Teflon tape) or pipe joint compound.
- Check under sinks and around fixtures. Open cabinets under kitchen and bathroom sinks. Use your flashlight to inspect supply lines, shut-off valves, and the bottom of the cabinet. Run the faucet and check for drips at joints and connections. Feel around pipes and the back corners with a dry hand or cloth.
- Inspect around toilets. Look at the base of the toilet for discoloration, soft flooring, or a musty smell. Flush and watch closely for any water seeping around the base. Check the supply line and shut-off valve for dampness or corrosion.
- Look at ceilings and walls below bathrooms and kitchens. In rooms under upstairs plumbing, check for stains, bubbling paint, or soft drywall. Use a flashlight to scan corners and around light fixtures—these spots often show water first.
- Test for a slow leak at your water meter (if accessible). Turn off all water in the house (no running faucets, dishwasher, or toilets refilling). Check the water meter. If the leak indicator is spinning or the numbers are changing, you may have a hidden leak in the system.
- Fix minor leaks now. For small drips at threaded joints, turn off the local shut-off valve, unscrew the connection, wrap threads with plumber’s tape (2–3 wraps in the direction of the threads), and reconnect snugly. For compression fittings, a gentle turn of the nut with an adjustable wrench is often enough, but don’t overtighten. If a valve is corroded, cracked, or you’re unsure—stop and call a licensed plumber.
Practical tip: Keep a photo record. If you see a small stain or suspect area, take a dated photo. Compare every few months to see if it’s spreading.
Step 2: Tighten Up Drafty Windows and Doors
Air leaks make your home uncomfortable and your energy bills higher. Sealing them is a fast, high‑impact repair nearly any DIYer can handle.
What you’ll need: incense stick or thin tissue, painter’s tape, weatherstripping (adhesive foam or rubber), door sweep, exterior caulk and caulk gun.
- Do a simple draft test. On a breezy day, close all windows and exterior doors. Turn off fans and HVAC so air is still. Hold a lit incense stick (or a very thin strip of tissue) around window frames, door frames, and outlets on exterior walls. If smoke or tissue pulls strongly in one direction, you’ve found a draft.
- Inspect weatherstripping. Open doors and windows. Look for cracked, brittle, or flattened weatherstripping. If you can see daylight around the perimeter when they’re closed, the seal is likely poor.
- Replace worn weatherstripping. Peel off old adhesive-backed strips and clean the surface. Measure the sides and top of the door or window. Cut new weatherstripping to length, peel the backing, and press firmly in place. Close the door or window to check fit: it should be snug but not hard to latch.
- Install or adjust door sweeps. If you can see light or feel air under exterior doors, add a door sweep. Screw a new sweep in place at the bottom of the door, then adjust so it just brushes the threshold without dragging.
- Seal exterior gaps with caulk. Outside, walk around your house and inspect where window and door frames meet siding. Scrape out loose or cracked caulk. Apply a steady bead of exterior‑grade caulk and smooth with a damp finger or tool. Let it cure per manufacturer instructions.
Practical tip: Focus first on rooms that feel hardest to heat or cool; you’ll feel the difference fastest and see it in your utility bills.
Step 3: Secure Loose Flooring Before It Gets Worse
Loose floors aren’t just annoying—they can become trip hazards or lead to more serious damage. Tackling subtle movement early is easier than repairing a section that has failed.
What you’ll need (depending on floor type): drill/driver, wood screws, construction adhesive, finishing nails, hammer, putty knife, wood filler, replacement tiles/planks if needed.
- Identify movement spots. Walk slowly across each room and note squeaks, soft spots, and any bending or flexing. Pay special attention near doorways, stairs, and heavy furniture paths.
- Tighten squeaky subfloors under carpet (basic method). If the issue is under carpet and you’re comfortable working carefully:
- Locate the squeak and mark it with painter’s tape.
- Pull carpet back only if you’re confident you can re‑stretch it. Otherwise, consider using specialty “squeak repair” screws designed to go through carpet without removal.
- Drive screws into the subfloor and joist below, pulling them snug without breaking through the surface.
- Re-secure loose hardwood planks. For mild movement where boards flex slightly:
- Drill small pilot holes at an angle through the tongue side of the board into the subfloor.
- Drive finishing nails and set them slightly below the surface with a nail set.
- Fill holes with matching wood filler and wipe off excess.
- Fix loose tiles. If a floor tile moves or sounds hollow:
- Carefully pry it up with a putty knife or thin pry bar.
- Scrape away old adhesive or mortar from both tile and subfloor.
- Apply fresh thinset or tile adhesive and reset the tile, using spacers if needed.
- Once cured, re‑grout around the edges and wipe clean.
- Address soft or spongy subfloor sections. If the floor noticeably sinks, you may have water damage or structural issues. This usually requires removing surface flooring and cutting out damaged plywood. At this point, if you’re not experienced with structural carpentry, it’s safer to bring in a pro and use your notes and photos to explain what you’ve found.
Practical tip: When drilling or screwing into floors, always confirm where pipes and wires run, especially near kitchens, bathrooms, and walls.
Step 4: Restore Reliable Power at Outlets and Switches
Intermittent electrical issues are more than an annoyance—they can be a safety risk. While complex wiring belongs to licensed electricians, there are basic checks and fixes a careful DIYer can handle.
What you’ll need: non‑contact voltage tester, outlet tester, flathead and Phillips screwdrivers, replacement outlets/switches (if needed), flashlight.
- Test suspect outlets safely. Plug an outlet tester into outlets that feel loose, have discoloration, or don’t always work. The tester’s lights will show basic wiring problems like open ground or reversed hot/neutral. If you get an error you don’t understand, note it and consider professional help.
- Shut off power before opening anything. At the breaker panel, turn off the circuit for the outlet or switch you’re working on. Verify power is off using a non‑contact voltage tester at the device before touching wires or screws.
- Tighten loose outlets or switches. Remove the cover plate. Gently pull the outlet or switch forward. If the device wiggles in the box, tighten the mounting screws to secure it. Add outlet spacers if the device still sits too far back.
- Inspect connections. Look for burned insulation, melted plastic, or loose wires. If wires are wrapped around screws, they should be tight with no exposed bare copper except under the screw head. Back‑stab (push‑in) connections are more prone to loosening over time; you can move them to the screw terminals by releasing the wire, stripping fresh insulation as needed, and firmly securing under the screw.
- Replace worn or damaged devices. If an outlet is cracked, discolored, or won’t hold plugs firmly, replace it. Match the amperage and type (standard, GFCI, etc.). Move one wire at a time from old to new to avoid confusion, keeping hot, neutral, and ground in the same positions. Tighten all screws, carefully fold wires back into the box, attach the cover, then restore power and test again.
Practical tip: Any buzzing, sparking, burning smell, hot faceplate, or frequently tripping breaker is a stop sign. Don’t troubleshoot those yourself—call a licensed electrician.
Step 5: Protect Your Walls From Everyday Damage
Walls take a lot of hits—door handles, furniture, kids, pets. Keeping them in good shape makes your home look better and avoids bigger repairs down the road.
What you’ll need: stud finder, drill, drywall screws, spackle or joint compound, putty knife, sandpaper, touch‑up paint, doorstops, wall anchors.
- Secure heavy items properly. Use a stud finder to locate framing when hanging shelves, TVs, or large mirrors. Mark stud locations lightly with pencil. Whenever possible, drive screws into studs instead of relying on drywall alone.
- Use the right wall anchors. For medium loads where there is no stud, select anchors rated for the weight of your item—plastic expansion anchors for light items, toggle or molly bolts for heavier ones. Follow the manufacturer’s drill size and installation steps closely.
- Install or upgrade doorstops. If you see dents behind doors or damaged trim, install wall‑mounted door bumpers or hinge‑pin doorstops. Position them so the knob or handle never hits the wall. This is a 5‑minute fix that prevents recurring damage.
- Repair small holes and dents. For nail holes and small dings:
- Scrape away loose paint or drywall.
- Apply a thin layer of spackle with a putty knife and smooth it flush.
- Let it dry, sand lightly, and repeat if needed.
- Touch up with matching paint.
- Patch larger drywall damage. For holes larger than a coin:
- Use a drywall patch kit or cut out a clean square around the damage.
- Cut a new piece of drywall to fit, screw it into backing (like a furring strip) behind the opening.
- Tape the seams, apply joint compound in thin layers, sanding between coats.
- Prime and paint once smooth and fully dry.
Practical tip: Keep a small “wall repair box” with spackle, putty knife, sanding sponge, and a labeled jar of each room’s paint. Quick patches are more likely to happen if everything’s in one place.
Conclusion
A solid home isn’t just about big renovations—it’s mostly about regular, simple checks that keep small problems from turning into emergencies. By making these five checkpoints part of your routine, you’ll spot leaks before they rot floors, seal drafts before they drain your wallet, stabilize floors before they fail, keep your electrical system reliable, and protect your walls from constant wear.
You don’t have to do everything in one weekend. Break this routine into manageable sessions—water and drafts one day, floors and walls another, electrical checks when you have time and feel prepared. The more familiar you get with your home’s systems, the faster you’ll notice when something changes. That awareness is one of the most valuable “tools” any DIY enthusiast can have.
Sources
- [U.S. Environmental Protection Agency – Fixing Leaks at Home](https://www.epa.gov/watersense/fix-leak-week) – Overview of common household leaks, how to spot them, and why early repair matters
- [U.S. Department of Energy – Air Sealing Your Home](https://www.energy.gov/energysaver/air-sealing-your-home) – Detailed guidance on finding and sealing drafts for better comfort and efficiency
- [Federal Emergency Management Agency (FEMA) – Reducing Damage from Localized Flooding](https://www.fema.gov/sites/default/files/documents/fema_reducing-damage-from-localized-flooding.pdf) – Covers water‑related risks in the home and mitigation strategies
- [U.S. Consumer Product Safety Commission – Household Electrical Safety](https://www.cpsc.gov/safety-education/safety-guides/home) – Safety advice for dealing with outlets, cords, and basic electrical issues
- [Family Handyman – How to Patch and Repair Drywall](https://www.familyhandyman.com/project/how-to-patch-and-repair-drywall/) – Practical, illustrated walkthroughs for small and medium drywall repairs
Key Takeaway
The most important thing to remember from this article is that this information can change how you think about Home Repair.


