Small problems at home rarely stay small. A dripping faucet, a loose outlet cover, or a cracked tile can quietly turn into bigger repairs—and bigger bills. The good news: a lot of everyday fixes are totally doable with basic tools, clear steps, and a bit of patience.
This guide walks you through five common home repair tasks in a straightforward, step-by-step way. Each section includes what you need, how to do it safely, and practical tips so you can move from “I hope I don’t break anything” to “I can handle this.”
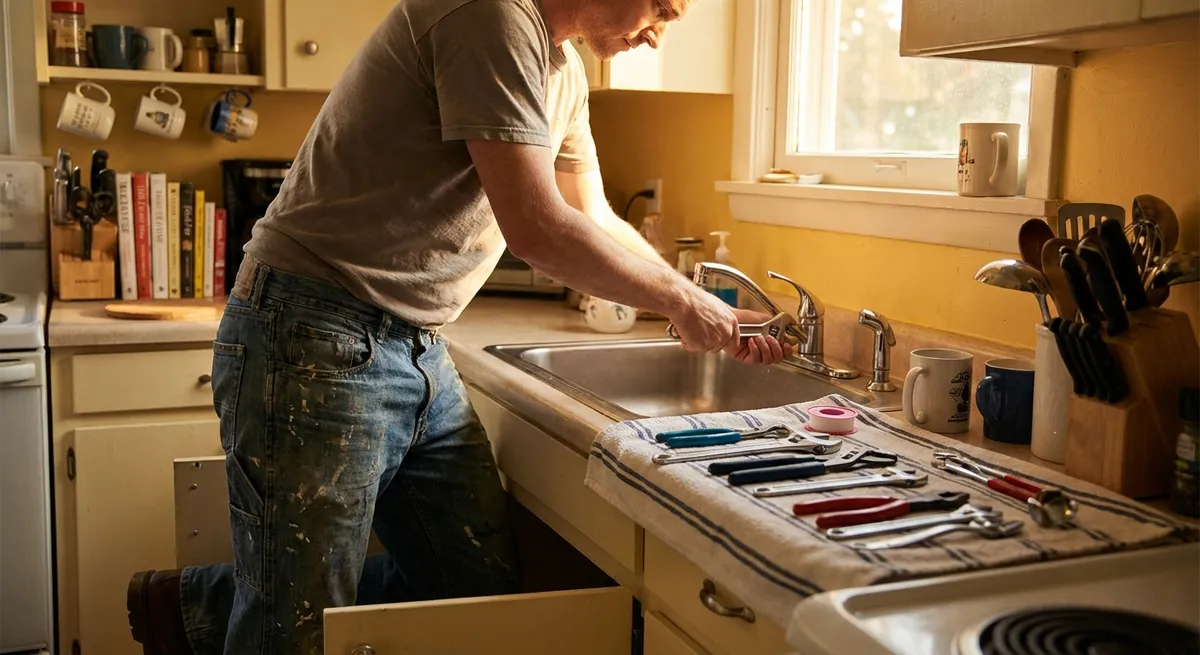
Step 1: Stop a Dripping Faucet (Without Calling a Plumber First)
A dripping faucet wastes water, raises your bill, and is just plain annoying. In many cases, the fix is as simple as replacing a worn-out cartridge or washer.
What you’ll need
- Adjustable wrench
- Phillips and flathead screwdrivers
- Replacement cartridge or washer (check brand/model if possible)
- Plumber’s grease (optional but helpful)
- Small bowl or towel for small parts
How to do it
- Shut off the water supply.
Look under the sink for the shutoff valves (one for hot, one for cold). Turn them clockwise until they’re fully closed. Turn the faucet on to relieve pressure and confirm water is off.
- Remove the faucet handle.
Pop off the decorative cap (if present) with a small flathead screwdriver. Unscrew the handle screw underneath, then pull the handle straight up or off. If it’s stuck, wiggle gently; avoid forcing it sideways.
- Access the cartridge or stem.
Depending on your faucet type (cartridge, ball, or compression), you’ll see a retaining nut or clip. Use an adjustable wrench or pliers to loosen it carefully. Keep small parts in a bowl so nothing goes down the drain.
- Remove and inspect the internal parts.
Pull out the cartridge or stem. Look for worn rubber seals, O-rings, or a cracked cartridge. If you have the old part with you, match it at a hardware store to get an exact replacement.
- Reassemble with the new parts.
Lightly coat O-rings with plumber’s grease to help them seal and last longer (not strictly required, but recommended). Insert the new cartridge or stem, reinstall the retaining nut or clip, then put the handle back on. Turn the water back on slowly and test for leaks.
Practical tips
- If you’re unsure about the cartridge type, take a clear photo and the old part to the store.
- Don’t overtighten the retaining nut—snug is usually enough.
- If the faucet still drips after replacement, double-check that the cartridge is fully seated and oriented correctly.
Step 2: Patch a Small Hole in Drywall So It Actually Disappears
Whether it’s from a doorknob, wall anchor, or moving furniture, small drywall damage is common—and very fixable. Done right, the repair should blend seamlessly once painted.
What you’ll need
- Sanding sponge or fine sandpaper (120–220 grit)
- Spackling paste or joint compound
- Putty knife (2–4 inches)
- Self-adhesive patch (for holes ~1–4 inches)
- Primer and touch-up paint
- Damp cloth
How to do it
- Prep and clean the damaged area.
Use the sanding sponge to remove loose material and rough edges around the hole or dent. Wipe the dust away with a damp cloth so the compound can stick well.
- For nail holes and small dents: fill directly.
Scoop a little spackle onto the putty knife and press it into the hole. Scrape off excess by pulling the knife flat across the surface. Let it dry as directed, then sand lightly until smooth.
- For larger holes (around 1–4 inches): use a patch.
Center a self-adhesive mesh patch over the hole. Press firmly. Apply joint compound over the patch with the putty knife, feathering the edges outward so it tapers into the wall. Let dry completely.
- Apply additional coats as needed.
Sand the dried compound lightly, wipe off dust, then add a second thin coat that extends a bit farther out. This helps hide the patch line. Two to three thin coats are usually better than one thick one.
- Prime and paint to blend.
Once smooth and dust-free, apply primer to the repaired area. After it dries, paint using the same finish (matte, eggshell, semi-gloss) as the existing wall. If you don’t have leftover paint, take a small painted chip to the store for a color match.
Practical tips
- Keep your putty knife clean between passes to avoid ridges and lines.
- Use a wider knife (6 inches) on the final coat for smoother blending.
- If the repair shows through after painting, add one more light sanding and paint coat.
Step 3: Fix a Running Toilet Before It Wastes More Water
A constantly running toilet can waste hundreds of gallons a month and is usually caused by a worn flapper, improperly set float, or leaky fill valve. Most fixes are simple and don’t require removing the toilet.
What you’ll need
- Replacement flapper (match to existing type)
- Adjustable wrench (for fill valve replacement if needed)
- Towel or small container
- Scissors (if you need to trim the flapper chain)
How to do it
- Take off the tank lid and observe.
Flush the toilet and watch what happens inside. Does water continue to trickle into the bowl? Is the water level going above the overflow tube? This tells you where to focus.
- Check and replace the flapper.
Turn off the water at the shutoff valve behind the toilet and flush to empty most of the tank. Unhook the old flapper from the overflow tube and chain. Attach the new flapper in the same way, then reconnect the chain to the flush lever.
- Adjust the chain length.
The chain should have just a little slack—too tight and the flapper won’t seal; too loose and it won’t lift fully. Aim for about 1/4 inch of slack when the flapper is closed.
- Set the water level correctly.
Turn the water back on and let the tank fill. The water level mark is usually indicated on the inside wall of the tank or on the overflow tube. Adjust the float (via screw, clip, or sliding collar) so the water stops about 1 inch below the top of the overflow tube.
- Test for a silent, complete stop.
Flush a few times. The toilet should refill, then stop completely with no trickling sound. If it still runs, check that the flapper is seating flat and that the chain isn’t hung up on anything.
Practical tips
- If replacing the flapper and adjusting the float doesn’t help, the fill valve might be worn; modern replacement fill valves are inexpensive and often include clear instructions.
- Avoid using in-tank bleach tablets—they can degrade rubber parts (like the flapper) faster.
Step 4: Replace a Light Fixture Safely and Cleanly
Swapping out an outdated ceiling fixture or adding a brighter one is a big visual upgrade for relatively little work. Working with electricity requires care, but you can stay safe by cutting power and double-checking before you touch anything.
What you’ll need
- New light fixture (with included mounting hardware)
- Voltage tester (non-contact preferred)
- Screwdrivers
- Wire strippers (if needed)
- Wire connectors (wire nuts)
- Step ladder
How to do it
- Turn off power at the breaker.
Don’t rely only on a wall switch. Flip the correct circuit breaker off in your electrical panel. Put a small piece of tape on the switch as a reminder if others are home.
- Confirm the power is off.
Remove the existing fixture’s cover and bulbs. Use a voltage tester near the wires to make sure there’s no live current. Only proceed when the tester confirms it’s off.
- Remove the old fixture.
Support the fixture with one hand while you loosen the mounting screws with the other. Carefully pull it down to expose the wiring. Unscrew or untwist the wire connectors to separate fixture wires from house wires.
- Prep the new fixture.
Read the installation instructions that came with it. Usually, you’ll attach the mounting bracket to the electrical box first. Strip about 1/2 inch of insulation off the fixture wires if needed.
- Connect and secure.
Match colors: typically black (or red) to black (hot), white to white (neutral), and green or bare to the ground wire or grounding screw. Twist each pair clockwise and secure with a wire nut. Gently tuck the wires back into the box, attach the fixture to the mounting bracket, and install the bulbs and cover. Turn the breaker back on and test.
Practical tips
- If the wires in your ceiling don’t match the standard color coding, take a photo before disconnecting the old fixture and replicate the connections.
- If the electrical box feels loose or is not rated for ceiling fans, don’t hang a heavy fixture or fan from it—replace with a proper rated box first.
Step 5: Re-Caulk a Bathtub or Shower to Prevent Hidden Water Damage
Old, cracked, or moldy caulk around tubs and showers lets water seep behind walls and under flooring. Re-caulking is more about patience than skill—and it can dramatically improve both function and appearance.
What you’ll need
- Caulk remover tool or utility knife
- Painter’s tape
- Bathroom-grade 100% silicone or siliconized acrylic caulk (look for “bath” or “kitchen & bath” on label)
- Caulk gun (for standard tubes)
- Rubbing alcohol or bathroom cleaner
- Paper towels or rags
- Bucket or trash bag for old caulk
How to do it
- Remove all old caulk.
Use a caulk removal tool or a sharp utility knife to carefully cut along both sides of the old bead. Peel it up and dispose of it. Any leftover residue should be scraped off—new caulk won’t stick to old.
- Clean and dry the area thoroughly.
Clean the joint with bathroom cleaner or rubbing alcohol to remove soap scum, mildew, and oils. Let everything dry completely; moisture trapped under new caulk can lead to mold.
- Tape for clean, straight lines.
Apply painter’s tape along both sides of the joint, leaving the gap exposed. This guides where your new bead goes and helps you get a professional-looking edge, especially if you’re new to caulking.
- Apply a smooth, continuous bead.
Cut the caulk tube tip at a 45-degree angle with a small opening. Load it into the caulk gun. Starting at one end, apply steady pressure to lay down a continuous bead along the joint. Avoid stopping and starting too often.
- Tool the caulk and remove tape.
Immediately smooth the bead with a caulk-smoothing tool or a damp finger, pressing gently to push caulk into the joint. Pull the painter’s tape away at a 45-degree angle while the caulk is still wet. Let the caulk cure as directed (often 24 hours) before using the tub or shower.
Practical tips
- Use mold-resistant bathroom caulk—check the label for “mildew resistant” or “mold resistant.”
- Don’t rush drying time; using the shower too soon can ruin the seal.
- Keep windows open or use a fan while working; some caulks have strong fumes while curing.
Conclusion
Home repair doesn’t need to be overwhelming or expensive. By learning a few practical fixes—like stopping a dripping faucet, patching drywall, quieting a running toilet, safely swapping a light fixture, and re-caulking a tub—you can prevent bigger problems, save money, and feel more in control of your space.
Start with one task that feels manageable, gather what you need, and take it step by step. The more you practice, the more “fix ready” your home (and your skills) will be.
Sources
- [U.S. Environmental Protection Agency – Fix a Leak](https://www.epa.gov/watersense/fix-leak-week) - Explains how small leaks (like dripping faucets and running toilets) waste water and provides basic troubleshooting guidance
- [The Family Handyman – How to Fix a Leaky Faucet](https://www.familyhandyman.com/project/how-to-fix-a-leaky-faucet/) - Detailed walkthroughs for different faucet types with photos and diagrams
- [Lowe’s – How to Patch and Repair Drywall](https://www.lowes.com/n/how-to/patch-and-repair-drywall) - Step-by-step instructions and visuals for repairing drywall holes and dents
- [U.S. Consumer Product Safety Commission – Electrical Safety in the Home](https://www.cpsc.gov/safety-education/safety-guides/home/electrical-safety-in-the-home) - Key safety guidelines to follow when working on electrical projects like light fixture replacement
- [Centers for Disease Control and Prevention – Mold After a Disaster](https://www.cdc.gov/disasters/mold/index.html) - Background on mold growth and why moisture control and proper caulking in bathrooms matter
Key Takeaway
The most important thing to remember from this article is that this information can change how you think about Home Repair.


