If your feed has been full of jaw‑dropping carpentry lately, you’re not alone. A viral gallery titled “50 Times People Made Something Amazing Out Of Wood” has been making the rounds, showing off everything from intricate tables to sculpted chairs. Beyond the eye candy, there’s a useful takeaway for homeowners: the same basic woodworking skills behind those projects are exactly what you need for real‑world home repairs.
You don’t need to build a museum‑worthy piece to make a big difference at home. With a few simple tools and some patience, you can tackle repairs that pros routinely charge hundreds for. Below, we’ll walk through five practical, step‑by‑step fixes inspired by the current boom in DIY woodworking—each one focused on solving a common home problem.
1. Repair a Sagging Interior Door So It Closes Smoothly
A sagging door is one of the most common and annoying issues in any home. All those viral wooden masterpieces start with square, well‑fitted joints—and your door should too.
Step 1: Diagnose the sag
Look at the gap around the door when it’s closed. A larger gap at the top on the handle side usually means the door is sagging on the top hinge. Check if any hinge screws are loose or if the hinges are bent.
Step 2: Tighten or replace hinge screws
Open the door and support it (a stack of books or a pry bar with a wood block works). With a screwdriver or drill, tighten the hinge screws into the jamb and the door. If any screw just spins, it’s stripped and needs fixing.
Step 3: Fix stripped screw holes
Remove the loose screw. Cut wooden toothpicks or a small wood dowel to the depth of the hole, coat them with wood glue, and pack them tightly into the hole. Snap them flush, let dry for at least 30 minutes, then drive the screw back in. This is the same “fill and re‑drill” idea woodworkers use on furniture.
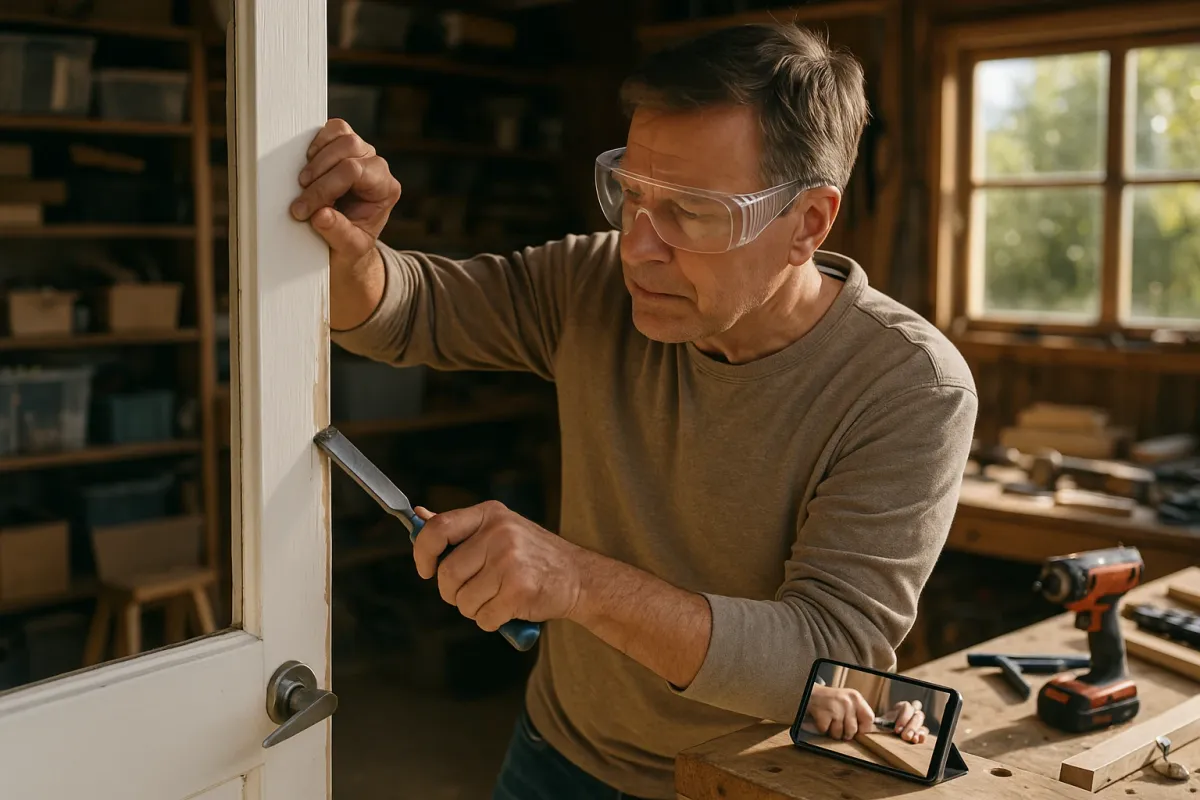
Step 4: Adjust hinge position if needed
If the door still rubs or won’t latch, you may need to slightly deepen the hinge mortise. Remove the hinge leaf from the jamb, score around the mortise with a utility knife, and carefully pare away a thin layer of wood with a sharp chisel. Reinstall the hinge and test the door.
Step 5: Fine‑tune with a plane or sandpaper
If the latch side still sticks, mark the rub spots with a pencil, remove the door from its hinges, and use a hand plane or coarse sandpaper on a sanding block to take off a small amount of wood along the edge. Rehang and test until it closes smoothly.
2. Replace a Rotten Exterior Trim Board Before It Spreads
Wood rot around windows, doors, or along fascia boards is more than ugly—it lets in moisture and pests. The same attention to grain direction and joinery you’re seeing online is what keeps exterior trim solid and weather‑resistant.
Step 1: Confirm it’s rot, not just peeling paint
Probe the suspect area with a screwdriver. If it feels spongy or crumbles, it’s rot. If it’s solid but flaky, you may just need scraping and repainting. For real rot, plan to replace the affected section, not just patch it.
Step 2: Remove the damaged board
Score the caulk lines along the trim with a utility knife. Use a flat pry bar with a thin wood shim behind it to protect the siding, then gently work the trim loose. Pull any remaining nails with a nail puller or locking pliers.
Step 3: Use the old piece as a template
Lay the rotten board on a new, rot‑resistant board—PVC trim, fiber cement trim, or primed pine rated for exterior use. Trace the profile and length. If there are angles (like around a window), copy them exactly. Cut with a miter saw or circular saw, following the grain to avoid splintering.
Step 4: Prime, paint, and seal edges
Before installing, prime all sides and especially the cut ends (this is where moisture sneaks in). Apply at least one coat of exterior paint to the faces that will be hard to reach later. Let everything dry fully per the can directions.
Step 5: Install and caulk
Fit the new board in place and secure it with exterior‑rated nails or screws into solid framing, not just siding. Fill nail holes with exterior wood filler. Run a bead of high‑quality exterior caulk along all joints and seams, then smooth with a damp finger. Finish with a second coat of exterior paint to lock everything out from the weather.
3. Reinforce a Wobbly Stair Tread Before It Becomes Dangerous
Those polished wooden staircases you see in woodworking posts look great—but what really matters is that they’re solid. A loose or squeaky stair tread is usually a simple wood‑to‑wood connection issue you can fix from below.
Step 1: Find the source of movement
If there’s access under the stairs (basement or crawlspace), have one person walk on the squeaky tread while you watch from below. Look for movement where the tread meets the stringer (the diagonal side supports) or the riser (vertical piece).
Step 2: Add screws where nails have loosened
If you see nails that have loosened over time, pre‑drill small pilot holes next to them and drive in wood screws at an angle, pulling the tread tight to the stringer. Use 2–3" wood screws, depending on thickness. Avoid over‑driving; snug is enough.
Step 3: Glue loose joints from above
From the top side of the stairs, sprinkle talcum powder or powdered graphite into small squeaks caused by friction, and work it in with your foot. For bigger gaps, use a thin wood glue bottle with a nozzle to squeeze glue into the joint between tread and riser. Step on it to work the glue in, then wipe away excess.
Step 4: Add cleats for extra support
For treads that flex, cut 1x2 or 2x2 wood cleats to length and screw them underneath the tread, tight against the stringer or riser. This adds support like a bracket. Pre‑drill to avoid splitting, and use construction adhesive plus screws for a long‑lasting repair.
Step 5: Let adhesive cure fully
If you’ve used wood glue or construction adhesive, keep heavy traffic off that step for the recommended cure time on the tube. Once cured, re‑test by walking normally. You should feel a noticeable difference in stiffness and hear fewer (or zero) squeaks.
4. Patch and Re‑Anchor a Loose Handrail in Solid Wood
A loose handrail is a safety hazard, especially on stairs. Many of the impressive wood projects trending now rely on strong, hidden fasteners—your rail should too.
Step 1: Remove the wobbly bracket or rail section
If the rail bracket is loose, unscrew it completely from the wall. If the rail itself is loose at a post, look for screws or bolts under decorative caps or plugs and remove them. Keep hardware organized; you may be reusing some of it.
Step 2: Locate solid backing (studs or blocking)
Use a stud finder along the rail height to find studs, or tap and listen for solid vs. hollow sound. Mark stud centers with painter’s tape. Mounting rails into drywall alone is asking for problems—rails should always be anchored into framing or solid blocking.
Step 3: Repair or relocate mounting holes
If an existing hole in the rail or bracket is chewed up, fill it with wood glue and a tight‑fitting wood dowel or multiple toothpicks. Let it cure, cut flush, and re‑drill a new pilot hole. If there’s no stud behind the old bracket location, shift the bracket so it hits a stud and mark new holes.
Step 4: Re‑fasten with proper hardware
Use 3" wood screws (for studs) or heavy‑duty rail mounting hardware designed for your wall type. Pre‑drill pilot holes through the bracket into the stud, then drive screws snugly. For rail‑to‑post connections, use structural screws or lag bolts as specified for your rail system—do not rely on small finish screws.
Step 5: Finish and test for solid feel
Cover visible screw heads with matching wood plugs or filler if desired. Sand lightly and touch up with matching stain or paint. Finally, lean hard on the rail in multiple directions as if you were falling toward it. If it doesn’t move, you’ve done it right.
5. Build a Simple, Strong Wood Patch for a Damaged Subfloor
Woodworkers showing off massive slab tables care a lot about flat, stable surfaces. Your floors are no different. If you’ve pulled up old flooring and found a soft or broken section of subfloor, you can repair it with basic carpentry skills.
Step 1: Expose and outline the damaged area
Remove flooring over and at least 6" beyond the damaged spot (carpet, vinyl, or plank). Use a marker to draw a rectangle around the damaged area, making sure your cut lines land in the middle of joist bays or directly over joists for best support.
Step 2: Cut out the bad subfloor
Set a circular saw blade depth just slightly deeper than the subfloor thickness (usually 5/8" or 3/4"). Cut along your lines, stopping short of walls or joists to avoid cutting anything structural or electrical. Finish corners with a multi‑tool or handsaw. Pry up the damaged panel section.
Step 3: Add blocking for support
If your new patch edges won’t land on joists, cut 2x lumber to fit between joists as blocking. Screw or nail the blocking into the sides of the joists so half of each block sits under the future patch seam. This gives you something solid to screw the patch into, just like adding extra support under a tabletop joint.
Step 4: Cut and dry‑fit the replacement piece
Measure the opening precisely and cut a new piece of plywood or OSB of the same thickness and grade as the existing subfloor. Test‑fit it in the hole; it should sit flat and flush with minimal gaps. Plane or sand edges if necessary for a snug fit.
Step 5: Secure and seal the patch
Apply construction adhesive to the top of joists and blocking where the patch will sit. Drop in the patch and screw it down every 6–8" along edges and every 8–12" in the field, using subfloor screws. If the area is prone to moisture (bathrooms, laundry), seal seams with flooring‑appropriate sealant or tape before reinstalling the finish flooring.
Conclusion
The woodworking projects going viral right now prove how far creativity, patience, and some basic tools can go. You don’t need to carve an art‑piece chair to put those same skills to work where they matter most—keeping your home safe, solid, and comfortable.
Start with one issue you already notice every day: that sticky door, wobbly stair, or soft floor spot. Tackle it carefully, keep safety in mind, and let each repair build your confidence. The more hands‑on you get, the more you’ll see your home the way those woodworkers see their projects: something you can actively shape, fix, and improve.
Key Takeaway
The most important thing to remember from this article is that this information can change how you think about Home Repair.


