Floor squeaks are one of those small annoyances that make your home feel older and less solid than it really is. The good news: in most cases, you don’t need a full flooring replacement or a pro visit to calm them down. With a few basic tools and some patience, you can track down the noise, secure loose framing, and restore that solid, quiet feel underfoot.
This guide walks you through simple, practical ways to fix squeaky floors from above and below, so you can choose the method that fits your skill level and access to the space.
Understand What’s Actually Causing the Squeak
Before you start drilling or pulling up trim, it helps to know what you’re trying to fix.
Most floor squeaks come from movement between two surfaces that should be tight together. When those pieces shift, they rub or pop—and you hear it.
Common causes include:
- Subfloor panels (plywood or OSB) flexing against joists
- Nails that have loosened and are sliding up and down with each step
- Gaps between joists and subfloor from wood shrinkage over time
- Floorboards rubbing against each other or against nail heads
- Framing lumber that has warped or twisted slightly
If you have access from below (like an unfinished basement or crawlspace), you’ll usually get a more durable, hidden fix. If you only can work from above, you’ll want low-profile methods that won’t damage visible flooring.
The goal in every case: stop the movement by pulling surfaces tightly together or blocking the motion so there’s nothing left to squeak.
Step 1: Track Down the Exact Squeak Location
You can’t fix what you can’t find. Take a few minutes to pinpoint the squeak accurately before reaching for fasteners.
Walk the floor slowly
Wear soft-soled shoes or socks and walk the area slowly. Mark every spot that squeaks with painter’s tape or a pencil mark on the floor. Don’t guess—listen carefully and test multiple times.
Narrow it down to a small area
Try to locate the squeak within a 6"–12" circle. Step with one foot while pressing down with your hand or knee nearby. When you’ve got the “loudest” spot, mark it clearly.
If possible, have a helper
One person walks above while another listens below in the basement or crawlspace. The listener can watch for movement between joists and subfloor or see where boards flex.
Look underneath if you can
From below, use a flashlight to look for: - Gaps between joists and subfloor - Nails that are partially pulled out - Movement when someone steps above Use a pencil to mark those joists and the approximate squeak location.
Check for other issues
If you see water stains, severe warping, or rotted wood, stop. That’s not just a squeak—it’s a structural or moisture issue. Those cases usually need professional assessment rather than a quick DIY fix.
By the end of this step, you should know: “The floor squeaks right here, over this joist,” not “Somewhere in this room.”
Step 2: Fix Squeaks From Below Using Shims and Screws
If you have open access to the underside of the floor, this is often the cleanest, most durable way to fix squeaks without touching your finished flooring.
Tools & materials:
- Wood shims (softwood is fine; avoid brittle cedar shingles for this)
- Construction adhesive (optional but helpful)
- 2½" or 3" wood screws
- Drill/driver with appropriate bits
- Flashlight or work light
- Safety glasses
How to do it:
Identify the moving joint
Have someone walk on the floor above while you watch from below. Look for: - The subfloor moving up and down on a joist - A gap between the joist top and subfloor bottom - A joist that’s not tight against the subfloor
Gently insert a shim
Slide a wood shim into the gap between joist and subfloor where you see movement. Do this by hand, pushing just enough to take up the gap but not enough to lift or bow the floor above. If the shim drives in easily more than an inch or two, you may need a slightly thicker shim or multiple shims at different points, not just one forced in deeply.
Secure the shim (optional but recommended)
Add a small bead of construction adhesive on the shim before inserting, or apply around its edges after it’s in place. This helps hold it over time and reduces future movement.
Reinforce with screws
Drive wood screws up through the joist into the subfloor on both sides of the shim (avoid hitting the shim directly). Pre-drill if your lumber is very dry or prone to splitting. Place screws about 1"–1½" away from the shim, angled slightly upward so they pull subfloor tight to the joist.
Test the area again
Have your helper walk the floor. If you still hear a squeak, check nearby joists in the same area; noise often carries along the framing. Add additional shims and screws where you see movement.
This method tackles the core issue: it physically tightens the floor assembly without creating visible fasteners on the finished surface.
Step 3: Use Blocking or Bracing Where Joists Are the Problem
Sometimes the squeak isn’t just loose subfloor—it’s flexing joists or lumber that moved over time. In those cases, adding blocking or braces between joists can reduce motion and silence squeaks.
Tools & materials:
- 2x lumber (2x4, 2x6, or 2x8, depending on joist size)
- Construction adhesive
- 3" wood or structural screws
- Tape measure, saw, drill/driver
- Safety glasses and hearing protection
How to do it:
Spot the flexing joist
With someone walking above, watch for a joist that appears to move more than its neighbors. Sometimes the joist itself creaks where it contacts the subfloor or adjoining framing.
Cut solid blocking pieces
Measure the space between the two joists around the squeak area. Cut a piece of 2x lumber to fit snugly between them. It should sit tight enough that you tap it in with a hammer but not so tight that it bows the joists.
Install the blocking piece
Apply construction adhesive to the ends of the block. Tap it into place between the joists, centered under the squeak location if possible.
Screw the block in securely
Drive at least two 3" screws through each joist into the ends of the block (four screws total, minimum). Angle the screws slightly in opposite directions (“toe-screw”) to pull everything tight and prevent future loosening.
For wider problem areas, add more
If squeaks cover a longer section of floor, add a series of blocking pieces or a continuous “sister” board alongside the joist and screw it tightly to the existing joist.
Retest the floor
Have your helper walk the room. The floor should feel more solid and sound quieter. If any squeaks remain, repeat this process one joist bay over.
Blocking and bracing increase the stiffness of your floor system, which not only reduces squeaks but also makes the floor feel less bouncy overall.
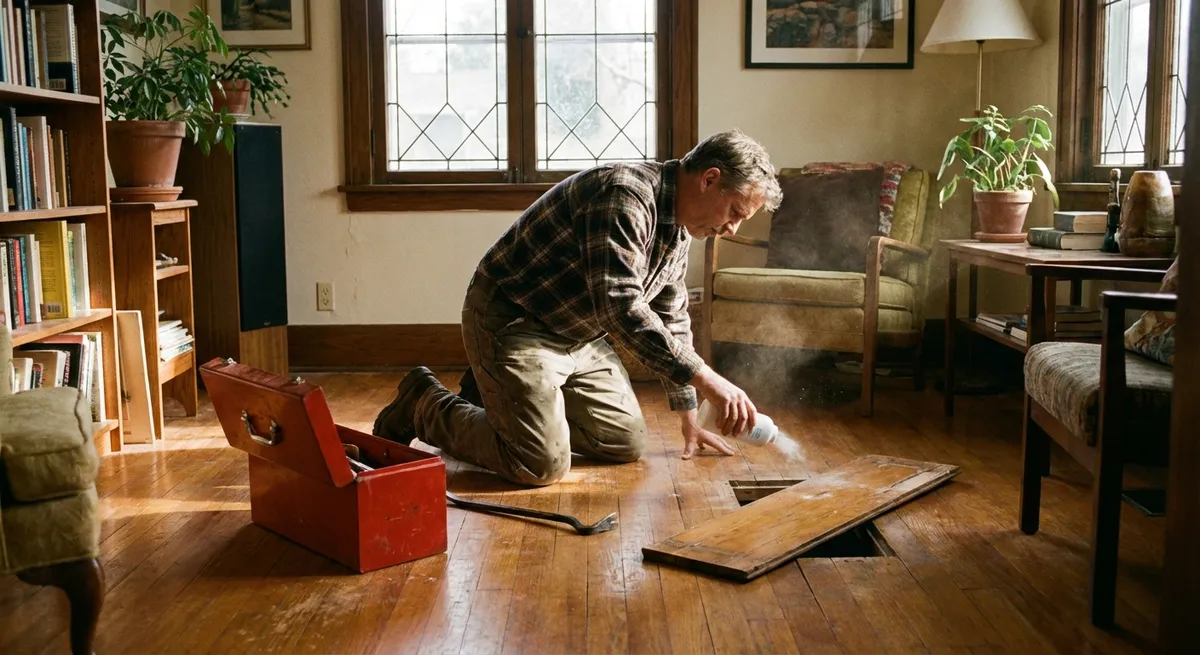
Step 4: Tackle Squeaks From Above Without Ruining the Finish
When you can’t get at the underside—like in a finished basement ceiling or on a second floor—you’ll have to work from the top. The challenge is to secure the floor without leaving ugly hardware or damage behind.
Tools & materials (choose based on floor type):
- For carpeted floors:
- Special “squeak repair” screw kit (e.g., Squeeeeek-No-More or similar)
- Drill/driver
- For hardwood floors:
- Trim-head wood screws or flooring screws
- Drill with small countersink bit
- Wood filler or color-matched wax sticks
How to do it on carpeted floors:
Find the joist under the carpet
Use a stud finder along the floor to locate joists. Mark them with painter’s tape. Squeaks are usually right above a joist or next to it.
Use the screw kit according to instructions
These kits come with special screws and a guide that lets you drive screws through the carpet and subfloor into the joist. The screw head is designed to break off below the surface.
Drive screws at the squeak points
Place the guide tool over your squeak location in line with the joist. Drive the screw until the head snaps off below the surface. The carpet will close over it and hide the repair.
Test and add more screws if needed
Walk the area. If you still hear a squeak, add one or two more screws a few inches away along the joist line.
How to do it on hardwood floors:
Locate the joist line
Joists usually run perpendicular to hardwood boards. Tap lightly and listen for a more solid sound where a joist is underneath or use a stud finder on the floor.
Pre-drill and countersink
At your squeak spot, pre-drill a small pilot hole through the hardwood and subfloor into the joist. Use a countersink bit so the screw head will sit just below the hardwood surface.
Drive a trim-head screw
Use a narrow trim-head wood screw so it’s less noticeable. Tighten enough to pull the floor snug, but stop before the board visibly dips.
Fill and blend the hole
Fill the small recess with wood filler or a color-matched wax stick. Wipe clean and, if necessary, lightly buff or touch up finish once it dries.
Avoid nails for fixes
Nails are more likely to loosen again and can cause new squeaks. Screws hold much better over time.
This approach trades a few tiny, repairable holes for a floor that feels solid and quiet again.
Step 5: Prevent Future Squeaks With Smart Habits and Upgrades
Once you’ve silenced the worst offenders, you can reduce future squeaks by improving how your floor system is fastened and how your home handles movement.
Use screws instead of nails for future work
If you ever replace flooring or open up an area, fasten subflooring to joists with construction adhesive plus screws (not just nails). This is standard in many new builds specifically to reduce squeaks.
Control humidity swings
Wood expands and contracts with moisture. Extreme swings in humidity can loosen fasteners and open gaps that later squeak. - Use a humidifier in very dry winters - Use ventilation and dehumidifiers in damp basements Aim for consistent indoor humidity, roughly in the 30–50% range.
Address minor leaks quickly
Even small plumbing drips or roof leaks can warp or weaken subfloors over time. Fix leaks promptly and don’t ignore recurring stains or musty smells.
Add subfloor screws during renovations
If you pull up carpet or vinyl for any reason, take the opportunity to drive screws every 6"–8" into the joists before installing new flooring. It’s a one-time job that prevents years of noise.
Recheck high-traffic paths periodically
Hallways, stairs, and main room paths get the most wear. Once a year, walk these routes and listen. Early fixes are easier and usually need fewer fasteners.
By tightening up your floor system now and managing moisture and movement, you’ll greatly reduce the odds that squeaks will return—or appear in new places.
Conclusion
Noisy floors aren’t just an annoyance; they’re usually a sign that something in your floor system is moving more than it should. With a little detective work and a few basic tools, you can track down those trouble spots, tighten up your framing, and bring back the solid, quiet feel your home had when it was new.
Whether you’re shimming from below, adding blocking, or using specialized screws through carpet, the principle is the same: remove the movement, and you remove the noise. Start with the worst squeaks, work systematically, and test as you go. Most DIYers can tackle these fixes in a weekend and enjoy the results every day after.
Sources
- [U.S. Department of Housing and Urban Development – Residential Rehabilitation Inspection Guide (PDF)](https://www.hud.gov/sites/documents/DOC_9835.PDF) - Offers guidance on common floor and structural issues in homes, including framing and subfloor considerations.
- [APA – The Engineered Wood Association: Floor Construction](https://www.apawood.org/floor-construction) - Explains best practices for subfloor installation, fastening schedules, and methods to minimize floor movement and noise.
- [The Spruce – How to Fix Squeaky Floors](https://www.thespruce.com/how-to-fix-squeaky-floors-1822925) - Provides homeowner-focused explanations of typical floor squeak causes and repair options from above and below.
- [Fine Homebuilding – Stopping Floor Squeaks From Below](https://www.finehomebuilding.com/project-guides/framing/stopping-floor-squeaks-from-below) - Professional-level tips on using shims, screws, and blocking to quiet floors at the framing level.
- [This Old House – How to Silence Squeaky Floors](https://www.thisoldhouse.com/flooring/21015010/how-to-silence-squeaky-floors) - Step-by-step instructions and visuals for using specialized fasteners and other methods to repair squeaks in finished floors.
Key Takeaway
The most important thing to remember from this article is that this information can change how you think about Home Repair.


