Floor squeaks are one of those small annoyances that never seem serious enough to call a contractor—but they can drive you crazy. The good news: in many homes, you can quiet squeaky floors in an afternoon with basic tools and a bit of patience. This guide walks you through practical, step-by-step methods that work whether you have access from below (unfinished basement/crawlspace) or you’re working from above on finished floors.
Understand What’s Actually Making the Floor Squeak
Most squeaks come from movement—wood rubbing against wood or metal when it isn’t tightly fastened.
Common causes:
- Subfloor separating slightly from joists
- Floorboards rubbing against each other
- Nails that have loosened and move up and down
- Gaps that allow boards to flex when stepped on
Start by walking slowly across the squeaky area. Have another person stay below (if possible) and listen or feel for movement along the joists. Mark squeak spots on the floor with painter’s tape or a pencil so you can find them easily once you start the repair.
Understanding the underlying cause helps you choose the right fix instead of just randomly adding fasteners, which can sometimes make things worse or damage flooring.
Step 1: Fix Squeaks from Below Using Shims
If you have access to the underside of the floor (unfinished basement or crawlspace), this is often the cleanest, least invasive fix.
Locate the joist and gap
Find the area where the subfloor lifts or moves against the joist when someone walks above. You may actually see a small gap or feel movement.
Use wood shims, not random scraps
Get thin, tapered wood shims. Avoid forcing in thick pieces that can lift the floor and create new problems.
Gently tap the shim into the gap
Place the thin end of the shim where the subfloor and joist are separating. Tap it lightly with a hammer until it’s snug, but stop as soon as the squeak stops—don’t overdrive it.
Secure with construction adhesive
Once the shim is in place and tested (have someone walk above again), back it out slightly, apply a bit of construction adhesive to the shim and gap, then tap it back in. This glue helps lock things in without excessive force.
Trim off excess
Cut any protruding part of the shim flush with the joist so it doesn’t interfere with other materials or future work.
This method works especially well where joists are slightly crowned or the subfloor has settled over time, creating small gaps that move and squeak.
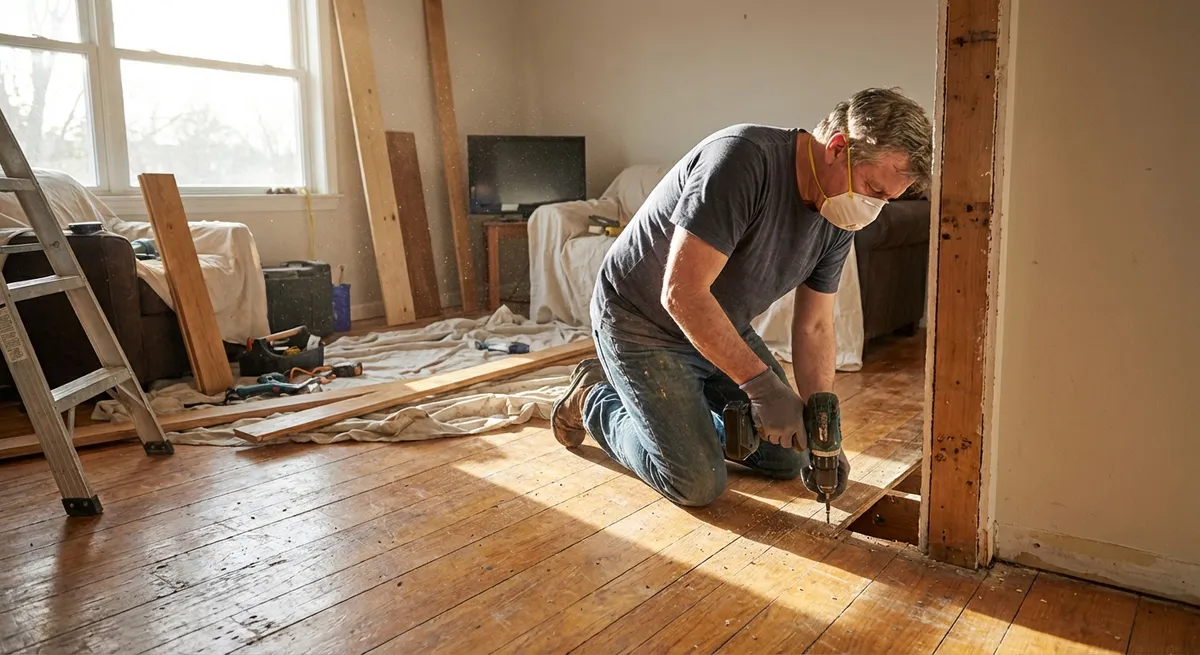
Step 2: Secure a Loose Subfloor with Screws (From Below or Above)
If the subfloor is moving up and down on the joists, screws are usually the most durable solution.
Identify movement
Have a helper walk on the floor while you watch from below. Look for joists where the subfloor flexes or you see nails moving slightly.
Choose appropriate screws
Use wood or deck screws long enough to go through the subfloor and deeply into the joist (often 2–3 inches, depending on thickness). Avoid drywall screws; they’re brittle and can snap.
Drive screws from below when possible
If you can work from the basement/crawlspace, pre-drill if needed and drive screws up through the joist into the subfloor. Place screws near (but not directly into) existing nails to pull the subfloor tightly down.
Working from above on carpet
If you can’t access from below and you have carpeted floors, locate the joists with a stud finder. Use specialized anti-squeak screw kits that let you drive screws through carpet and then snap the heads off below the surface, leaving the carpet unharmed.
Working from above on hardwood
For finished hardwood, pre-drill and drive trim-head or flooring screws at an angle (toe-screw) into the joist. Countersink the heads slightly below the surface, then fill with matching wood filler. Test frequently as you go so you don’t add more fasteners than necessary.
Focusing your screws directly over joists and only where there is real movement keeps the repair effective and less visible.
Step 3: Reduce Board-on-Board Squeaks in Hardwood Floors
If the squeak is coming from individual flooring boards rubbing against each other, the fix is more about lubrication and subtle tightening than heavy fastening.
Confirm the source
Listen closely as you step. Board-on-board squeaks often sound higher-pitched and more “creaky” than a thunk from a loose subfloor.
Apply a dry lubricant
Sprinkle powdered graphite, talc, or a specialized floor lubricant into the gaps between squeaky boards. Avoid oily products—they attract dirt and can stain.
Work the powder into the gaps
Use a soft brush or cloth to work the powder down into the seams. Place a cloth over the area and walk over it to help it settle into the joints.
Tighten with finishing nails if needed
For stubborn spots, pre-drill tiny pilot holes at an angle through the tongue side of a board into the joist below, then tap in a small finishing nail. Set the nail head slightly below the surface with a nail set and fill with color-matched wood filler.
Clean the surface thoroughly
Wipe away excess powder and filler so you don’t leave slippery or visible residue. Check surrounding boards to make sure you haven’t just shifted the squeak a few inches over.
This approach is especially helpful in older homes where seasonal expansion and contraction have loosened tongue-and-groove joints.
Step 4: Quiet Noisy Stairs Safely and Effectively
Stairs are one of the most common squeak zones, and they’re also high-traffic—and safety-critical—areas.
Figure out what’s moving: tread, riser, or stringer
Step on each tread individually and watch where it flexes. Sometimes it’s the tread pulling away from the riser, other times it’s loose on the stringers at the sides.
Tighten from the top where possible
From the tread surface, drive trim-head screws near the back of the tread into the riser and into each stringer. Pre-drill to avoid splitting. Countersink and fill holes on finished wood.
Reinforce from below when accessible
If the underside of the staircase is exposed, add wood glue and blocks where treads meet risers or stringers. Secure the blocks with screws, not just nails, for a long-term fix.
Use construction adhesive at critical joints
Run a bead of construction adhesive along gaps where the tread meets the riser or stringer before installing screws or blocks. This helps eliminate micro-movement that causes squeaks.
Check for code and safety issues
While working, confirm that your stair dimensions, handrails, and treads are solid and safe. Any cracks, serious rot, or structural movement may need professional evaluation, not just DIY squeak fixes.
Well-secured stairs not only stay quiet but also feel more solid and safer underfoot.
Step 5: Prevent New Squeaks Before They Start
A bit of foresight during repairs or renovations can save you from chasing future squeaks.
Use screws instead of nails for subfloors
Whenever you’re installing or replacing subflooring, fasten it mostly with screws. Nails are quicker but are more likely to loosen over time and squeak.
Add construction adhesive on top of joists
Before laying new subfloor, run beads of construction adhesive along each joist. This bonds the subfloor and helps reduce future movement.
Space fasteners consistently
Follow recommended spacing (often 6 inches along edges and 8–12 inches in the field) to keep the subfloor uniformly tight. Skipping areas is an easy way to guarantee future squeaks.
Acclimate wood flooring
For hardwood installations, let the material acclimate in the home for several days per manufacturer instructions. Stable moisture content means less expansion and contraction—and fewer squeaks later.
Address moisture issues
High humidity, leaks, or poor ventilation can swell and soften wood, encouraging movement and squeaks. Fix plumbing leaks, improve ventilation, and keep humidity in a reasonable range to preserve both structure and sound.
Thinking ahead during any flooring or framing work can turn squeak-prone areas into solid, quiet surfaces that stay that way for years.
Conclusion
You don’t have to live with noisy floors. Most squeaks come down to a few predictable causes: gaps, loose fasteners, and rubbing surfaces. By methodically finding where the movement happens and using targeted fixes—shims, screws, adhesive, and dry lubricants—you can quiet down floors, stairs, and hallways without major demolition. Start with the least invasive methods, test as you go, and reserve professional help for any areas that show structural damage or extensive movement. A quieter, more solid-feeling home is well within reach for most DIY enthusiasts.
Sources
- [U.S. Department of Housing and Urban Development – Rehab Guide: Floors](https://www.huduser.gov/portal/publications/RehabGuides-Floor.pdf) - Detailed technical guidance on floor construction, subfloors, and fastening methods
- [Fine Homebuilding – How to Fix a Squeaky Floor](https://www.finehomebuilding.com/2018/01/05/fix-squeaky-floor) - Practical, pro-level tips for diagnosing and repairing squeaky floors from above and below
- [The Family Handyman – How to Fix Squeaky Floors](https://www.familyhandyman.com/project/how-to-fix-squeaky-floors/) - Step-by-step instructions with diagrams for shimming, screwing, and lubricating problem areas
- [Bob Vila – How to Fix Squeaky Stairs](https://www.bobvila.com/articles/how-to-fix-squeaky-stairs/) - Focused guidance on different types of stair squeaks and appropriate repair methods
Key Takeaway
The most important thing to remember from this article is that this information can change how you think about Home Repair.


