A house that creaks, rattles, and echoes can feel older, cheaper, and more stressful than it really is. The good news: a lot of that noise comes from fixable issues—loose parts, vibration, air gaps, and hard surfaces bouncing sound around. With basic tools and a bit of focused effort, you can make your home feel quieter, sturdier, and more comfortable without a full remodel.
This guide walks through five practical, step‑by‑step fixes that DIY enthusiasts can handle in a weekend or two.
Step 1: Track Down and Quiet Floor Creaks
Floor creaks come from movement—usually wood rubbing against wood or against fasteners. Before you can fix them, you need to locate the exact spots.
- Find the squeak path.
Walk slowly across the room in quiet shoes or socks. Mark every squeak with painter’s tape or a sticky note so you can see the pattern. Pay attention to high‑traffic lines between doors and common furniture spots.
- Identify the floor type and access.
Is this hardwood, laminate, or carpet over a wood subfloor? Can you access the underside (basement or crawlspace)? Accessible joists make for stronger, more permanent repairs.
- For hardwood or exposed subfloor (from above).
- Use trim screws or flooring screws (not drywall screws) that are long enough to grab the subfloor into the joist.
- Locate joists with a stud finder or by measuring from known joists below.
- Pre‑drill if needed, then drive screws at an angle through the squeaky board into the joist to pull them tight.
- Set the screw heads slightly below the surface and fill with wood filler if visible.
- For floors over basement or crawlspace (from below).
- Have someone walk above while you watch from below. Look for movement between joists and subfloor.
- Install shims or construction adhesive where the subfloor meets the joists. Tap wood shims in gently—don’t over‑force them or you’ll create new gaps.
- For a stronger fix, use metal L‑brackets or squeak repair kits that clamp the subfloor to the joist.
- For carpeted floors (from above).
- Use a stud finder to locate joists.
- Drive special breakaway screws from a carpet squeak kit through the carpet and pad into the subfloor and joist. The top of the screw snaps off below the carpet surface so it won’t show or catch.
Pro tip: Work gradually. Fix the worst squeaks first, test, then move to the next. It’s easy to over‑fasten and create visible dimples if you rush on hardwood.
Step 2: Tighten Up Rattling Doors and Frames
Doors that rattle, slam, or won’t stay closed usually need simple adjustments—not replacement. Most of the time, you’re fixing alignment and play in the hinges and latch.
- Inspect hinges and screws.
Open the door halfway and gently lift up on the handle. If it moves vertically, the hinges are loose or sagging. Look for loose screws and worn hinge holes.
- Tighten and reinforce hinge screws.
- Try tightening all hinge screws first with a screwdriver (not just a drill) so you don’t strip them.
- If a screw spins without tightening, remove it and replace it with a longer wood screw that reaches deeper into the framing stud.
- For stripped holes, glue in wooden toothpicks or a small dowel, snap flush, then re‑drive the screw into the fresh wood.
- Adjust the strike plate to stop rattles.
- Close the door slowly and see how the latch meets the strike plate. If the latch doesn’t fully engage or the door rattles, you may need to move the plate slightly.
- Loosen the strike plate screws. Shift the plate up, down, or inward, then retighten.
- For small adjustments, bend the metal “tab” inside the plate slightly toward the door to hold the latch more firmly.
- Quiet the slam.
- Install adhesive door bumpers (the clear rubber dots) on the frame where the door contacts.
- Alternatively, use weatherstripping along the latch side and top of the frame. This both softens the close and seals air gaps that can whistle or rattle in wind.
- Check and adjust the door closer (for exterior doors).
- If you have a hydraulic closer, use the adjustment screws to slow the closing speed and latching force.
- Aim for a firm but gentle close that doesn’t shake the frame.
Pro tip: If you’re repainting or rehanging a problem door, label each hinge and its position. Swapping hinges around can reintroduce alignment issues you accidentally solved over the years.
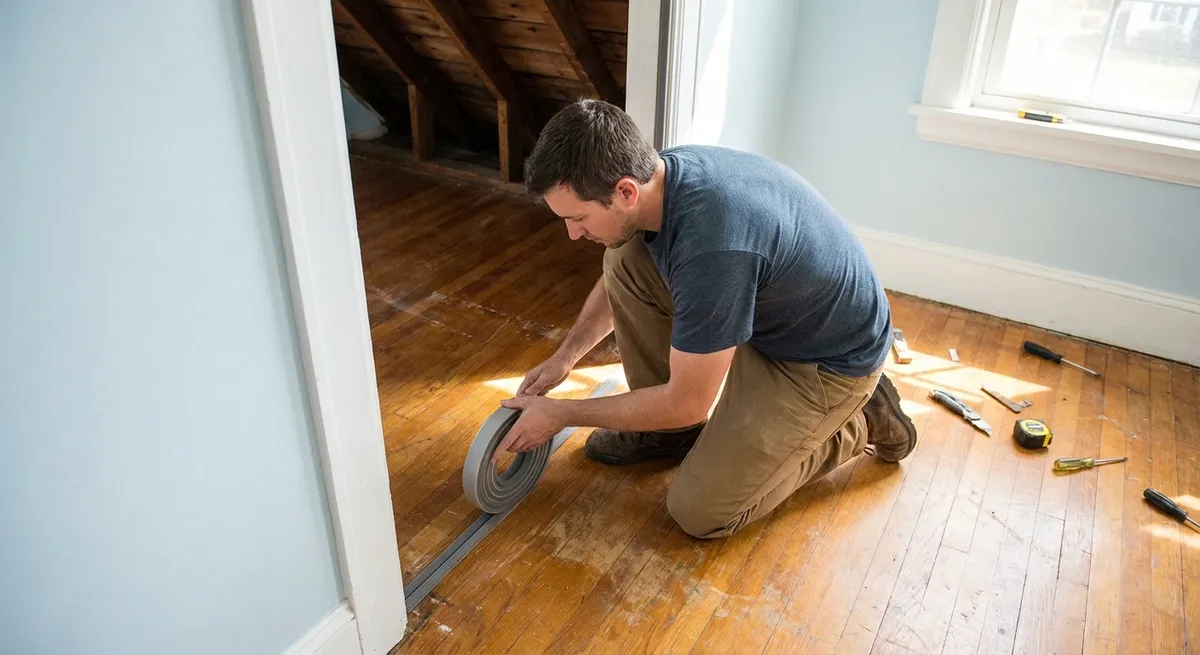
Step 3: Seal Whistling Windows and Drafty Gaps
Air leaks don’t just waste energy—they carry noise from outdoors and cause whistling and rattling when it’s windy. Sealing gaps is one of the highest‑value, low‑skill home repairs you can do.
- Find leaks with a simple test.
On a windy day or with kitchen/bath fans running, hold a lit incense stick or a damp hand around window and door frames, outlets on exterior walls, and baseboards. Smoke whipping or cold air on your hand signals a leak.
- Tackle window and door gaps first.
- For operable windows, replace worn or missing weatherstripping with new foam, rubber, or V‑strip types designed for windows.
- For fixed gaps between trim and wall, run a fresh bead of paintable caulk, smooth it with a damp finger or caulk tool, and wipe away excess.
- Seal exterior cracks and penetrations.
- Inspect around exterior window frames, siding joints, and where pipes/wires enter the house.
- Use exterior‑grade caulk or sealant compatible with your siding material.
- Don’t block weep holes on windows or siding—those are intentional drainage paths.
- Address outlets and switches on exterior walls.
- Turn off power at the breaker before removing plates.
- Install foam gasket inserts behind outlet/switch covers to cut drafts.
- In very leaky spots, use low‑expansion spray foam around the box, taking care not to get foam inside the box.
- Upgrade problem windows if needed.
If a window is very old, loose, or single‑pane, consider:
Pro tip: Work room by room. Finish sealing and cleaning in one area before moving on so you can actually feel the improvement and avoid half‑done projects.
Step 4: Soften Echoes and Footstep Noise Between Floors
If your home is full of hard surfaces—bare floors, tall ceilings, minimal furniture—sound will bounce and amplify. You can make a big difference with targeted “softening” and a few simple construction tweaks.
- Start with the worst echo chamber.
Clap your hands and talk at normal volume in each room. Spaces like hallways, stairwells, and living rooms with bare floors usually sound harshest.
- Add soft surfaces strategically.
- Place rugs or runners in high‑traffic and high‑echo areas, especially near doors and at the top and bottom of stairs.
- Use rug pads underneath to both quiet footsteps and prevent slipping.
- Add curtains or fabric panels near large windows or blank walls to absorb reflections.
- Break up long, reflective surfaces.
- On large blank walls, hang canvases, fabric‑covered panels, or bookshelves with mixed contents (books + décor) to scatter sound.
- In long hallways, use a series of smaller wall hangings rather than one big piece.
- Reduce noise between floors (from above).
- For squeak fixing, follow Step 1.
- Add heavier rug pads and dense rugs in upstairs rooms to reduce impact noise.
- Use felt pads under furniture legs to minimize scraping sounds.
- Reduce noise between floors (from below, if accessible).
- In an unfinished basement, install insulation batts between joists under noisy rooms. This doesn’t make the floor stronger, but it does dampen sound transmission.
- For bonus quieting, attach resilient channels and drywall to the underside for a more substantial sound barrier if you’re finishing the ceiling.
Pro tip: You don’t have to “soundproof” to notice a real difference. A few targeted changes in the noisiest paths—like stairs, hallways, and living rooms—can dramatically change how “calm” the house feels.
Step 5: Silence Vibration From Appliances and Plumbing
Vibration turns normal operation—washing machines, HVAC systems, plumbing—into rattles and hums that travel through the structure. Controlling it is mostly about isolation and secure mounting.
- Balance and isolate laundry appliances.
- Level the washer and dryer using a bubble level and the built‑in adjustable feet. All feet should be firmly on the floor with no wobble.
- Add anti‑vibration pads or a thick rubber mat under the machines to absorb movement.
- Avoid overloading or underloading the washer; uneven loads cause banging against the drum.
- Secure loose ducts and vent lines.
- Inspect accessible HVAC ducts and dryer vents for loose sections or metal parts that can rattle.
- Use metal hanging straps secured to framing to support long runs.
- Add short strips of foil tape at loose joints and ensure screws are tight.
- Quiet rattling plumbing pipes.
- Look for copper or PEX lines that touch framing members and vibrate when water runs.
- Gently secure pipes with padded pipe clamps or plastic pipe supports instead of metal‑on‑metal straps.
- For “water hammer” (a loud bang when closing a valve), consider installing water hammer arrestors near problem fixtures and ensure the main water pressure isn’t excessively high.
- Check fans and vents.
- Clean bathroom and kitchen exhaust fan covers and blades; built‑up dust causes imbalance and noise.
- If a fan housing is rattling against drywall, apply thin foam weatherstripping where the cover meets the ceiling, or tighten mounting screws.
- Isolate small countertop appliances.
For blenders, coffee grinders, and similar tools, place a silicone mat or thin cutting board under them to dampen vibration on hard countertops, especially on hollow or overhanging sections.
Pro tip: Listen for patterns. If noise only happens when a certain appliance runs or a specific faucet closes, you almost always have a vibration or pressure issue, not a structural defect.
Conclusion
A quieter, more solid‑feeling home doesn’t require tearing out walls or hiring a crew. By focusing on creaks, rattles, drafts, echoes, and vibration, you’re dealing with the most common sources of everyday noise and “flimsy” feeling.
Work one zone at a time, test as you go, and keep notes on what you’ve fixed. Over a few weekends, these practical repairs add up—your house feels sturdier underfoot, doors and windows behave, and daily life gets noticeably calmer.
Sources
- [U.S. Department of Energy – Air Sealing Your Home](https://www.energy.gov/energysaver/weatherize/air-sealing-your-home) - Explains why and how to seal air leaks around windows, doors, and other openings
- [Energy Star – Windows, Doors and Skylights](https://www.energystar.gov/products/building_products/residential_windows_doors_and_skylights) - Covers performance and efficiency considerations for windows and doors
- [Family Handyman – How to Fix Squeaky Floors](https://www.familyhandyman.com/project/how-to-fix-squeaky-floors/) - Step‑by‑step methods and product options for eliminating floor squeaks
- [This Old House – How to Fix a Sticking Door](https://www.thisoldhouse.com/doors/21015160/how-to-fix-a-sticking-door) - Practical techniques for adjusting doors, hinges, and strike plates
- [University of Rochester – Basics of Acoustics](https://www2.ece.rochester.edu/~zduan/teaching/ece248/ur_ece248_lecture1.pdf) - Background on how sound behaves in spaces and why surfaces and materials matter
Key Takeaway
The most important thing to remember from this article is that following these steps can lead to great results.


