Every home has noises that drive you a little bit crazy: doors that slam, pipes that knock, floors that creak, vents that buzz. They’re annoying, but they’re also early warning signs that something could wear out faster than it should. This guide walks you through five practical, step-by-step fixes to make your home quieter, safer, and more comfortable—without needing a full tool trailer or contractor.
Step 1: Silence a Slamming Interior Door
A slamming door is more than a noise issue—it can crack trim, loosen hinges, and wake everyone up. You can tone it down in under an hour.
What you’ll need
- Screwdriver (usually Phillips)
- Utility knife
- Self-adhesive felt pads or weatherstripping
- Painter’s tape (optional)
- WD-40 or silicone spray (optional)
How to do it
Check the hinges first
Open the door halfway and gently lift the handle up and down. If there’s movement, your hinges are loose. Use your screwdriver to tighten all hinge screws on both the door and the frame. Tight hinges reduce slamming and misalignment.
Test the latch alignment
Slowly close the door and watch how the latch meets the strike plate. If you need to push or pull the door to get it to latch, it may be slightly out of alignment. Mark any rub spots with a bit of painter’s tape or pencil.
Add soft-close contact points
Clean the door jamb where the door meets the frame. Stick small felt pads or a thin strip of weatherstripping on the latch side of the frame (top and bottom corners are usually enough). Start with thin material; you can always add more if needed.
Adjust as needed
Close the door normally. If it doesn’t latch, your pads are too thick or too close to the latch. Trim them or move them slightly away from the latch area with your utility knife. Aim for a firm, quiet close—no bounce-back.
Lubricate moving parts (optional)
If the latch is noisy, spray a small amount of silicone spray or WD-40 into the latch mechanism and work the handle several times. Wipe away any excess to avoid staining.
Pro tip: On heavy doors that still slam, consider installing an adjustable door closer. Many models can be dialed in so the last few inches close gently instead of snapping shut.
Step 2: Tame Banging Water Pipes (Water Hammer)
If you hear a loud bang when you shut off a faucet or your washing machine finishes filling, you might be dealing with water hammer. It’s more than a nuisance—it can stress your plumbing over time.
What you’ll need
- Adjustable wrench
- Towels or bucket
- Access to main water shutoff
- Optional: ready-made water hammer arrestor
How to do it
Turn off the main water supply
Locate your main shutoff valve (often near where the water line enters the house or by the water meter). Turn it clockwise until it stops. Open a faucet at the lowest level of your home and one at the highest to drain most of the water.
Drain the system to release air and pressure
Let water fully stop running from both faucets. Flush toilets to clear remaining water from the lines. This helps reset any built-in air chambers and reduces trapped pressure that causes banging.
Turn the water back on slowly
With faucets still open, turn the main valve back on slowly. You’ll hear air escaping. Once the water flows steadily at both faucets, close the lower one first, then the upper one. This gradual refill helps cushion the lines.
Secure loose pipes
If you can access your pipes (in a basement, crawlspace, or utility area), gently push them while someone turns a faucet on and off. If you see pipes move or hit wood, that’s a likely noise source. Use pipe straps or padded clamps to secure them firmly to framing, but don’t overtighten metal pipes.
Install a water hammer arrestor (if needed)
If banging still happens—especially when your washing machine or dishwasher closes its valves—install a water hammer arrestor on the affected line. Many screw directly onto washing machine supply valves with basic tools. Follow the manufacturer’s instructions and re-check for leaks.
Safety note: If you see corrosion, leaks, or damaged valves, stop and call a licensed plumber. Those issues need more than a DIY adjustment.
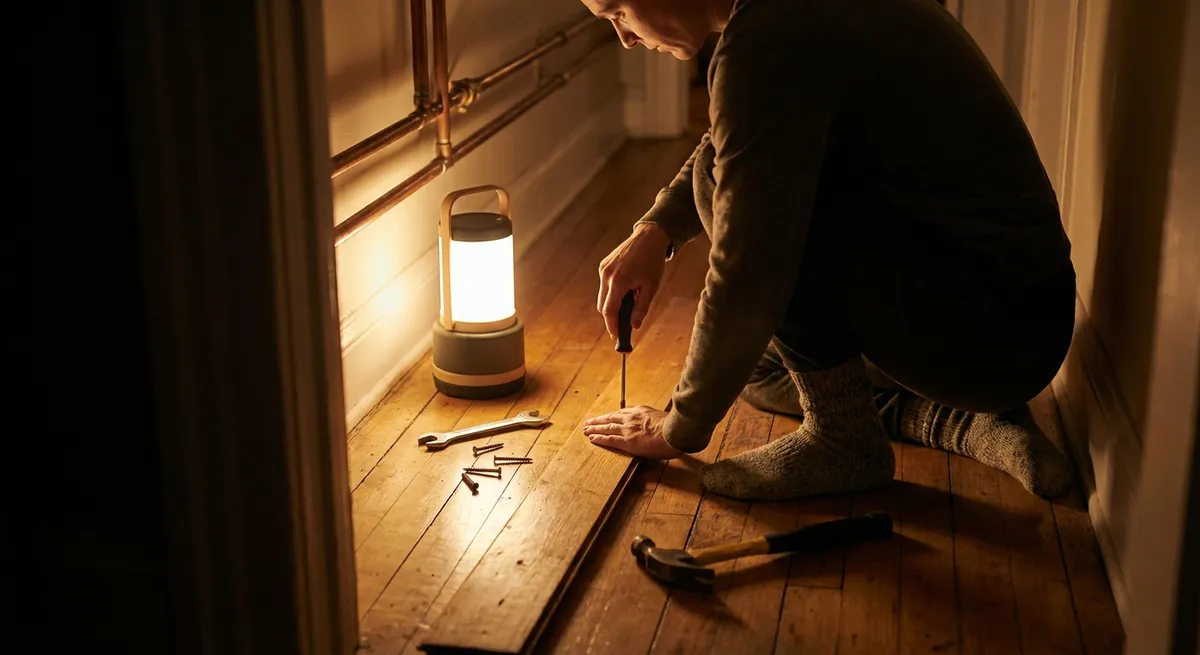
Step 3: Fix a Creaky Floor Without Tearing It Up
Creaks are usually wood rubbing against wood or loose fasteners. You can often quiet them from above, even with finished flooring.
What you’ll need
- Helper (optional but helpful)
- Stud finder (with joist detection, if possible)
- Trim head screws or specialized floor squeak screws
- Drill/driver with appropriate bit
- Wood filler (for hardwood) or carpet rake (for carpet)
- Painter’s tape or masking tape
How to do it
Find the squeak source
Have someone walk slowly across the noisy area while you listen and lightly press spots with your foot. Mark loud points with small Xs using painter’s tape. Creaks usually form in lines along floor joists.
Locate the joists
Use a stud/joist finder to find joist locations under the floor. Mark them lightly. If several squeaks line up, that’s a good clue you’re directly above a joist.
For carpeted floors: screw through the carpet
Use specialized “squeak” screws if you have them; they’re designed to snap off below the carpet surface. Drive screws where joists run, through the carpet and subfloor into the joist. If using regular trim screws, go slowly and stop as soon as the head approaches the carpet surface to avoid snagging fibers.
For hardwood floors: use trim screws and filler
Drill a small pilot hole at a slight angle into a board where it meets the joist. Drive a trim head screw until it just sinks below the wood surface. Test the creak. If it’s gone, fill the tiny hole with matching wood filler and wipe level with a damp cloth before it dries.
Test and adjust
Walk the area again. If one spot still creaks, add another screw 2–3 inches away. Move systematically until the noise is minimized. The goal isn’t perfection—it’s reducing everyday noise so walking feels solid and quiet.
Pro tip: Avoid very long screws unless you’re sure of joist depth; you don’t want to pierce pipes or wires below. When unsure, use shorter screws and more of them.
Step 4: Stop a Rattling Air Vent or Return Grille
Rattling vents are usually caused by loose screws, bent metal, or air pushing against a panel that’s slightly off. Fixing them improves comfort and reduces stress on your HVAC hardware.
What you’ll need
- Screwdriver
- Foam weatherstripping tape or thin craft foam
- Metal snips or utility scissors
- Vacuum with brush attachment
- Level (optional)
How to do it
Remove the vent cover
Turn off your HVAC system at the thermostat. Unscrew the vent or return grille and pull it away carefully. If it’s painted to the wall, score the edges with a utility knife first to avoid peeling paint.
Check for damage or warping
Lay the vent on a flat surface. If one corner is bent or the frame is twisted, that can cause rattling. Gently bend it back to flat by hand or with light pressure against a table edge.
Add a soft gasket
Apply thin foam weatherstripping around the back edge of the vent frame where it contacts the wall or ceiling. This creates a cushion that reduces vibration and air whistling.
Tighten and level on reinstall
Vacuum dust from the duct opening and screw holes. Reinstall the vent, tightening screws evenly so the frame doesn’t twist. Don’t overtighten—just snug enough that the foam compresses and the grille sits flat.
Test with the system running
Turn your system back on. Stand near the vent while it runs and listen for rattles. Gently tap the grille; if it buzzes, add an extra small foam pad at any contact point that still sounds loose.
Pro tip: For large return grilles that flex in the middle, you can sometimes add a discreet foam block between the grille and the duct at the center to support it and stop “oil can” popping noises.
Step 5: Quiet a Noisy Bathroom Fan So It Actually Gets Used
Loud bathroom fans encourage people to skip using them, which leads to moisture problems, peeling paint, and mold. A few basic steps can make your fan quieter and more effective.
What you’ll need
- Step stool or ladder
- Vacuum with brush attachment
- Mild soap and water
- Screwdriver
- Silicone lubricant spray (dry type, not greasy)
- Replacement fan motor or full fan kit (if needed, model-specific)
How to do it
Turn off power to the fan
Switch off the fan at the wall, then turn off the circuit at your breaker panel for extra safety. Always verify by flipping the switch and making sure nothing comes on.
Remove the cover and clean it
Pull the cover straight down; many are held by spring clips you can squeeze to release. Wash the cover in warm soapy water, rinse, and let it dry. A dusty cover alone can noticeably increase fan noise.
Vacuum the fan housing
Use a brush attachment to gently vacuum dust from the fan blades, motor, and housing. Be thorough—built-up dust throws the fan off-balance and makes it louder.
Lubricate moving parts (if accessible)
Some older fans have exposed motor shafts or bushings you can reach. Spray a small amount of dry silicone lubricant on the shaft where it meets the housing, avoiding electrical connections. Spin the fan blade by hand to distribute.
Decide if it’s time to upgrade
Turn power back on and test. If the fan is still very loud, vibrates heavily, or struggles to move air, consider a replacement insert or full unit. Many modern bathroom fans are designed to fit into existing housings, dramatically cutting noise without new ductwork. Match the unit to your existing duct size and bathroom square footage for best results.
Pro tip: If you upgrade, look for the fan’s “sones” rating. Around 1.5 sones or less is considered quiet for residential bathrooms.
Conclusion
You don’t need a full remodel to make your home feel calmer and more solid. Fixing slamming doors, banging pipes, creaky floors, rattling vents, and loud fans are all realistic DIY wins that protect your house and your sanity. Tackle one noise at a time, work methodically, and use the right fasteners and materials instead of quick hacks. Over a few evenings or weekends, you’ll notice a big difference in how your home sounds—and that’s often the first sign it’s running better, too.
Sources
- [U.S. Consumer Product Safety Commission – Home Maintenance and Repairs](https://www.cpsc.gov/Safety-Education/Safety-Guides/home) - General safety guidance for working on home systems and fixtures
- [Family Handyman – How to Stop Door Slamming](https://www.familyhandyman.com/project/how-to-stop-a-door-from-slamming/) - Practical methods and hardware options for quieting doors
- [This Old House – Silencing Squeaky Floors](https://www.thisoldhouse.com/flooring/21015037/how-to-fix-a-squeaky-floor) - Detailed breakdown of squeak causes and repair strategies for different floor types
- [Energy Star (EPA) – Bathroom Ventilation Fans](https://www.energystar.gov/products/ventilating_fans) - Guidance on selecting efficient, quiet bathroom fans and understanding ratings
- [The Spruce – Dealing With Noisy Plumbing Pipes](https://www.thespruce.com/how-to-fix-noisy-pipes-2718736) - Overview of common plumbing noise issues like water hammer and DIY mitigation steps
Key Takeaway
The most important thing to remember from this article is that following these steps can lead to great results.


