Noisy floors can make a solid home feel rickety. Every step you take announces itself, late-night trips to the kitchen wake everyone up, and guests hear every move. The good news: many squeaks and creaks are fixable with basic tools, a little patience, and a methodical approach. This guide walks you through practical, DIY-friendly ways to quiet floors from above and below so you can bring some peace back to your space.
Understand What’s Making Your Floor Squeak
Before you start drilling or hammering, it’s important to understand what’s actually making the noise. Floor squeaks are usually caused by movement between two pieces of wood: floorboards rubbing against each other, subfloor rubbing on joists, or nails moving in their holes. When you step down, the wood shifts, and that movement creates the sound.
Start by identifying the type of floor you have: solid hardwood, engineered wood, laminate, or carpet over subfloor. If you have a basement or crawlspace, look up from underneath to see the joists and subfloor; this often makes diagnosing the problem much easier. Gently press on suspicious areas from above while someone below watches for movement or gaps. Mark noisy spots with painter’s tape or sticky notes so you can come back to them. A bit of detective work early on will help you choose the right fix and avoid unnecessary holes or damage.
Step 1: Locate and Map the Noisy Zones
The first practical step is finding exactly where the squeaks are coming from, not just the general area. Walk slowly across the room in socks or soft shoes, listening carefully. When you hit a squeak, rock your weight back and forth on that spot and try to pinpoint the loudest point within a few inches. Mark the location with a piece of painter’s tape. If you have a helper, have them stand in the basement or crawlspace to listen and watch while you walk above; they can often see which joist or board moves when the noise happens.
If the floor is covered in carpet, feel for joists by gently pressing along the floor and listening for changes in sound. Joists are typically spaced 16 inches on center in many homes, though some are 12 or 24 inches. You can use a stud finder on the floor surface to help identify joist locations. Mark probable joist lines with long strips of tape so you can see the pattern. Taking the time to map the noisy spots and joist directions will make your fixes faster, more accurate, and safer.
Step 2: Tighten Floorboards from Below (When You Have Access)
If you can reach the underside of the floor from an unfinished basement or crawlspace, that’s usually the best place to start. Look for gaps between the joist and the subfloor or between subfloor seams that move when someone walks above. You may also see shiny nail shanks that have loosened and are no longer holding tight. Have a helper walk on the marked squeaky areas while you watch for movement; this will confirm you’ve found the right spots.
To tighten loose areas, use wood screws driven up through the joist into the subfloor. Choose screws that are long enough to grab the subfloor securely but not so long that they poke through finished flooring (measure the joist and subfloor thickness if possible). Pre-drill pilot holes to reduce the risk of splitting, especially in older, dry lumber. Install screws a few inches apart on each side of any visible gap. If there is a small gap between joist and subfloor, you can also apply a high-quality construction adhesive along the top of the joist before driving screws to lock the connection. Work methodically along noisy joists until each trouble spot feels solid and no longer moves when pressure is applied above.
Step 3: Use Shims and Adhesive to Fill Gaps
Sometimes squeaks are caused by a small but stubborn gap where the subfloor has pulled slightly away from the joist. In these cases, carefully inserting a shim can stop the movement. From below, identify the gap and clean out any dust or debris. Use thin, tapered wood shims rather than trying to force in a thick piece at once; forcing a large shim can actually lift the floor and create a new problem. Lightly coat the shim with wood glue or construction adhesive, then gently tap it into the gap with a hammer until it’s snug but not overly tight.
After the shim is in place, wipe away any excess adhesive and add one or two screws at a slight angle to pin the subfloor to the joist nearby. This combination of shim plus fasteners helps distribute pressure and minimizes future movement. Avoid stacking multiple shims on top of each other, which can be unstable; if one shim doesn’t do the job, you may need to reposition it or try a slightly thicker one. Let glue or adhesive cure fully based on the product instructions before heavily loading the area to give your repair the best chance of lasting.
Step 4: Quiet Squeaks Under Carpet from Above
If you don’t have access from below and the squeak is under wall-to-wall carpet, you can still fix it from above with the right technique. The goal is to secure the subfloor to the joist without damaging the carpet surface. Specialized “squeak repair” kits use breakaway screws that go through the carpet and pad into the subfloor, then snap off just below the surface, leaving almost no visible trace. Follow the manufacturer’s instructions carefully, since the depth and alignment are critical.
To target the squeak, first confirm the joist location running under the noise by measuring from nearby walls or using a stud finder. Place the kit’s alignment tool or tripod over the squeaky spot along the joist line, then drive the screw through the carpet where indicated. As the screw pulls the subfloor tight to the joist, test the area by stepping on it. If the squeak is reduced but not gone, add one or two more screws a few inches to either side. Once you’re satisfied, use the kit’s tool to snap off the screw head below the carpet surface. Gently brush the carpet fibers to disguise any minor disturbance, and repeat the process for each marked squeaky zone.
Step 5: Secure Squeaky Hardwood or Laminate Planks
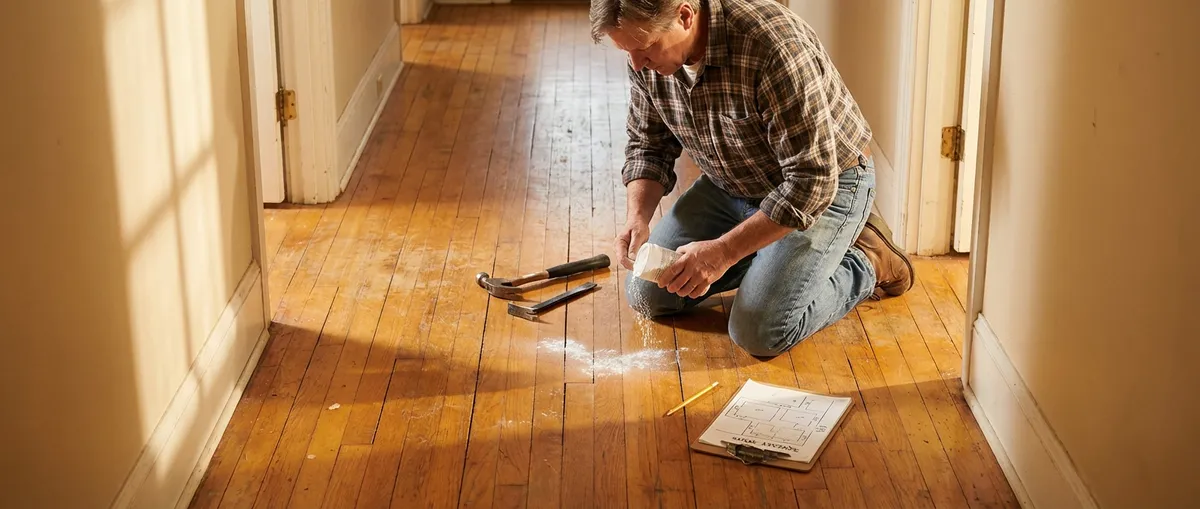
For exposed hardwood or laminate floors, the challenge is to stop movement with minimal visible damage. First, confirm whether the squeak is at a seam between boards or somewhere in the middle of a board over a joist. For tongue-and-groove hardwood, you can often drive a very thin trim screw or flooring screw at an angle through the tongue edge into the subfloor or joist. Pre-drill with a small bit to avoid splitting, then set the screw head just below the surface and fill with a color-matched wood filler or putty. Wipe away excess and lightly buff once dry so the repair blends in.
If the squeak is between two boards rubbing together, a dry lubricant can help. Sprinkle a small amount of powdered graphite, talcum powder, or a commercial floor lubricant into the seam, then work it down by gently stepping on and flexing the boards. Wipe away any residue to avoid a slippery surface. For floating laminate floors, squeaks often mean the underlayment has compressed or there’s a slight hump or gap under the plank. In those cases, you may need to carefully remove nearby trim and a few planks to inspect and level the subfloor or replace damaged underlayment. While that’s more involved, doing it once correctly will usually eliminate multiple noise sources at the same time.
Conclusion
Stopping squeaky floors is mostly about tracking down small movements and locking those pieces of wood together so they act as one solid surface. With a bit of patience and basic tools, you can tackle most common squeaks from above or below without calling a contractor. Start by mapping the noise, then choose the right method—screws, shims, adhesives, specialized kits, or careful lubrication—based on what you find. Once you’re done, you’ll not only enjoy a quieter home, but you’ll also have a better understanding of how your floors are built and how to keep them solid for years to come.
Sources
- [Family Handyman – How to Fix Squeaky Floors](https://www.familyhandyman.com/project/how-to-fix-squeaky-floors/) - Step-by-step guidance and diagrams for repairing squeaky floors from above and below
- [This Old House – Stop Floor Squeaks](https://www.thisoldhouse.com/flooring/21015122/stop-floor-squeaks) - Expert tips and product recommendations for silencing squeaky flooring
- [U.S. Department of Housing and Urban Development – Residential Rehabilitation Inspection Guide](https://www.hud.gov/program_offices/public_indian_housing/programs/ph/phecc/rehabguide) - General guidance on assessing and repairing common residential structural and finish issues
- [University of Kentucky Cooperative Extension – Floors and Foundations](https://www.uky.edu/environment/files/pubs/hc/HC-ROOF_FLOORS_FOUNDATIONS.pdf) - Educational overview of floor systems and common problems affecting performance and noise
Key Takeaway
The most important thing to remember from this article is that this information can change how you think about Home Repair.


