A loose, rattling door is annoying, wastes energy, and can get worse over time if you ignore it. The good news: you don’t need a full door replacement or a contractor to fix it. With a few common tools and a bit of patience, you can tighten hardware, align the latch, and get doors closing smoothly again. This guide walks you through a practical, step-by-step process that DIYers of all levels can follow.
Understand What’s Actually Wrong With the Door
Before grabbing a drill, figure out what’s causing the problem. “Loose hardware” can mean a few different things, and each has its own fix.
Start by slowly opening and closing the door and watch what happens:
- Does the knob feel wobbly or spin loosely in your hand?
- Does the latch barely catch the strike plate, or miss it entirely?
- Does the door rattle when it’s closed, like it’s not held tightly in place?
- Are there visible gaps around the door where light or air comes through?
- Do you see stripped screw holes, cracked wood, or a bent strike plate?
Most interior door issues fall into one or more of these categories:
- Loose knob or lever – Screws have backed out, or the connecting mechanism is worn.
- Loose hinges – Screws no longer bite into the wood, so the door sags.
- Misaligned latch and strike plate – The door moved slightly over time, so the latch doesn’t line up.
- Rattle when closed – The latch doesn’t sit snugly in the strike plate.
- Worn or damaged hardware – Older parts are bent, cracked, or just too worn to function well.
Once you know what’s wrong, you can work through the fixes methodically instead of guessing.
Step 1: Tighten and Secure the Door Hinges
If the door is sagging, sticking, or not lining up with the latch, start at the hinges. Much of the time, hinge screws are the original culprit.
- Inspect each hinge. With the door open, look at the top, middle, and bottom hinges. If you see gaps between the hinge leaf and the frame or the screws sit proud (sticking out), they need attention.
- Tighten existing screws. Use a manual screwdriver (usually a Phillips) rather than a drill to avoid stripping. Turn each screw until it’s snug—don’t over-torque, especially in older frames.
- Test the door. Close and reopen it. If the latch now lines up and the knob feels better, you might already be done. If not, move on to reinforcing.
- Fix stripped screw holes. If a screw keeps spinning without tightening, the hole is stripped. Remove the screw, then:
- Cut wooden toothpicks or a small dowel to the depth of the hole.
- Coat them with wood glue and pack the hole tightly.
- Wipe away excess glue, let it dry for at least 30–60 minutes (longer is better), then drive the screw back in.
- Upgrade to longer screws if needed. If a frame is weak or the door feels heavy, replace one or two short screws in the top hinge (especially on the jamb side) with 2.5- to 3-inch wood screws. This anchors the hinge more securely into the wall framing, reducing sag.
Re-check alignment by gently closing the door. If the door now sits square in the frame but the latch still misbehaves, move on to the knob and strike plate.
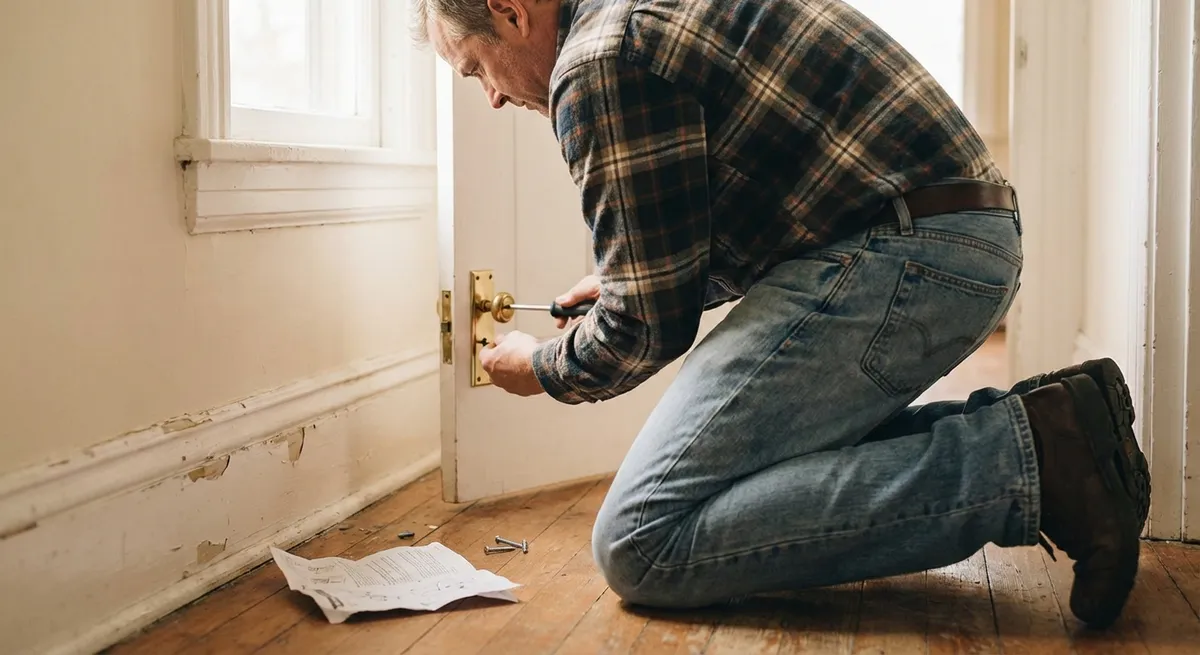
Step 2: Tighten and Adjust a Wobbly Door Knob or Lever
A loose knob feels cheap and can eventually fail. Most interior knobs can be snugged up quickly.
- Identify how your knob is held together.
- Many modern knobs have exposed screws on the interior side.
- Others hide screws under a decorative cover plate (rosette).
- Some use a tiny set screw on the neck of the lever or knob.
- Tighten exposed screws. Hold the opposite knob steady and tighten each screw evenly until the assembly feels solid. Don’t overtighten to the point the knob binds.
- Remove a cover plate if needed. If you don’t see screws:
- Look for a small notch or tab on the edge of the rosette.
- Gently pry with a flat screwdriver to pop the plate off and expose the mounting screws.
- Tighten the screws, then snap the plate back into place.
- Check and tighten the set screw. For levers especially, there’s often a small hex (Allen) or Phillips set screw on the underside. Tighten it until the lever no longer wiggles.
- Test the latch operation. Turn the knob several times with the door open. The latch should extend and retract smoothly without sticking or grinding. If it binds, slightly loosen the screws, adjust the knob’s position, and re-tighten.
If the knob is tightened but the latch still doesn’t catch or the door rattles, the strike plate and latch alignment need work.
Step 3: Align the Latch With the Strike Plate
The latch needs to meet the strike plate opening cleanly. Even a small misalignment can cause poor latching, sticking, or rattling.
- Mark where the latch hits.
- Close the door slowly and watch where the latch contacts the strike plate.
- If you can’t see clearly, coat the latch lightly with a dry-erase marker or lipstick, close the door, then open it to see where the color transfers.
- Determine direction of misalignment.
- Too high or too low: The latch hits the top or bottom of the opening.
- Too far in or out: The latch barely makes contact or doesn’t fully enter the opening.
- Try a small adjustment first. Loosen the strike plate screws slightly (don’t remove them) and shift the plate up/down or in/out as far as the mortise allows. Retighten and test.
- If you need more movement, carefully modify the mortise.
- For small vertical adjustments, use a sharp chisel to remove a bit of wood at the top or bottom edge of the mortise to create more room.
- Work slowly, removing thin shavings of wood, and test-fit frequently.
- Reinstall the strike plate. Once the latch enters the strike plate cleanly and the door closes without resistance, tighten the screws firmly.
- Check the latch engagement. When fully closed, the latch’s beveled part should sit fully inside the strike opening, and the door should require a light push to latch—no slamming.
If the door now latches but still rattles when pushed, you’ll fine-tune the fit next.
Step 4: Eliminate Door Rattle and Improve the Seal
A door that “clicks” shut but still wiggles is annoying and can let noise or drafts through. The fix is usually simple: adjust how tightly the latch and strike hold the door.
- Inspect the strike plate’s lip.
- Look at the slightly bent metal tab or lip inside the strike plate where the latch rests.
- If it’s too flat, the latch won’t be pulled tight against the stop.
- Gently bend the tab inward.
- Remove the strike plate from the jamb.
- With pliers, carefully bend the inner lip just a little toward the room so it will grip the latch more firmly.
- Reinstall and test. Repeat in small adjustments until the rattle disappears.
- Add or adjust weatherstripping (if present).
- Some interior doors (especially to garages or utility rooms) have foam or rubber weatherstripping.
- If the door feels loose, slightly thicker weatherstripping can help hold it snug. If it’s hard to close, the weatherstripping may be too thick or compressed unevenly.
- Use strike plate shims if needed.
- If bending doesn’t work, you can use thin cardboard or purpose-made shims behind the strike plate to change how deeply the latch sits.
- Removing material (cutting the mortise slightly deeper) makes the door looser; adding shims moves the plate outward to tighten the fit.
- Test for quiet operation. Close the door gently and push on it from both sides. You shouldn’t hear a rattle, and the latch should still release easily when you turn the knob.
You’ve now fixed most “loose door” problems. If the hardware itself is worn or wobbly even when tightened, you may need to replace components.
Step 5: Replace Worn Hardware for a Long-Lasting Fix
Sometimes hardware is simply at the end of its life. If knobs grind, latches stick, or metal is visibly bent or cracked, replacement is the safest and most durable solution.
- Match your existing hardware style and backset.
- Measure from the edge of the door to the center of the knob hole (usually 2-3/8" or 2-3/4"). This is the backset, and your new latch should match it.
- Note if the door is passage (no lock), privacy (bed/bath lock), or dummy (decorative) and buy the correct type.
- Remove the old knob and latch.
- Unscrew both sides of the knob/lever and pull them off.
- Remove the two screws on the edge of the door holding the latch, then slide the latch out.
- Remove the strike plate from the jamb.
- Install the new latch and knob.
- Slide the new latch into the existing mortise making sure the beveled side faces the door’s closing direction.
- Screw the latch in place, then install the interior and exterior knobs, aligning the spindle or connecting bar through the latch.
- Tighten all screws until snug, checking that the knob turns freely.
- Fit the new strike plate.
- If the new strike plate is the same size as the old one, reuse the existing mortise.
- If it’s slightly different, carefully chisel or sand the mortise to fit, keeping edges clean.
- Install and test the door’s closing action, revisiting the alignment and anti-rattle steps if needed.
- Do a final function check.
- Open and close the door 10–15 times.
- Confirm the latch catches reliably, there’s no rattle, and the knob/lever feels solid in your hand.
- Check that children or elderly family members can operate it easily without extra force.
A properly installed, quality hardware set can last for decades, especially if occasionally checked and re-tightened.
Conclusion
Loose door hardware is one of those “small” home issues that quietly chips away at comfort and makes a house feel worn out. Instead of living with rattles, sticking latches, or wobbly knobs, you can fix almost every common problem in under an hour with a screwdriver, a chisel, and a little patience.
By working through the door from hinges to knob to strike plate—and replacing parts only when needed—you’ll end up with doors that close smoothly, stay quiet, and feel solid. It’s a simple, confidence-building repair that pays off every time you walk through the room.
Sources
- [Family Handyman – How to Fix Loose Door Hinges](https://www.familyhandyman.com/project/how-to-fix-loose-door-hinges/) - Practical guidance on tightening and reinforcing door hinges, including fixing stripped screw holes
- [This Old House – How to Replace a Door Knob](https://www.thisoldhouse.com/doors/21017611/how-to-replace-a-door-knob) - Step-by-step instructions and visuals for removing and installing interior door knobs and latches
- [Bob Vila – How to Adjust a Door Strike Plate](https://www.bobvila.com/articles/how-to-adjust-a-door-strike-plate/) - Detailed tips on aligning latch and strike plate and dealing with misaligned doors
- [Energy.gov – Weatherstripping](https://www.energy.gov/energysaver/weatherstripping) - Overview of weatherstripping types and how they improve comfort and efficiency around doors and openings
Key Takeaway
The most important thing to remember from this article is that this information can change how you think about Home Repair.


