Squeaky floors and stairs make your home feel older (and louder) than it is. The good news: most squeaks are annoying, not dangerous—and you can fix many of them in an afternoon with basic tools. This guide walks you through practical, step‑by‑step methods to track down and silence those noises so your home feels more solid and peaceful.
Understand What’s Causing the Squeak
Squeaks come from friction—two pieces of wood (or wood and metal) rubbing together when you walk.
In most homes, floors are built from:
- Joists – the big horizontal framing members
- Subfloor – sheets of plywood or OSB on top of the joists
- Finish flooring – hardwood, laminate, carpet, tile, or vinyl on top
Over time, wood dries, shrinks, or flexes. Nails loosen, screws back out slightly, or gaps appear between layers. When you put weight down, those parts move and rub, and you hear the squeak.
Common squeak points:
- Subfloor rubbing on joists
- Loose nails sliding in and out of wood
- Hardwood boards rubbing against each other
- Stair treads moving against risers or stringers
Understanding this helps you choose fixes that stop the movement, not just cover the sound.
Step 1: Track Down the Exact Squeak Location
Before you fix anything, you need to know exactly where the noise comes from. A few inches off can mean your repair doesn’t work.
How to do it:
Walk slowly over the noisy area
Take small steps and put your full weight on one foot at a time. Listen for the loudest point.
Mark the hot spots
Use painter’s tape or a pencil to mark spots where you hear squeaks. If it’s a long hallway, you might find several.
Have a helper listen from below (if possible)
If you have an unfinished basement or crawlspace under the area, send a helper downstairs. - You walk on the floor. - They look up to see which joist or subfloor area moves. - They can tap the spot from underneath so you can match it to the floor above.
Check if the floor moves under your feet
When you step, watch and feel: - Does the floor dip slightly? - Do boards flex or move side to side? That’s a strong sign of loose subfloor or finish flooring.
Mark from below as well
From the underside, use a marker or tape to note the joist location and the noisy area directly above. This makes targeted repairs much easier.
Tip: On carpeted floors, use different color tape pieces or small sticky notes so you don’t lose track as you move around.
Step 2: Fix Squeaks From Below With Screws and Shims
If you can access the underside (unfinished basement, utility space, or open ceiling), that’s usually the best place to repair squeaks. You can tighten joints without disturbing finished flooring above.
Tools and materials:
- Drill/driver
- 2½" or 3" wood screws (for attaching subfloor to joists)
- Wood shims (thin, tapered wedges)
- Construction adhesive (optional but helpful)
- Utility knife or small hand saw
- Safety glasses
Step‑by‑step:
Locate the joist under the squeak
Use your marks from Step 1. The subfloor panel usually runs perpendicular to joists.
Tighten the subfloor with screws
- Drive wood screws up through the joist into the subfloor. - Space them about 6–8 inches apart across the noisy area. - Don’t overdrive the screw; you want it snug, not punching through the flooring above.
Add construction adhesive (if joints are loose)
If you see a visible gap between joist and subfloor: - Run a small bead of construction adhesive along the joint. - Then add screws to pull the surfaces tight together.
Use shims for small gaps
- Slide a wood shim gently into the gap between joist and subfloor where you see movement. - Tap it lightly with a hammer just until it feels snug and the movement stops. - Don’t drive the shim hard—too much force can lift the floor and create another problem. - Trim off the exposed shim with a utility knife or hand saw.
Test as you go
Have your helper walk on the floor while you watch from below. When the movement and sound stop, you’ve hit the right spot.
Tip: For long squeaky runs, work along the joist in sections, adding screws and shims only where movement is visible or loudest.
Step 3: Quiet Squeaky Floors Under Carpet From Above
If you can’t reach from below (finished ceiling, no basement), you can often fix carpeted floors from the top without fully removing the carpet.
Tools and materials:
- Drill/driver
- Special “squeak repair” kit for carpet (e.g., Squeeeeek-No-More or similar)
- Stud finder (optional)
- Tape measure
- Vacuum
Step‑by‑step:
Find the joist under the carpet
- Use a stud finder set to deep scan, or measure from a nearby wall. - Joists are usually 16" or 24" apart on center. - Press your knee down and feel where the floor feels the most solid—that’s often directly over a joist.
Set up the repair kit
These kits typically include special screws and a depth control fixture. - Place the fixture on the floor where you suspect the joist is. - The fixture helps guide the screw through carpet and pad into the subfloor and joist.
Drive the screws into the squeak area
- Follow the kit instructions to drive the screw down until it reaches the preset depth. - The screw head is designed to break off or sit below the surface, leaving the carpet almost untouched.
Work in a small grid pattern
- Start with 1–2 screws at the loudest point. - Test by walking on the area. - If you still hear noise, add screws in a small pattern (6–8 inches apart) until the squeak is gone.
Fluff the carpet and clean up
- Massage the carpet fibers with your hand around each repair spot to blend them. - Vacuum the area to remove any dust or broken-off screw tips.
Tip: Mark your joist lines on the carpet with painter’s tape before you start so you don’t lose track of where to place screws.
Step 4: Tighten Squeaky Hardwood or Laminate Without Major Damage
With exposed hardwood or laminate, you want to stop the squeak while keeping the surface as clean as possible. That often means using slim fasteners and careful drilling.
Tools and materials:
- Drill with small drill bits (1/16"–1/8")
- Finish screws (trim-head) or specialized floor repair screws
- Wood putty or colored wax fill sticks (for hardwood)
- Painter’s tape
- Vacuum
Step‑by‑step:
Identify if the squeak is between boards or at a joist line
- If the entire board flexes, the subfloor/joist joint is likely loose. - If only a narrow line squeaks when you press between boards, the boards may be rubbing against each other.
Pre‑drill small holes at the squeak location
- Use painter’s tape to mark the drill bit so you don’t drill too deep. - For hardwood, aim to hit the subfloor and (ideally) the joist beneath. - Drill straight down at the loudest points.
Drive trim-head screws
- Use slim, finish-style screws that can sit just below the surface. - Tighten until the squeak stops, but don’t over-tighten to avoid cracking boards.
Fill and blend the holes
- For hardwood: use wood putty or colored wax sticks that match your floor. - Press filler into the holes, wipe off excess, and buff lightly with a clean cloth. - For laminate: many manufacturers sell color-matched repair kits or pens.
For board‑to‑board rubbing, use graphite or talc
- If boards squeak against each other but are otherwise solid, sprinkle a small amount of powdered graphite or talcum powder along the seam. - Work it into the gap with a soft brush. - Wipe away the excess and test again.
Tip: Always test your filler or repair kit on a scrap piece or hidden spot (like inside a closet) to confirm color match before working in a visible area.
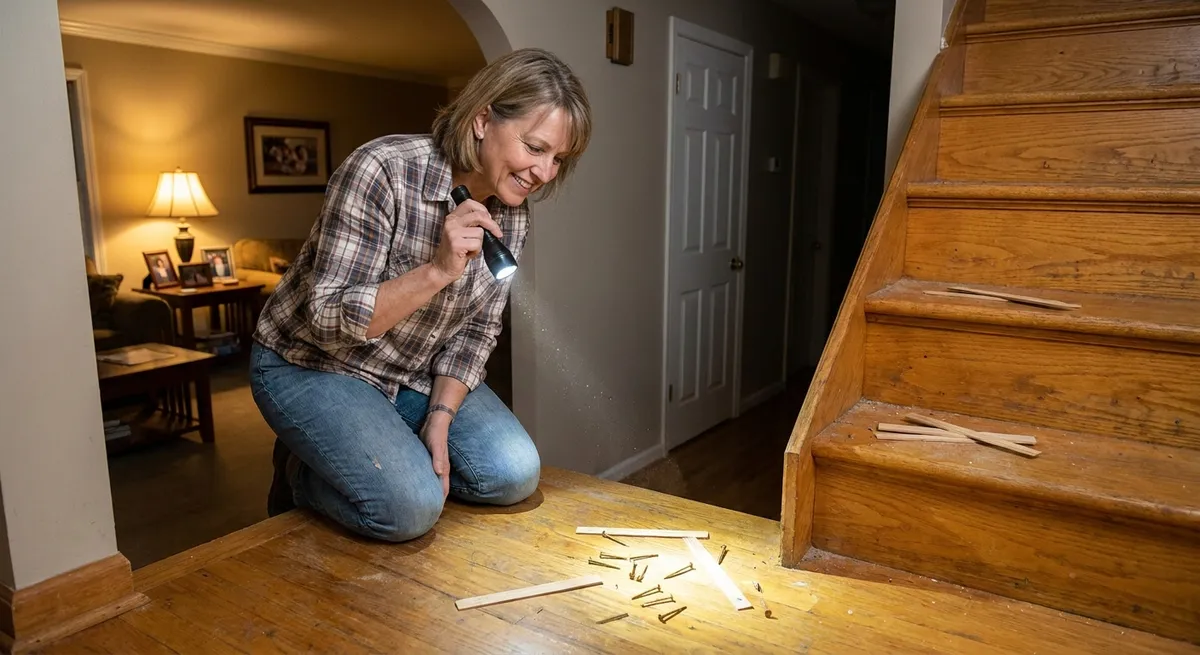
Step 5: Fix Squeaky Stairs at the Source
Stairs take a lot of abuse. Squeaks usually come from treads (the part you step on) moving against risers (vertical pieces) or against the side supports (stringers).
Tools and materials:
- Wood screws (1½"–2½", depending on thickness)
- Drill/driver
- Wood glue or construction adhesive
- Wood shims
- Finish nails and hammer (for finished stair faces)
- Wood filler and paint/stain (for cosmetic touch‑ups)
Step‑by‑step:
Inspect from below if you can
- From an open underside, look where treads meet stringers and risers. - Have someone walk on the stairs while you watch for movement.
Reinforce loose treads from underneath
- If you see gaps where the tread sits on the stringer, run a bead of construction adhesive along the joint. - Drive wood screws up through the stringer into the tread to tighten the connection. - For tread‑to‑riser gaps, use short screws angled so they grip both pieces without poking through the finished surface.
Use shims to stop movement
- Gently tap thin shims into visible gaps where treads meet risers or stringers. - Add a bit of wood glue to the shim before tapping it in. - Trim any excess shim material with a utility knife or small saw.
Tighten from the top if the underside is closed
- For painted or stained stairs, you can install finish screws or finish nails at the back of the tread (where it meets the riser). - Pre‑drill small holes to avoid splitting. - Drive fasteners at a slight angle to grab both the tread and riser. - Fill holes with matching wood filler and touch up paint or stain as needed.
Test each step and repeat where needed
- Move slowly up and down the stairs, listening for any remaining squeaks. - Address each noisy step with the same methods until the whole run feels solid.
Tip: Focus your first efforts on the loudest and most frequently used steps (usually the middle of the staircase and the top and bottom treads) for the biggest impact with less work.
Conclusion
Squeaky floors and stairs are usually a sign of loosened connections, not a structural emergency. By carefully locating the noise, tightening joints from below when possible, and using the right fasteners and fillers from above when needed, you can make your home much quieter without a major renovation. Work methodically, test as you go, and focus on stopping movement—not just covering sound—and those annoying creaks will finally stay quiet.
Sources
- [InterNACHI – How to Inspect Floor Systems](https://www.nachi.org/floor-systems.htm) - Explains typical floor construction, joists, and subfloor behavior
- [The Spruce – How to Fix Squeaky Floors](https://www.thespruce.com/how-to-fix-squeaky-floors-1822813) - Practical overview of methods for repairing squeaky floors from above and below
- [Family Handyman – How to Fix Squeaky Stairs](https://www.familyhandyman.com/project/how-to-fix-squeaky-stairs/) - Step‑by‑step instructions specific to stair squeaks
- [This Old House – Eliminating Floor Squeaks](https://www.thisoldhouse.com/flooring/21015343/eliminate-floor-squeaks) - Demonstrates several common techniques and specialty products for squeak repair
- [U.S. Department of Housing and Urban Development – Residential Rehabilitation Inspection Guide](https://www.hud.gov/sites/documents/DOC_9835.PDF) - Provides background on residential structural components and common issues
Key Takeaway
The most important thing to remember from this article is that this information can change how you think about Home Repair.


