Drafty windows don’t just make your home uncomfortable—they quietly drain your wallet every month. The good news: you don’t need new windows or special tools to make a noticeable difference. With a few affordable materials and a little time, you can tighten up leaky windows, reduce energy bills, and make your home feel more comfortable, fast.
This guide walks you through a simple, step-by-step process to find and fix the most common window air leaks so your windows work better without a full replacement.
Understand Where Window Drafts Really Come From
Before you start sealing, it helps to know what you’re looking for. Drafts around windows usually show up in a few predictable places:
- Between the window frame and the wall – gaps in the trim or drywall where the frame meets the wall.
- Around moving parts of the window – where sashes slide or swing open.
- At the bottom and sides of the window – worn or missing weatherstripping.
- Through cracked caulk and old paint lines – especially in older homes.
- From poorly insulated weight pockets or cavities – common in old double-hung windows.
You don’t need x-ray vision to find these problems. A slow, methodical check while the weather is cold (or with a fan creating a pressure difference) is often enough. The goal is to identify the worst offenders first so you get the biggest comfort and energy payoff for your effort.
Step 1: Find Your Leaks with Simple At-Home Tests
You can’t fix what you can’t see—or feel. Start by locating the leaks as precisely as possible.
What you’ll need:
- A lit incense stick, thin candle, or a strip of toilet paper
- Flashlight
- Notepad or masking tape and a marker
- Optional: a box fan
How to do it:
- Choose a cold or windy day if possible. The greater the temperature difference, the easier leaks are to spot. If it’s mild outside, place a box fan facing outward in one window and seal around it with cardboard or towels to help pull air through other gaps.
- Turn off fans, HVAC, and close interior doors to reduce random air movement inside. You want most airflow to come from leaks, not from your ceiling fan.
- Hold the incense, candle, or toilet paper strip slowly around each window. Move along:
- The edges where the frame meets the wall
- The joint where the sash meets the frame
- The bottom rail, side rails, and corners
- Watch for movement or smoke disturbance. If the flame flickers, the smoke trail bends sharply, or the paper flutters, you’ve found a leak.
- Mark each leak location. Use a small piece of masking tape or make a quick sketch. Label whether it’s frame-to-wall, sash-to-frame, or glass-to-sash (cracked glazing).
Take your time around each window. A few extra minutes mapping the leaks makes the sealing steps faster and more targeted.
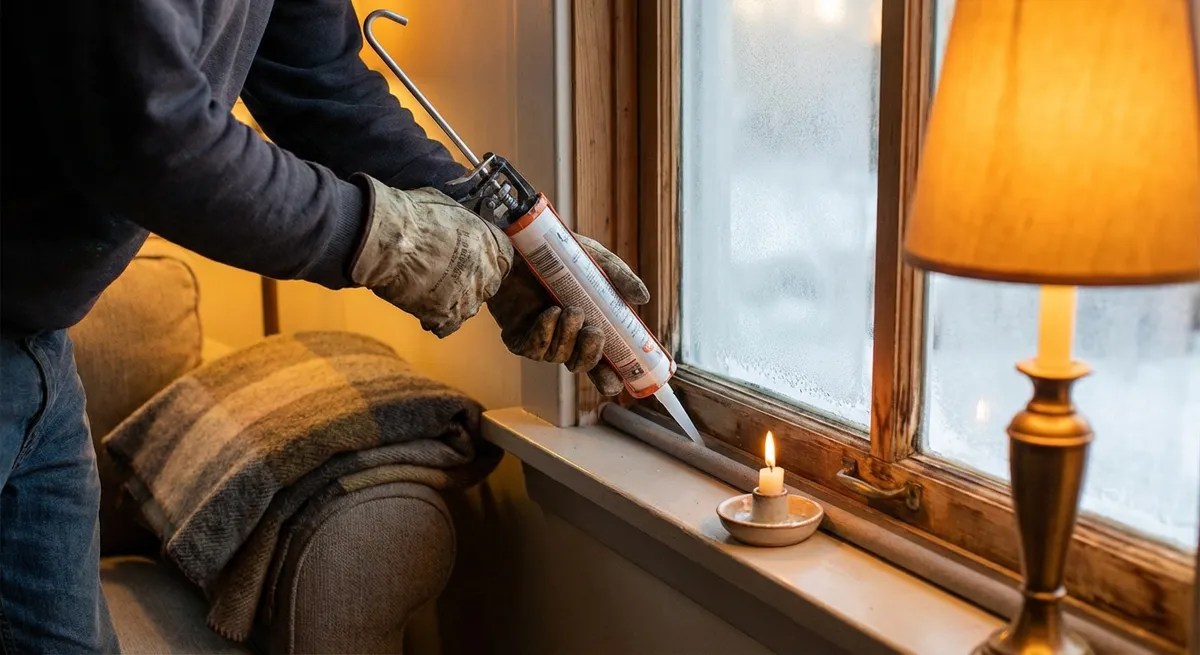
Step 2: Seal Frame-to-Wall Gaps with Caulk (The Big Payoff)
Once you know where the frame meets the wall and trim are leaking, you can close those gaps with caulk. This is one of the simplest, highest-impact fixes for air leaks.
What you’ll need:
- Paintable acrylic latex caulk (interior or exterior grade depending on location)
- Caulk gun
- Utility knife
- Painter’s tape (optional, for cleaner lines)
- Damp rag or sponge
How to do it:
- Clean the area. Wipe away dust, loose paint, and debris from the joint between the window frame and wall/trim. Caulk won’t stick to dirt.
- Remove loose or cracked old caulk. Use a utility knife to carefully cut and pull out failing caulk. Don’t dig into the wall or frame—just remove what’s clearly detached or brittle.
- Mask for clean lines (optional). Run painter’s tape along both sides of the joint, leaving the gap exposed. This helps create a straight caulk bead, especially if you’re new to caulking.
- Cut the caulk tube tip at a 45° angle. Start with a small opening (about 1/8 inch). You can always cut it larger if needed.
- Apply steady pressure with the caulk gun. Pull the tip along the joint, filling the gap continuously. Aim for a smooth, slightly raised bead—don’t worry if it looks a bit rough at first.
- Tool the caulk bead. Immediately run a damp finger or caulk tool along the bead to press it into the gap and smooth the surface. Wipe away excess with the rag.
- Remove painter’s tape (if used) while the caulk is still wet. Pull it away at a 45° angle for a crisp edge.
- Let the caulk cure per the manufacturer’s instructions. Most acrylic latex caulks are paintable after a few hours, but full cure takes longer.
Focus first on the inside perimeter around each window, then repeat outside (weather permitting) using exterior-rated caulk. Sealing both sides is ideal, but even sealing just the interior can significantly reduce drafts.
Step 3: Upgrade Weatherstripping on Moving Window Parts
Weatherstripping is the flexible material that seals gaps where windows open and close. Over time it flattens, cracks, or falls off—inviting in cold air and bugs. Replacing it is affordable and doesn’t require removing the window.
What you’ll need:
- Replacement weatherstripping (foam tape, V-strip, or bulb-type, depending on your window)
- Measuring tape
- Scissors or utility knife
- Screwdriver (if you need to remove stops or tracks)
How to do it:
- Identify your window type. Double-hung (slides up and down), slider (side to side), casement (cranks out), or awning. The style determines where weatherstripping goes and what type works best.
- Find worn weatherstripping. Look along:
- The bottom of the sash
- The sides where the sash meets the frame
- The meeting rail between upper and lower sashes on double-hung windows
- Gently remove old material. Peel off adhesive-backed foam or carefully pry out V-strips and seals. Use a scraper to remove old adhesive if necessary.
- Measure each section. Don’t guess. Measure both length and the width of the gap so you can match the right thickness of new weatherstripping. Too thin won’t seal; too thick can make the window hard to open or close.
- Cut new weatherstripping to size. Dry-fit each piece before removing backing or nailing anything in place.
- *Install with the window in the closed position. This ensures the new material compresses properly:
- For adhesive foam tape: peel backing and press firmly along clean, dry surfaces.
- For V-strip: fold into a “V,” nail or staple one side, so the other side presses against the moving sash.
- Test operation. Open and close the window a few times. It should move with moderate resistance but not feel jammed. If it’s too tight, remove and switch to slightly thinner weatherstripping.
Good weatherstripping can easily last several years and dramatically reduce drafts at the most active parts of the window.
Step 4: Add Interior Insulation with Film or Rope Caulk for Tough Cases
If your windows are older, single-pane, or still feel cold after basic sealing, adding an interior insulating layer can help—especially in rooms you don’t open often during winter.
Option A: Window insulation film (clear shrink plastic)
What you’ll need:
- Window insulation kit (plastic film + double-sided tape)
- Scissors
- Hair dryer
How to do it:
- Clean the window trim. The tape needs a dust-free surface to stick well.
- Apply double-sided tape around the inside perimeter of the trim. Press firmly.
- Cut the film slightly larger than the taped area. Better to have extra than come up short.
- Stick the film to the tape, pulling it gently to remove big wrinkles.
- Use a hair dryer on medium heat to shrink the film. Move slowly, a few inches away from the surface. The film will tighten and become nearly invisible.
This creates an extra air gap, similar to adding a storm window, without permanent changes.
Option B: Rope caulk (non-hardening, removable)
What you’ll need:
- Rope caulk (also called putty caulk)
How to do it:
- Roll and press rope caulk into small gaps where sashes meet the frame or where the window doesn’t fully seal.
- Smooth it with your fingers so it adheres and doesn’t fall out.
- Use this method for windows you don’t plan to open until the season changes. Rope caulk can be peeled off cleanly later.
These interior solutions are especially helpful for renters or anyone looking for reversible upgrades.
Step 5: Insulate Hidden Cavities Around the Window Frame
Even if the visible joints look fine, the area between the window frame and wall framing may be under-insulated—or completely empty. If you can access this space from the interior (during a renovation) or the exterior (under siding or trim), you can improve comfort significantly.
What you’ll need:
- Low-expansion spray foam labeled for “windows and doors”
- Utility knife
- Drop cloth and gloves
- Safety glasses
How to do it:
- Locate access points. This might be:
- Behind removable interior trim (casing)
- Under exterior trim or siding during other work
- Carefully remove trim if needed. Score along paint lines with a utility knife and gently pry using a flat bar to avoid cracking the wood or drywall.
- Look for gaps between the window frame and rough opening. These spaces are often 1/4–1 inch wide, sometimes larger, and may be loosely filled with fiberglass or left empty.
- Shake the spray foam can and attach the straw. Read the instructions; different brands expand differently.
- Apply foam sparingly. Insert the straw halfway into the gap and pull back slowly as you trigger the foam. Aim to fill only about 50% of the space—low-expansion foams will grow to fill the area without bowing the frame.
- Let the foam cure completely. This usually takes several hours. Don’t reinstall trim until the foam is firm.
- Trim excess foam flush with the wall or frame. Use a sharp utility knife for a clean cut.
- Reinstall the trim and touch up caulk and paint as needed.*
This step is more advanced than simple caulking, but it addresses a common hidden problem in drafty homes and can deliver a significant comfort upgrade.
Conclusion
Drafty windows don’t automatically mean you need to budget for expensive replacements. By systematically finding leaks, sealing frame-to-wall gaps, upgrading weatherstripping, adding interior insulation when needed, and improving hidden cavity insulation, you can transform cold, uncomfortable rooms into spaces that feel solid and cozy.
Most of these fixes use basic tools, low-cost materials, and a free weekend. Start with the biggest leaks first, test your work as you go, and build confidence window by window. Your home will feel better, your heating and cooling system won’t have to work as hard, and your energy bills will quietly reflect the effort you invested.
Sources
- [U.S. Department of Energy – Air Sealing Your Home](https://www.energy.gov/energysaver/air-sealing-your-home) - Explains where homes typically leak air and best practices for sealing.
- [ENERGY STAR – Window Caulking and Weatherstripping](https://www.energystar.gov/saveathome/sealing-air-leaks) - Covers recommended products and techniques for sealing window and door leaks.
- [Energy.gov – Weatherstrip and Caulk Windows and Doors](https://www.energy.gov/energysaver/weatherize/air-sealing-your-home/weatherstrip-and-caulk-windows-and-doors) - Provides step-by-step guidance for DIY weatherstripping and caulking.
- [University of Minnesota Extension – Weatherstripping and Caulking](https://extension.umn.edu/energy-efficiency/weatherstripping-and-caulking) - Offers practical tips on choosing and installing weatherstripping and caulk.
- [This Old House – How to Stop Drafts Around Windows and Doors](https://www.thisoldhouse.com/windows/21015116/how-to-stop-drafts-around-windows-and-doors) - Demonstrates common methods to find and fix drafts with photos and expert advice.
Key Takeaway
The most important thing to remember from this article is that this information can change how you think about Home Repair.


