Most home repair headaches start small and get expensive when they’re ignored. A loose faucet today becomes a cabinet-rotting leak in six months. A tiny crack in caulk turns into water damage around a tub. This home “checkup” walks you through simple, step-by-step inspections and fixes you can do in an afternoon to catch issues early—without tearing your house apart or buying specialty tools.
Why a DIY Home Checkup Matters
A house is constantly moving, settling, expanding, and shrinking. That movement shows up first in small, easy-to-miss signs: hairline cracks, sticky doors, faint stains, or a bit of moldy caulk. Left alone, those small warnings become big repairs that eat up weekends and bank accounts.
Doing a basic checkup a few times a year helps you:
- Catch water leaks before they damage floors, walls, or cabinets
- Spot ventilation issues before mold becomes a problem
- Protect your electrical system from unsafe wiring and overloaded outlets
- Extend the life of doors, windows, and finishes you already paid for
- Build confidence with simple fixes before you tackle bigger projects
You don’t need advanced skills to do this. You’ll mostly be observing, testing, tightening, and re-sealing. The key is moving through your home methodically and actually acting on what you find.
Step 1: Track Down Quiet Leaks in Kitchens and Baths
Water is the fastest way to ruin a house. This first step focuses on sinks, toilets, and visible plumbing you use every day but rarely inspect closely.
What you’ll need
- Flashlight
- Paper towels or a dry cloth
- Adjustable wrench (optional)
How to do it
- Check under every sink.
Open cabinets in the kitchen, bathrooms, and laundry room. Use a flashlight to look for:
- Dark, swollen, or soft wood
- White mineral buildup on pipes or fittings
- Active drips or dried water tracks
- Run water while you look.
Turn each faucet on to both hot and cold for 30–60 seconds. While water is running, feel along the drain pipe and connections with your hand or a dry paper towel. If the towel comes back damp, you have a leak.
- Tighten simple connections.
If you find a drip at a threaded connection (like a P-trap nut under the sink), gently snug it with your hand first. If it still leaks, use an adjustable wrench for a slight turn—about a quarter turn at a time. Avoid over-tightening; that can crack plastic fittings or crush rubber seals.
- Inspect around toilets.
Look at the floor around each toilet. Signs of trouble:
- Soft or spongy flooring when you step near the base
- Discoloration or staining around the toilet
- A musty smell
Gently wiggle the toilet. Slight movement is common, but noticeable rocking means the wax ring may be failing and should be replaced.
- Check supply lines.
Look at the flexible hoses going to faucets, toilets, and appliances:
- Replace any that are bulging, cracked, or rusty at the metal crimps
- For washing machines, braided stainless-steel hoses are a smart upgrade
Quick fix vs. call-a-pro
- DIY-friendly: Tightening loose nuts, replacing visible flexible supply lines with like-for-like parts
- Call a pro: Active leaks inside walls, major rusted shutoff valves, or anything requiring cutting and soldering copper pipes
Step 2: Seal Out Moisture Around Tubs, Showers, and Sinks
Even if your plumbing is fine, water that seeps around seams can cause hidden rot, mold, and loose tiles. A tube of caulk is cheaper than replacing a bathroom wall.
What you’ll need
- Tub and tile caulk (100% silicone or a bathroom-specific sealant)
- Caulk gun (if not using squeeze tube)
- Utility knife or caulk removal tool
- Painter’s tape (optional)
- Rags and rubbing alcohol or mild cleaner
How to do it
- Inspect the joints.
Look closely where:
- Tub meets wall
- Shower base meets the floor
- Countertop meets wall or backsplash
- Sink meets countertop
You’re looking for gaps, cracked caulk, mold that won’t scrub off, or places where caulk is pulling away.
- Remove bad caulk.
Don’t apply new caulk over failing material. Carefully cut away loose or cracked caulk with a utility knife or caulk removal tool. Scrape until you reach bare, clean surfaces.
- Clean and dry the area.
Wipe the joint with cleaner, then rubbing alcohol to remove soap scum and residue. Let it dry completely. Caulk won’t adhere to damp or dirty surfaces.
- Tape for cleaner lines (optional).
Apply painter’s tape above and below the joint, leaving a small gap over the seam. This helps create a neat, straight bead even if you’re new to caulking.
- Apply and smooth the caulk.
Cut the caulk tube tip at a 45-degree angle with a small opening. Run a steady bead along the joint. Then smooth it with a damp finger or caulk tool, pressing it into the seam. Remove tape immediately and let it cure per the instructions (often 24 hours) before getting it wet.
Quick fix vs. call-a-pro
- DIY-friendly: Recaulking tubs, sinks, and small seams where surfaces are solid
- Call a pro: Soft or spongy walls around tub/shower, loose tiles, or visible rot—these may require opening walls or replacing backer board
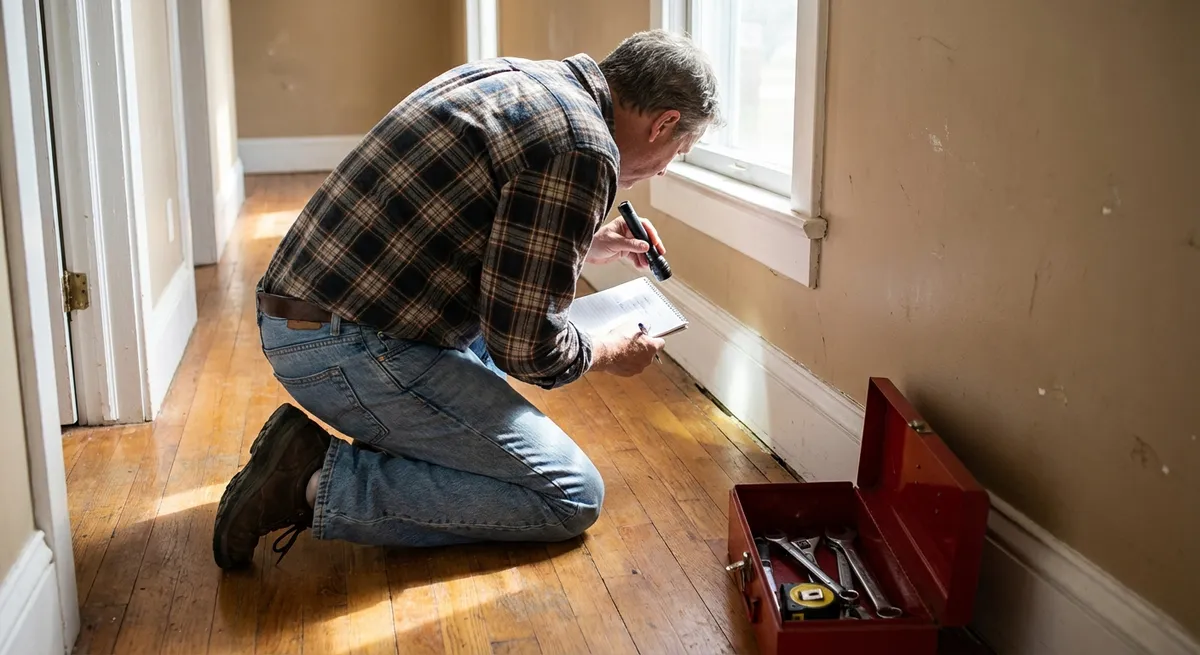
Step 3: Give Your Doors and Windows a Function Check
Sticking doors, drafty windows, and loose hardware are more than annoyances. They can point to moisture issues, poor insulation, or house movement that you want to catch early.
What you’ll need
- Screwdriver set
- Lubricant (silicone spray or dry lube; avoid oil that attracts dust)
- Utility knife
- Weatherstripping (if replacement is needed)
How to do it
- Open and close every exterior door.
Check for:
- Sticking or rubbing at the top or bottom
- Gaps where you can see daylight around edges
- Loose knobs, deadbolts, or strike plates
- Tighten loose hardware.
- Replace with slightly longer screws
- Use wood filler or toothpicks and wood glue in the hole, then reinsert the screw once dry
- Lubricate hinges and latches.
Use a screwdriver to snug up loose screws on hinges, knobs, and lock plates. If screw holes are stripped, you can:
Apply a small amount of lubricant to noisy or stiff hinges and latch mechanisms. Open and close the door several times to work it in, then wipe away excess.
- Inspect weatherstripping.
Close doors and windows with the lights off during the day. If you see light sneaking in around edges, the weatherstripping may be worn or missing.
- Replace brittle, cracked, or flattened strips with similar self-adhesive or nail-on versions
- For windows, check both the sash and the frame for worn seals
- Check window operation and locks.
Open and close each window. It should move smoothly and lock securely. Stuck windows may need tracks cleaned of debris and a light lubrication (use a dry silicone spray on tracks, not greasy oils).
Quick fix vs. call-a-pro
- DIY-friendly: Tightening hinges, adding weatherstripping, lubricating tracks
- Call a pro: Windows that won’t stay open, broken glass, or doors badly out of alignment due to structural settling
Step 4: Do a Basic Electrical Safety Sweep
You don’t need to open your electrical panel to catch obvious problems. A quick inspection of outlets, cords, and visible fixtures can prevent shocks and fires.
What you’ll need
- Plug-in outlet tester (inexpensive and very useful)
- Flashlight
- Notepad or phone to record issues
How to do it
- Test GFCI outlets.
In kitchens, bathrooms, garages, basements, and outdoor areas, press the “Test” button on each GFCI outlet. The power should cut off. Then press “Reset” to restore power.
- If an outlet doesn’t trip or reset, note its location—a licensed electrician should inspect it.
- Use an outlet tester where possible.
- Open ground
- Reversed hot/neutral
Plug the tester into standard outlets in main living areas and bedrooms. Compare the light pattern to the chart on the tester. Common issues include:
Electrical problems behind the wall are not DIY for most people—document any issues and call a professional for correction.
- Look for heat or discoloration.
Gently place your hand on outlet covers and switch plates that you commonly use, especially those serving large loads (space heaters, window A/C units). Warm is okay; hot is not. Also look for:
- Brown or black discoloration
- Cracked or melted plastic
- Inspect extension cords and power strips.
- Frayed, cracked, or taped
- Pinched under furniture or rugs
- Overloaded with multiple high-draw devices (space heaters, hair dryers, microwaves)
- Check light fixtures and bulbs.
- Make sure bulbs match or are under the maximum wattage listed for the fixture
- Gently tighten any loose bulbs
- Replace flickering bulbs—if flicker continues with a new bulb, note the fixture for an electrician
Replace cords that are:
Turn off the switch, then:
Quick fix vs. call-a-pro
- DIY-friendly: Replacing bulbs, swapping damaged extension cords, resetting GFCIs
- Call a pro: Hot outlets/switches, outlets that spark, frequent breaker trips, or any outlet tester problems you don’t clearly understand
Step 5: Walk Your Home’s Exterior Like an Inspector
Many interior problems start outside: clogged gutters overflow into walls, missing caulk around siding lets water in, and neglected grading sends rain toward your foundation. A slow walk around your home can reveal a lot.
What you’ll need
- Binoculars (optional but helpful)
- Ladder (only if you’re comfortable and use it safely)
- Work gloves
- Exterior-grade caulk
- Broom or leaf scoop
How to do it
- Start with the roof from the ground.
Using your eyes or binoculars, look for:
- Missing, curled, or broken shingles
- Sagging sections
- Damaged or missing flashing around chimneys and vents
You don’t need to climb up to know whether a roofer should take a closer look.
- Check gutters and downspouts.
Look for:
- Debris piles, plants, or visible clogging
- Gutters pulling away from fascia
- Downspouts that dump water right at the foundation
Clean accessible gutters wearing gloves, and add or extend downspout splash blocks or extensions to direct water several feet away from the house.
- Inspect siding and exterior caulk.
Walk the perimeter and examine where siding meets trim, windows, and doors. You’re looking for:
- Gaps or missing caulk
- Cracked or peeling paint exposing bare wood
- Rotting or soft trim boards
Scrape loose caulk, reapply exterior-grade caulk where needed, and spot-prime and paint bare wood if you can.
- Check ground slope (grading).
The soil should slope away from your foundation so water doesn’t pool. If you see standing water after rain or soil sloping toward the house, plan to:
- Add soil in low spots to create a gentle slope away
- Adjust landscaping that traps water against the walls
- Look at exterior vents and openings.
- Dryer vent flap: make sure it closes when not in use and isn’t clogged with lint
- Attic or crawlspace vents: check for damaged screens that could let pests in
- Gaps around pipes or cables: seal with appropriate exterior caulk or foam
Inspect:
Quick fix vs. call-a-pro
- DIY-friendly: Cleaning gutters within reach, basic caulking, minor paint touch-ups, adding downspout extensions
- Call a pro: Widespread rot, major siding damage, roof issues, or any work at heights you are not fully comfortable and properly equipped to handle
Conclusion
Home repair doesn’t always mean big tools and big projects. A simple, repeatable checkup like this catches problems when they’re still cheap and easy to fix. By routinely:
- Looking for hidden leaks
- Re-sealing wet areas
- Keeping doors, windows, and seals working smoothly
- Spotting basic electrical safety issues
- Walking the exterior with a critical eye
you’ll prevent a lot of the surprise repairs that drain time and money.
Use this guide as a loop you can run every few months. Take notes, tackle the easy fixes right away, and don’t hesitate to bring in a professional when something falls outside your comfort zone. The more you pay attention to small details now, the less likely you are to face major failures later—and the more confident you’ll feel owning and improving your home.
Sources
- [U.S. Environmental Protection Agency – Water Damage and Mold](https://www.epa.gov/mold/water-damage-mold) - Explains how water intrusion leads to mold and why early detection matters
- [U.S. Consumer Product Safety Commission – Home Electrical Safety Checklist](https://www.cpsc.gov/s3fs-public/513.pdf) - Provides guidance on basic electrical safety checks in the home
- [Energy.gov – Air Sealing Your Home](https://www.energy.gov/energysaver/air-sealing-your-home) - Covers the importance of sealing gaps around doors, windows, and other openings
- [Insurance Institute for Business & Home Safety – Gutter and Downspout Maintenance](https://ibhs.org/wildfire/gutters-and-downspouts/) - Details why proper drainage and gutter maintenance protect against water damage
- [University of Minnesota Extension – Preventing Moisture Problems in Homes](https://extension.umn.edu/how-prevent-moisture-and-mold-home/preventing-moisture-problems-homes) - Offers research-based advice on controlling moisture and protecting building materials
Key Takeaway
The most important thing to remember from this article is that this information can change how you think about Home Repair.


